Onboard Edge Node Using USB-Assisted Boot#
You can use USB-assisted boot to load the iPXE image.
Prepare the USB drive one time, so that the platform can use the USB-assisted boot to download the iPXE image. Use any Linux-based machine to do the following:
Run the following command to find the device identifier for the connected USB drive:
lsblk --output NAME,TYPE | grep disk
Run the following command to download the iPXE EFI file from the provided source:
wget https://tinkerbell-nginx.CLUSTER_FQDN/tink-stack/signed_ipxe.efi --no-check-certificate --no-proxy
Use the following command to download the secure boot certificate for iPXE and Hook Os, independent of final OS. This is step is not required if Secure Boot is not enabled. Replace CLUSTER_FQDN with the name of the domain that is used during installation.
wget https://tinkerbell-nginx.${CLUSTER_FQDN}/tink-stack/keys/db.der --no-check-certificate --no-proxy
For Edge Microvisor Toolkit, if Secure Boot (SB) is enabled (Not required for Ubuntu* OS):
Following you need to download the db-emt.der file from Release Service.
Repository URL path of Edge Microvisor Toolkit can be found by looking at the OS Profile you are trying to install and copying manually the Repository URL value without raw.gz suffix. Alternatively, it can be acquired using the Edge Orchestrator API - see the Acquiring the Edge Microvisor Toolkit repository URL path from Edge Orchestrator API section.
Choose the correct values for the command and replace them in the variables as per the example and resulting following command. Make sure that resulting HTTP status is successful.
export FILES_RS_URL=<Files Release Service URL>
export MICROVISOR_REPO_URL=<Repository URL path to OS Image without .raw.gz extension>
export OS_IMAGE_VERSION=<Microvisor Image Version>

# Following is an example of the variables and the expanded resulting command:
# export FILES_RS_URL=files-rs.edgeorchestration.intel.com
# export OS_IMAGE_VERSION=<Microvisor Image Version>
# export MICROVISOR_REPO_URL=files-edge-orch/repository/microvisor/non_rt/edge-readonly-$OS_IMAGE_VERSION-signed
# Command to download the microvisor der file
wget https://$FILES_RS_URL/$MICROVISOR_REPO_URL.der

# A real example with no variables
# wget https://files-edge-orch/repository/microvisor/non_rt/edge-readonly-3.0.20250324.1008.der -o db-emt.der --write-out "\nHTTP Status: %{http_code}\n"
Clear disk partition table:
sudo dd if=/dev/zero of=/dev/sdb bs=512 count=1 conv=notrunc
Initialize the GUID partition table (GPT):
echo -e "g\nw\nY\n" | sudo gdisk /dev/sdb
Format the USB drive:
sudo mkfs.fat -F32 /dev/sdb
Mount the USB drive:
sudo mkdir -p /tmp/efidrive
sudo mount /dev/sdb /tmp/efidrive
Create a boot Directory and copy
signed_ipxe.efito the drive:sudo mkdir -p /tmp/efidrive/efi/boot sudo cp signed_ipxe.efi /tmp/efidrive/efi/boot/bootx64.efi sudo cp *.der /tmp/efidrive/efi/boot/
Unmount the USB drive from the Linux machine:
sudo umount /dev/sdb
Note
Replace /dev/sdb with the appropriate device identifier for your USB drive.
Replace CLUSTER_FQDN with the name of the domain that is used during installation.
You can plug the same USB drive into multiple edge nodes to do the provisioning flow; you do not have to prepare the USB drive every time.
Acquiring the Edge Microvisor Toolkit repository URL path from Edge Orchestrator API#
For Edge Microvisor Toolkit, the repository URL path of the certificate can be acquired from Edge Orchestrator API with the following command, where PROFILE_NAME is set to the OS Profile name you are trying to install (for example, microvisor-nonrt, see View OS Profiles):
Note
To interact with Edge Orchestrator API, you must authenticate with a user who is part of the Host Manager Group and obtain a JSON Web Token (JWT) used here as JWT_TOKEN variable (see Obtaining a JSON Web Token (JWT) for instructions).
The variables CLUSTER_FQDN are PROJECT_NAME should be the same as used for obtaining the JTW_TOKEN value.
export PROFILE_NAME=<OS Profile name to be installed>
# example:
# export PROFILE_NAME="microvisor-nonrt"
export MICROVISOR_REPO_URL=$(curl -k -X GET https://api.${CLUSTER_FQDN}/v1/projects/${PROJECT_NAME}/compute/os \
      -H "accept: application/json" -H "Content-Type: application/json" -H "Authorization: Bearer ${JWT_TOKEN}" \
      | jq -r ".OperatingSystemResources[] | select(.profileName==\"${PROFILE_NAME}\") | .repoUrl" | sed 's/\.raw\.gz$//')
Enable UEFI Secure Boot (Optional)#
Secure boot is disabled by default. To enable it, follow the steps to configure secure boot in the BIOS. After that, see Secure Boot opt in feature to enable secure boot in Edge Orchestrator.
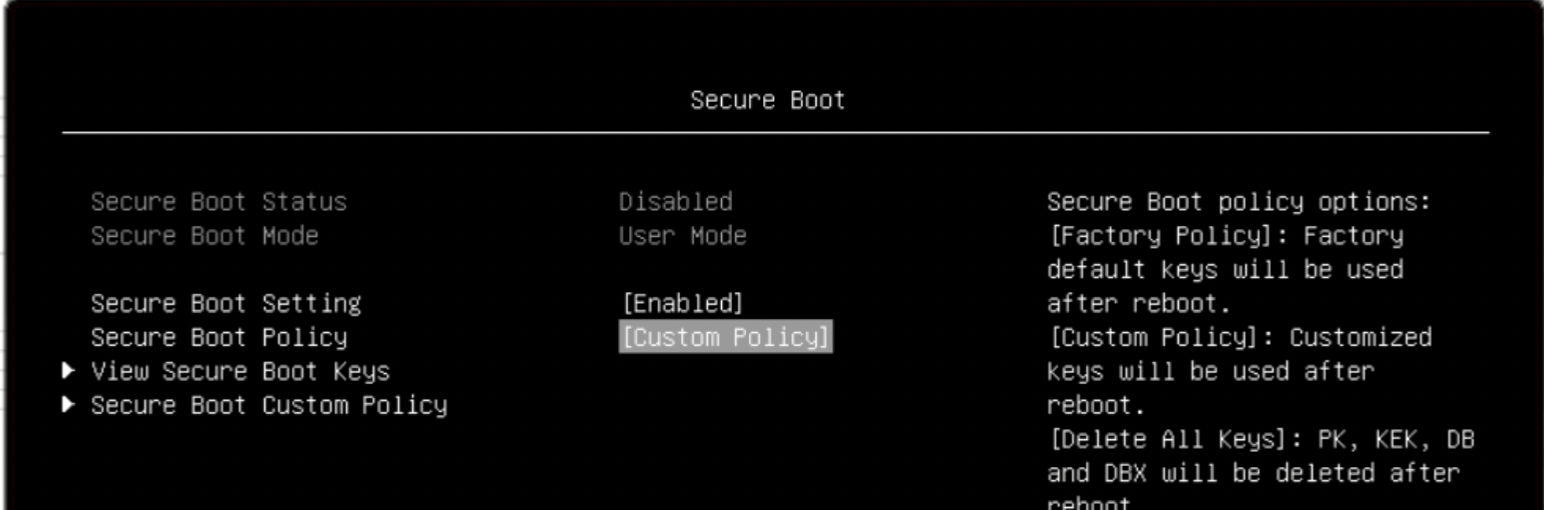
To enable the secure boot, navigate to System Settings > Security > Secure Boot Configuration. Enable the secure boot and change the policy to Custom:
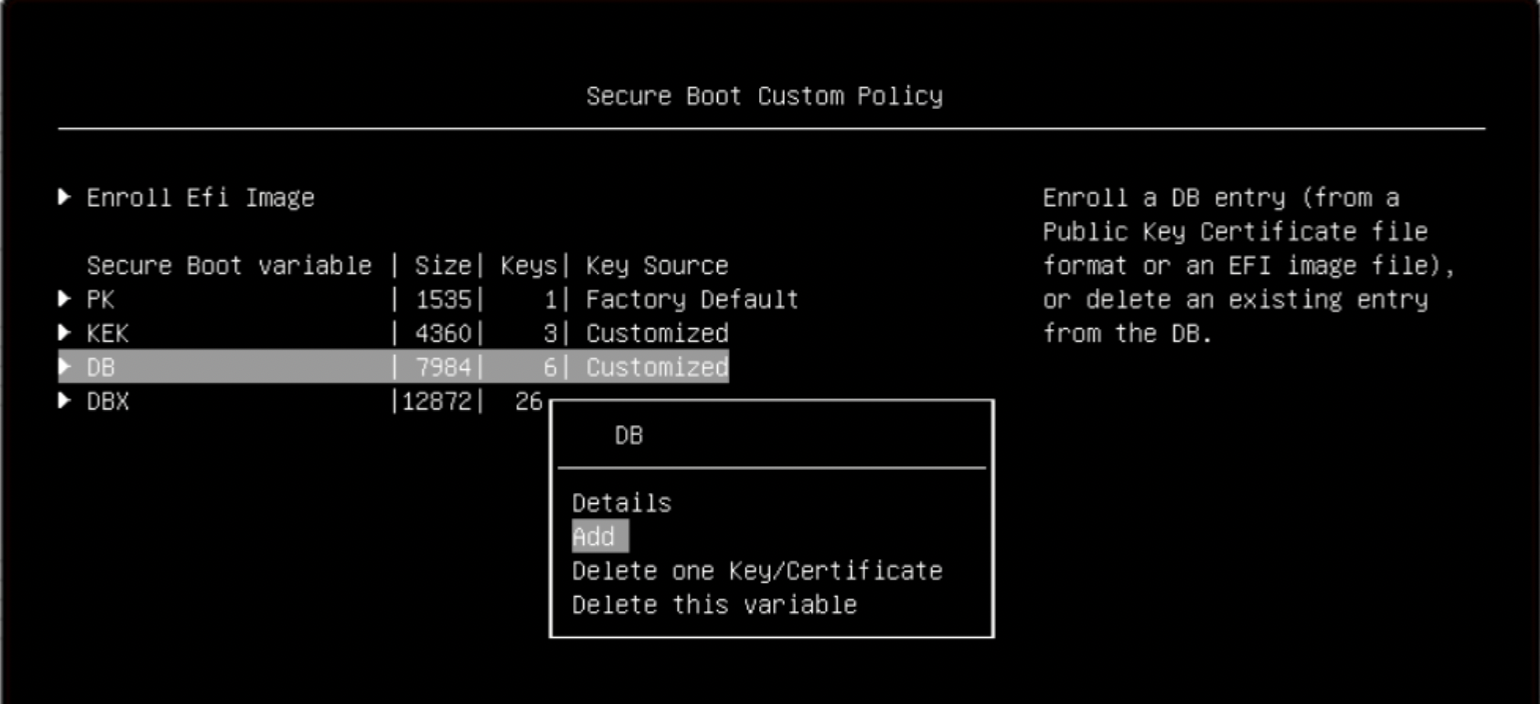
Append the db.der and db-emt.der public key through the Secure Boot Custom Policy page:
Save and reboot the node in System Setup.
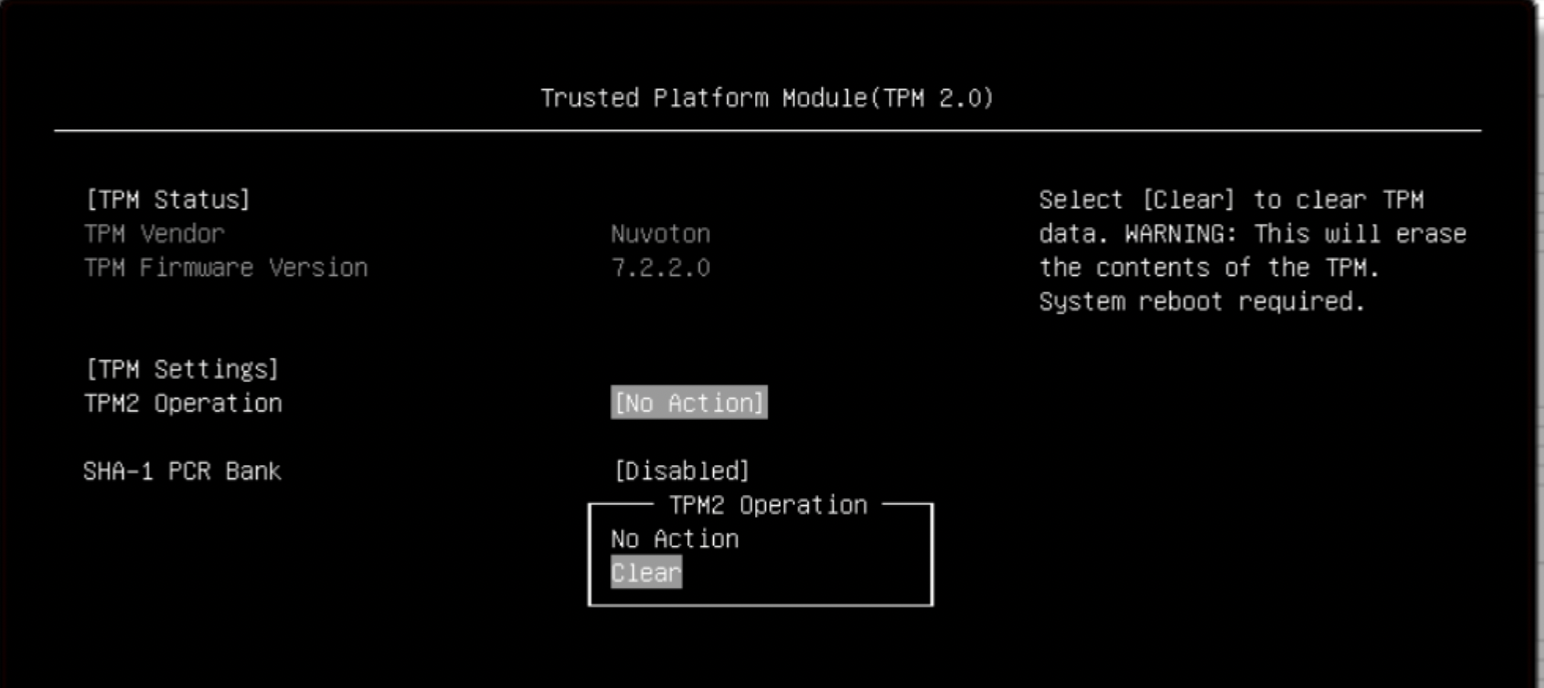
Reset the trusted platform module hierarchy and clear the trusted platform module. Navigate to System Settings > Security > Secure Boot Configuration > TPM > TPM2. Select Clear in the TPM2 Operation dialog:
Save and reboot the node in System Setup.
USB Boot Option#
Select the one-time boot option:
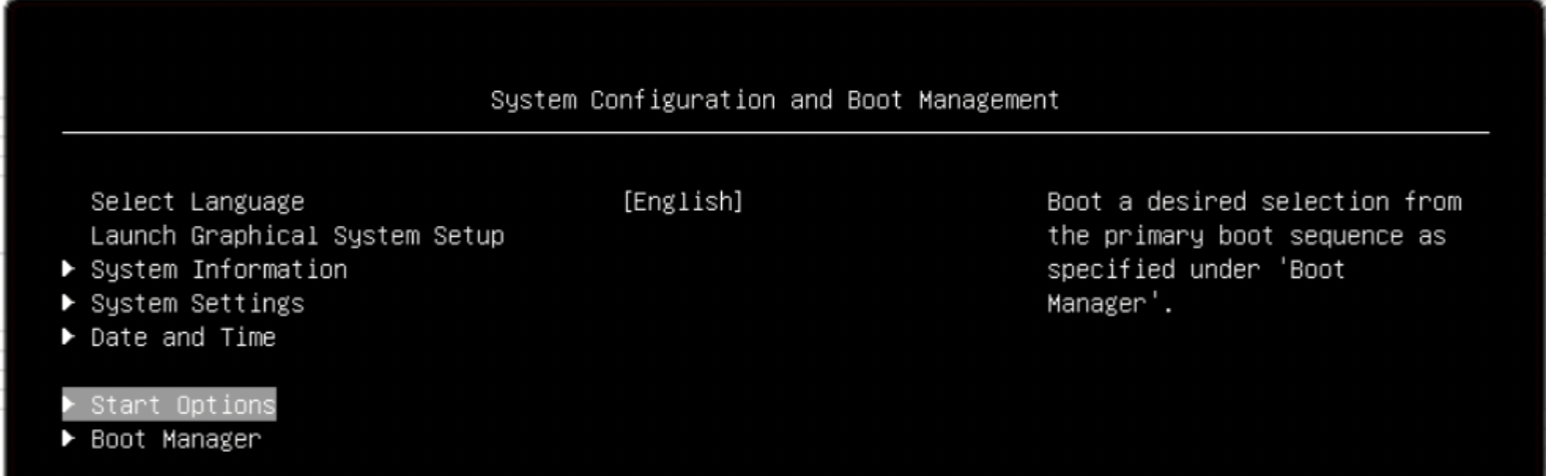
Select USB and confirm:
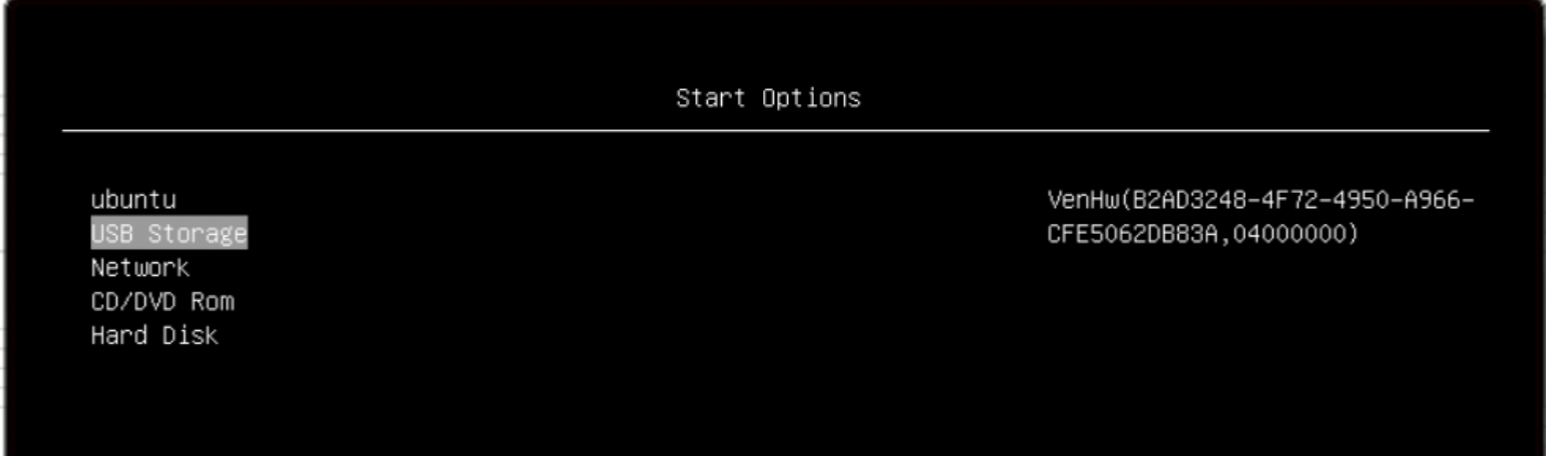
iPXE starts downloading and starts the chain loading process. The next steps are in Common Onboarding Procedures.