Motion Detection Use Case#
This guide walks you through the Motion Detection predefined pipeline. It uses the gvamotiondetect
DL Streamer element to identify regions of motion in each frame and then runs YOLOv8n object detection
through gvadetect, restricted to those motion regions of interest (ROIs). The result is an efficient
“detect only where something is moving” workload that is well suited to fixed-camera scenes such as
traffic monitoring, parking lots, or any other smart-city setup with mostly static backgrounds.
When to use motion detection#
The Motion Detection pipeline is a good fit when:
The camera is static and most of the frame is background most of the time.
You only care about activity (vehicles, people, animals) and not about identifying static objects.
You want to reduce the cost of full-frame inference by skipping idle frames or limiting detection to small motion ROIs.
It is not a good fit for handheld or moving cameras, scenes with constant global motion (for example heavy foliage or rain), or workloads that require recognizing static objects.
Step 2. Configure the Motion Detection element#
In the Pipeline Builder, click the Motion Detection node to open its configuration panel.
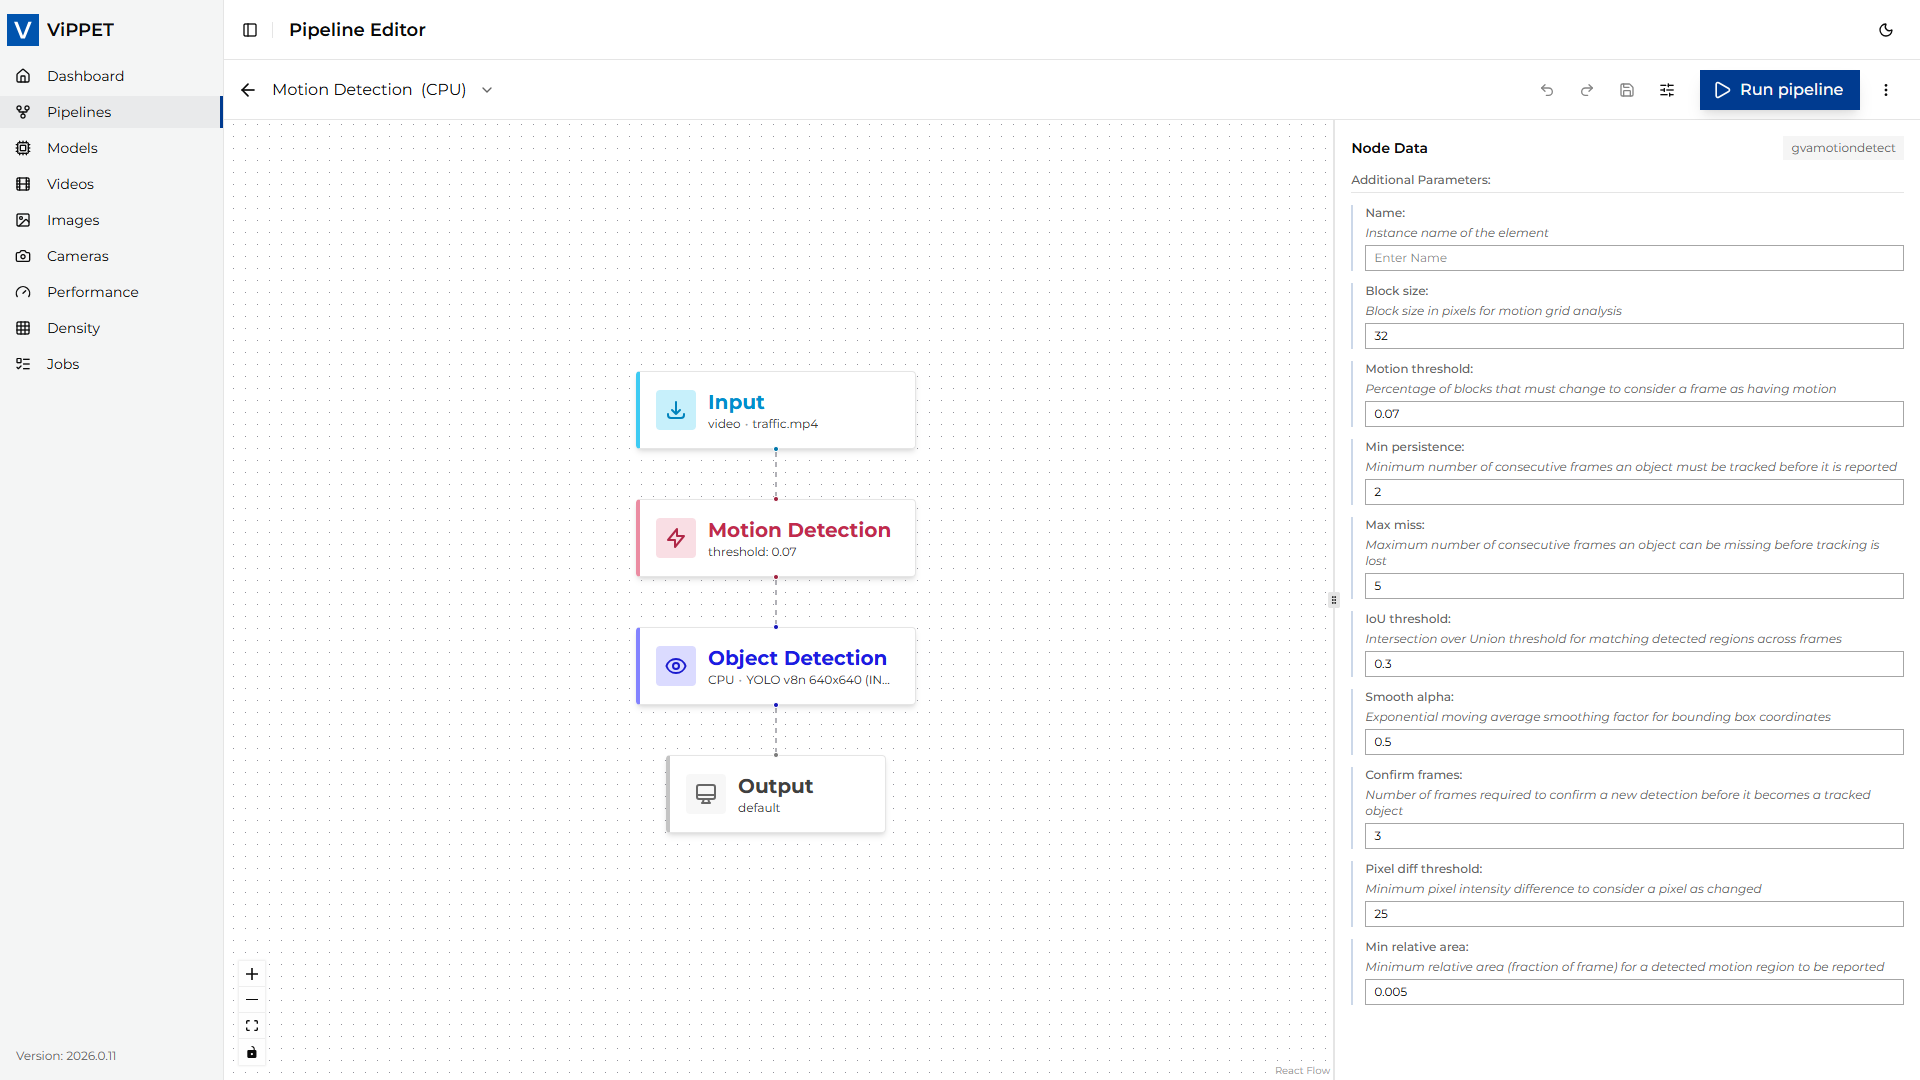
The following parameters are exposed in the UI:
Parameter |
Default (UI) |
Description |
|---|---|---|
name |
(empty) |
Instance name of the element. Optional, useful for logs and debugging. |
block-size |
|
Block size in pixels for the motion grid analysis. Smaller blocks detect finer motion at higher cost; larger blocks are cheaper but coarser. |
motion-threshold |
|
Percentage of blocks that must change between two consecutive frames for the frame to be considered as containing motion. Lower values make the detector more sensitive. |
min-persistence |
|
Minimum number of consecutive frames an object must be tracked before it is reported as a motion ROI. Higher values reduce false positives caused by short-lived noise. |
max-miss |
|
Maximum number of consecutive frames an object can be missing before tracking is lost. Higher values keep tracks alive through brief occlusions. |
iou-threshold |
|
Intersection over Union threshold used to match motion regions between frames. Lower values allow looser matching across frames. |
smooth-alpha |
|
Exponential moving average smoothing factor for the bounding boxes. Higher values follow new positions faster; lower values produce smoother, slower-moving boxes. |
confirm-frames |
|
Number of frames required to confirm a new detection before it becomes a tracked object. Higher values reduce flicker but delay reporting. |
pixel-diff-threshold |
|
Minimum per-pixel intensity difference (0-255) for a pixel to count as changed when comparing consecutive frames. |
min-rel-area |
|
Minimum relative area (fraction of the full frame) for a detected motion region to be reported. Filters out very small specks of motion. |
The defaults shown above are the UI defaults applied when you place a fresh
gvamotiondetect node on the canvas. The predefined Motion Detection pipeline overrides two of
them in its variants: motion-threshold=0.07 and min-persistence=2, which makes the detector
noticeably more sensitive than the bare UI defaults. Edit these values in the panel to match your
scene and noise level.
The downstream gvadetect node runs YOLOv8n object detection with inference-region=roi-list, so it
only inspects the motion ROIs produced by gvamotiondetect rather than the whole frame. The
gvametapublish node writes detections as JSON Lines, gvafpscounter reports throughput after a
short warm-up, and gvawatermark draws the boxes on the output video.
Step 3. Run the pipeline#
Confirm that the input video is available under the shared
videos/input/directory. The default pipeline usestraffic.mp4. If you do not have a traffic-like video on hand, upload one through the Videos view in the UI - any clip from a static CCTV camera (cars, people, bikes) will work well. Files uploaded through the UI land invideos/input/uploaded/and can then be selected as the source.Click Run. ViPPET launches the pipeline as a job; you can follow progress in the Jobs view.
While the job runs, the selected device’s utilization (CPU/GPU/NPU) should increase visibly in the Dashboard.
Step 4. Interpret the results#
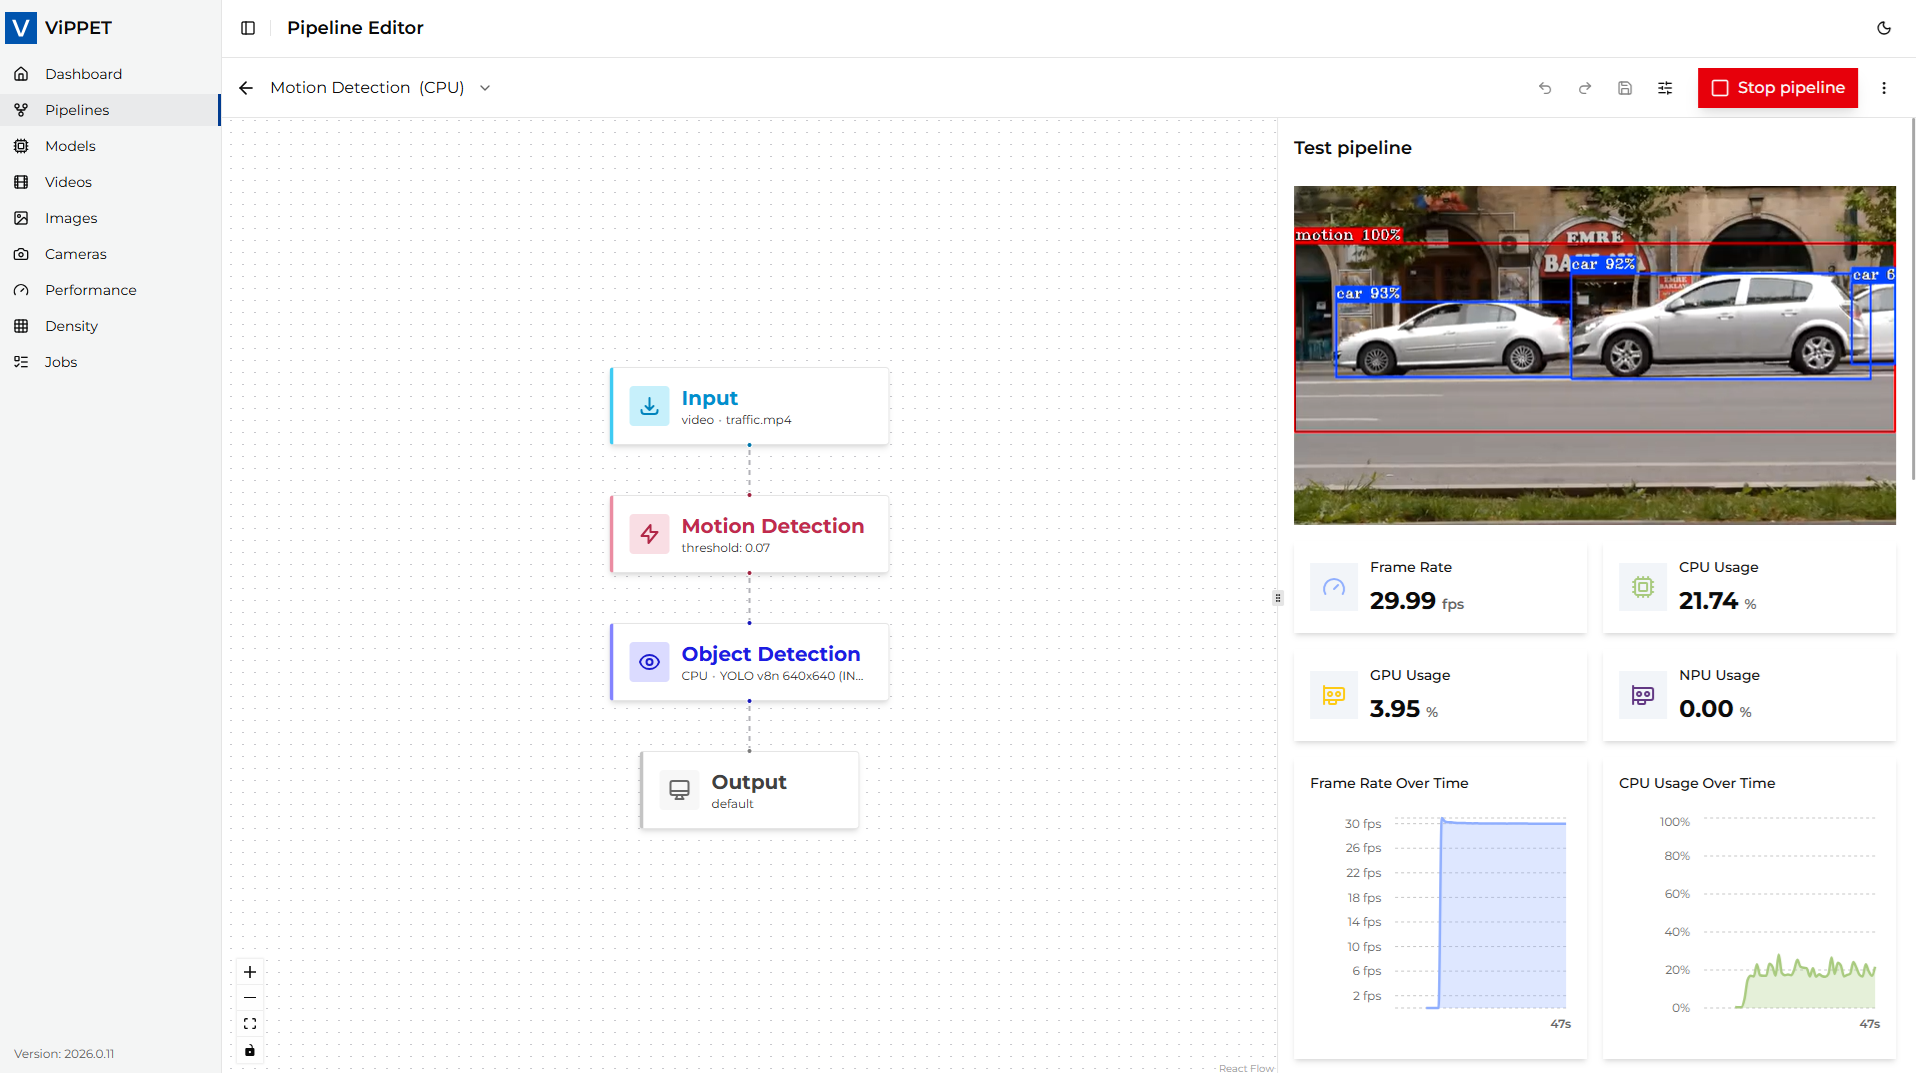
When the job completes (or while it is still running), three outputs are available:
Detections (JSON Lines): the
gvametapublishelement emits one JSON record per inferred frame. In the predefined pipeline the records are sent to/dev/nullso the variants stay lean for benchmarking. To capture them on disk, edit the variant and changefile-path=/dev/nullto a path inside the sharedvideos/output/directory (for examplefile-path=/videos/output/motion.jsonl).Annotated video: the
gvawatermarkelement overlays the YOLOv8n detection boxes on the decoded frames. Switch the variant’s output mode to Save to file or Live stream to consume it; the default mode in the predefined pipeline terminates infakesinkand discards the frames after watermarking.Throughput (FPS): the
gvafpscounterelement reports the steady-state processing rate after a short warm-up (the first 100 frames are skipped viastarting-frame=100). The number is visible in the job logs and in the Performance results view.
To evaluate the pipeline across hardware, re-run it with a different variant selected and compare the reported FPS and detection quality.
Step 5. Consume the live metadata stream#
For workloads that need to react to detections in real time (for example forwarding events to a
downstream system), ViPPET exposes the metadata produced by gvametapublish as a live
Server-Sent Events (SSE) stream.
Start the pipeline as a performance test so that the job is tracked by the Tests subsystem.
Make sure the
gvametapublishelement writes to a real file path (see Step 4); SSE streaming is not available when the pipeline writes to/dev/null.Poll the performance job status and read the
metadata_stream_urlsfield of the response. It is a mapping from pipeline id to a list of SSE URLs - one URL pergvametapublishfile in the pipeline. The list isnullwhen no streamable metadata file is present.Open the URL with any SSE-capable client. Each
data:event carries one JSON Lines record produced bygvametapublish. The connection stays open while the pipeline runs, sends a: keepalivecomment every 30 s, and closes automatically when the pipeline finishes.
The SSE endpoint is shaped as:
GET /api/v1/tests/performance/{job_id}/metadata/{pipeline_id}/{file_index}/stream
Accept: text/event-stream
A historical snapshot of recent records is also available without opening an SSE stream:
GET /api/v1/tests/performance/{job_id}/metadata/{pipeline_id}/{file_index}
Both endpoints, together with their request and response schemas, are documented in the live
OpenAPI reference at /docs (Swagger UI) and /redoc.
Tips and troubleshooting#
Too many or too few ROIs. Tune
motion-threshold(sensitivity) andmin-rel-area(minimum size) first.confirm-framesandmin-persistencehelp when short bursts of noise are leaking through.Boxes jitter. Raise
smooth-alphatoward0.7-0.9for steadier boxes, at the cost of slower reaction to fast-moving objects.Tracks split or flicker. Lower
iou-thresholdto allow looser frame-to-frame matching, and raisemax-missto keep tracks alive through brief occlusions.No detections at all. Check that the input video actually contains motion (a static scene will legitimately produce zero motion ROIs and therefore zero YOLOv8n detections), and that the YOLOv8n INT8 model is installed under
/models/output/public/yolov8n/INT8/.gvamotiondetectfails to link on GPU. The element only accepts NV12 frames; ViPPET’s graph validator injects the required conversion automatically, but custom pipelines that bypass it must insertvideoconvert ! video/x-raw,format=NV12(CPU) or avapostproc-based equivalent (GPU) before the element.