GenAI Use Case#
This guide walks you through the Video Summarization VLM predefined pipeline. It uses the gvagenai
DL Streamer element together with a vision-language model (VLM) to generate concise, scene-level natural-language
summaries from sampled frames of an input video. Unlike the classic detection/classification pipelines, this
pipeline produces metadata-only output (JSON Lines) — there is no rendered output video.
Step 2. Configure the GVAGenAI element#
In the Pipeline Builder, click the gvagenai node to open its configuration panel.
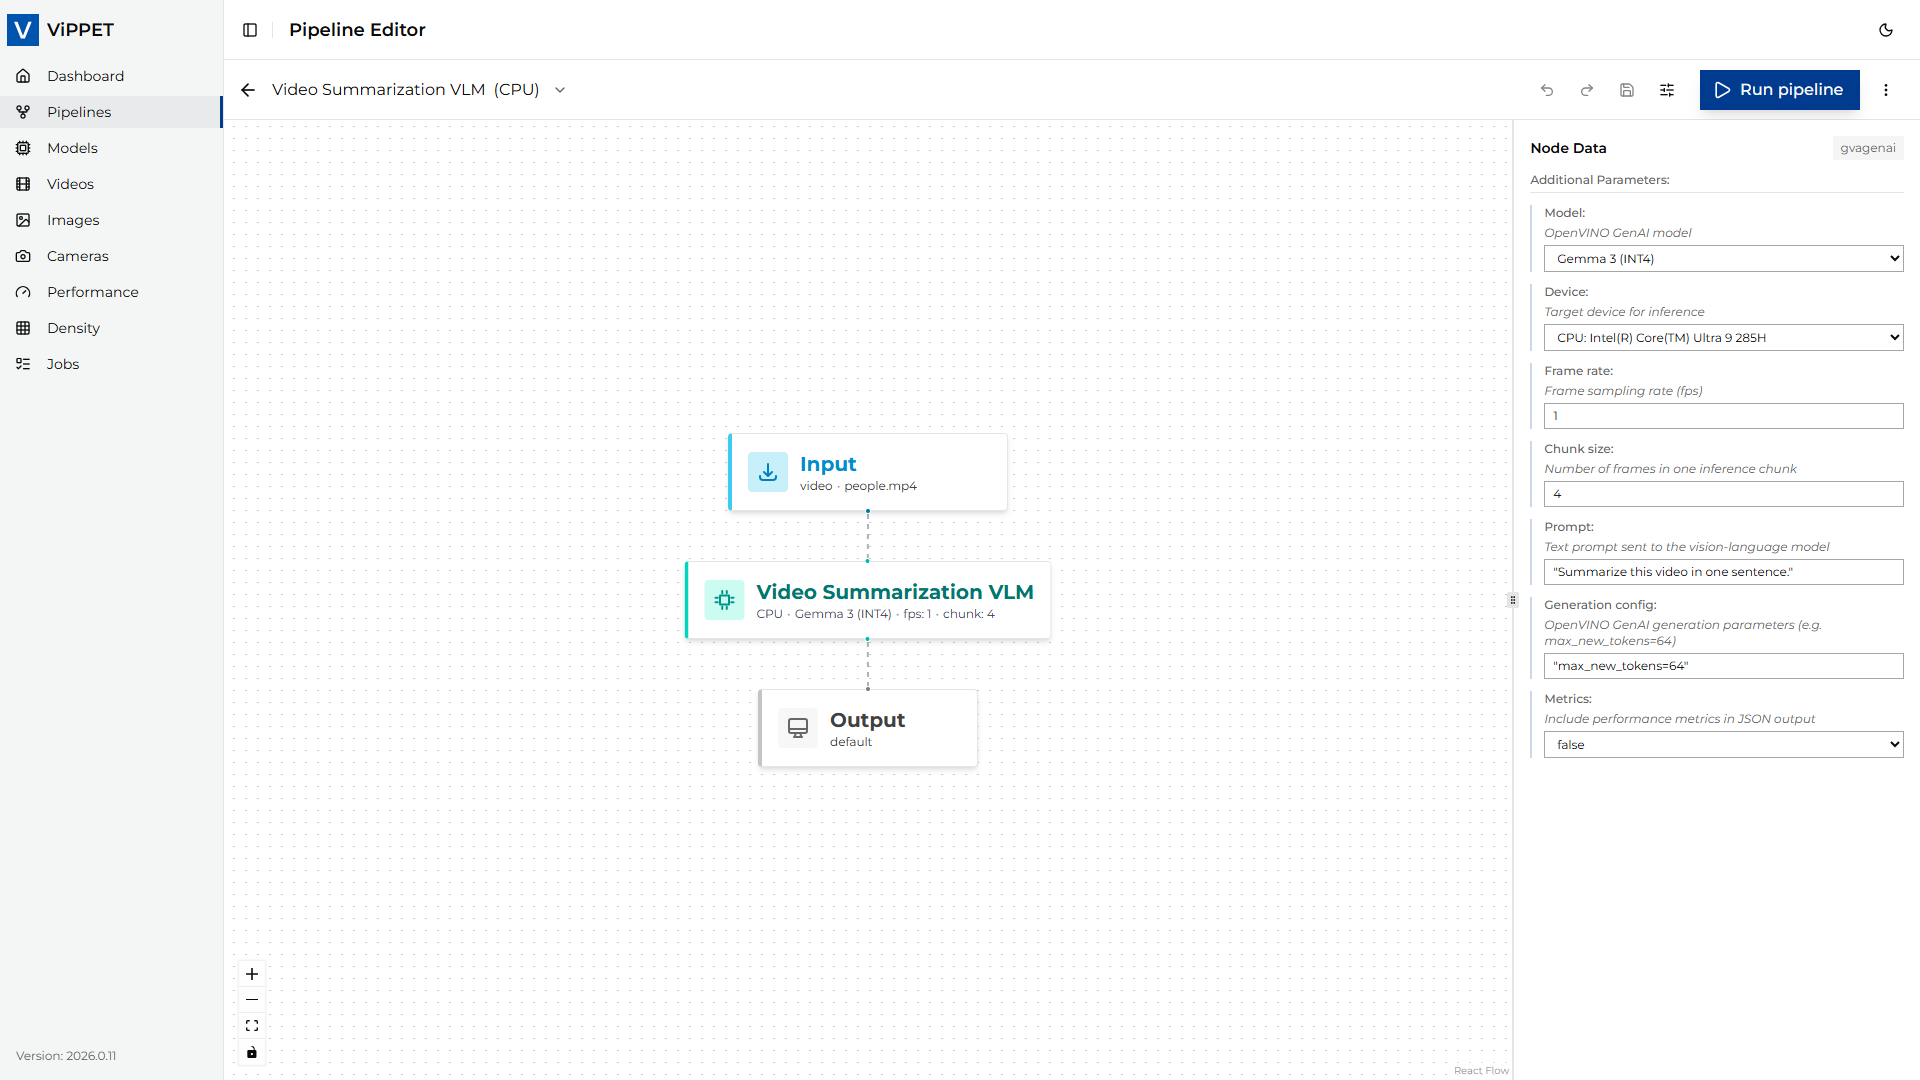
The following parameters are exposed in the UI (defaults shown reflect the predefined pipeline):
Parameter |
Default |
Description |
|---|---|---|
model |
|
The vision-language model used for summarization. Only models on disk tagged for GenAI are listed. The on-disk path is resolved automatically from the selected variant (CPU/GPU/NPU). |
device |
|
Target inference device. Set automatically by the selected variant; use the variant switcher to change devices rather than editing this field directly. |
prompt |
|
Instruction sent to the VLM for each chunk of sampled frames. Edit it to control the style, length, or focus of the generated summaries (for example, “List the main activities visible in the scene.”). |
generation-config |
|
Generation-config controls for the VLM, expressed as a comma-separated |
frame-rate |
|
Number of frames per second sampled from the decoded video and fed to the VLM. Lower values reduce compute; higher values capture more temporal detail. |
chunk-size |
|
Number of sampled frames grouped into a single VLM inference call. One summary entry is emitted per chunk. |
metrics |
|
When |
The downstream gvametapublish and gvafpscounter nodes are
responsible for writing the JSON Lines output and reporting FPS, respectively.
Note: The Video Summarization VLM pipeline is metadata-only — it terminates in an unnamed fakesink
and does not produce a rendered output video. The Save to file and Live stream output modes
therefore have no effect for this pipeline; only the JSON Lines metadata file is generated.
Step 3. Run the pipeline#
Confirm that the input video is available under the shared
videos/input/directory (the default pipeline usespeople.mp4).Click Run. ViPPET launches the pipeline as a job; you can follow progress in the Jobs view.
While the job runs, the selected device’s utilization (CPU/GPU/NPU) should increase visibly in the Dashboard.
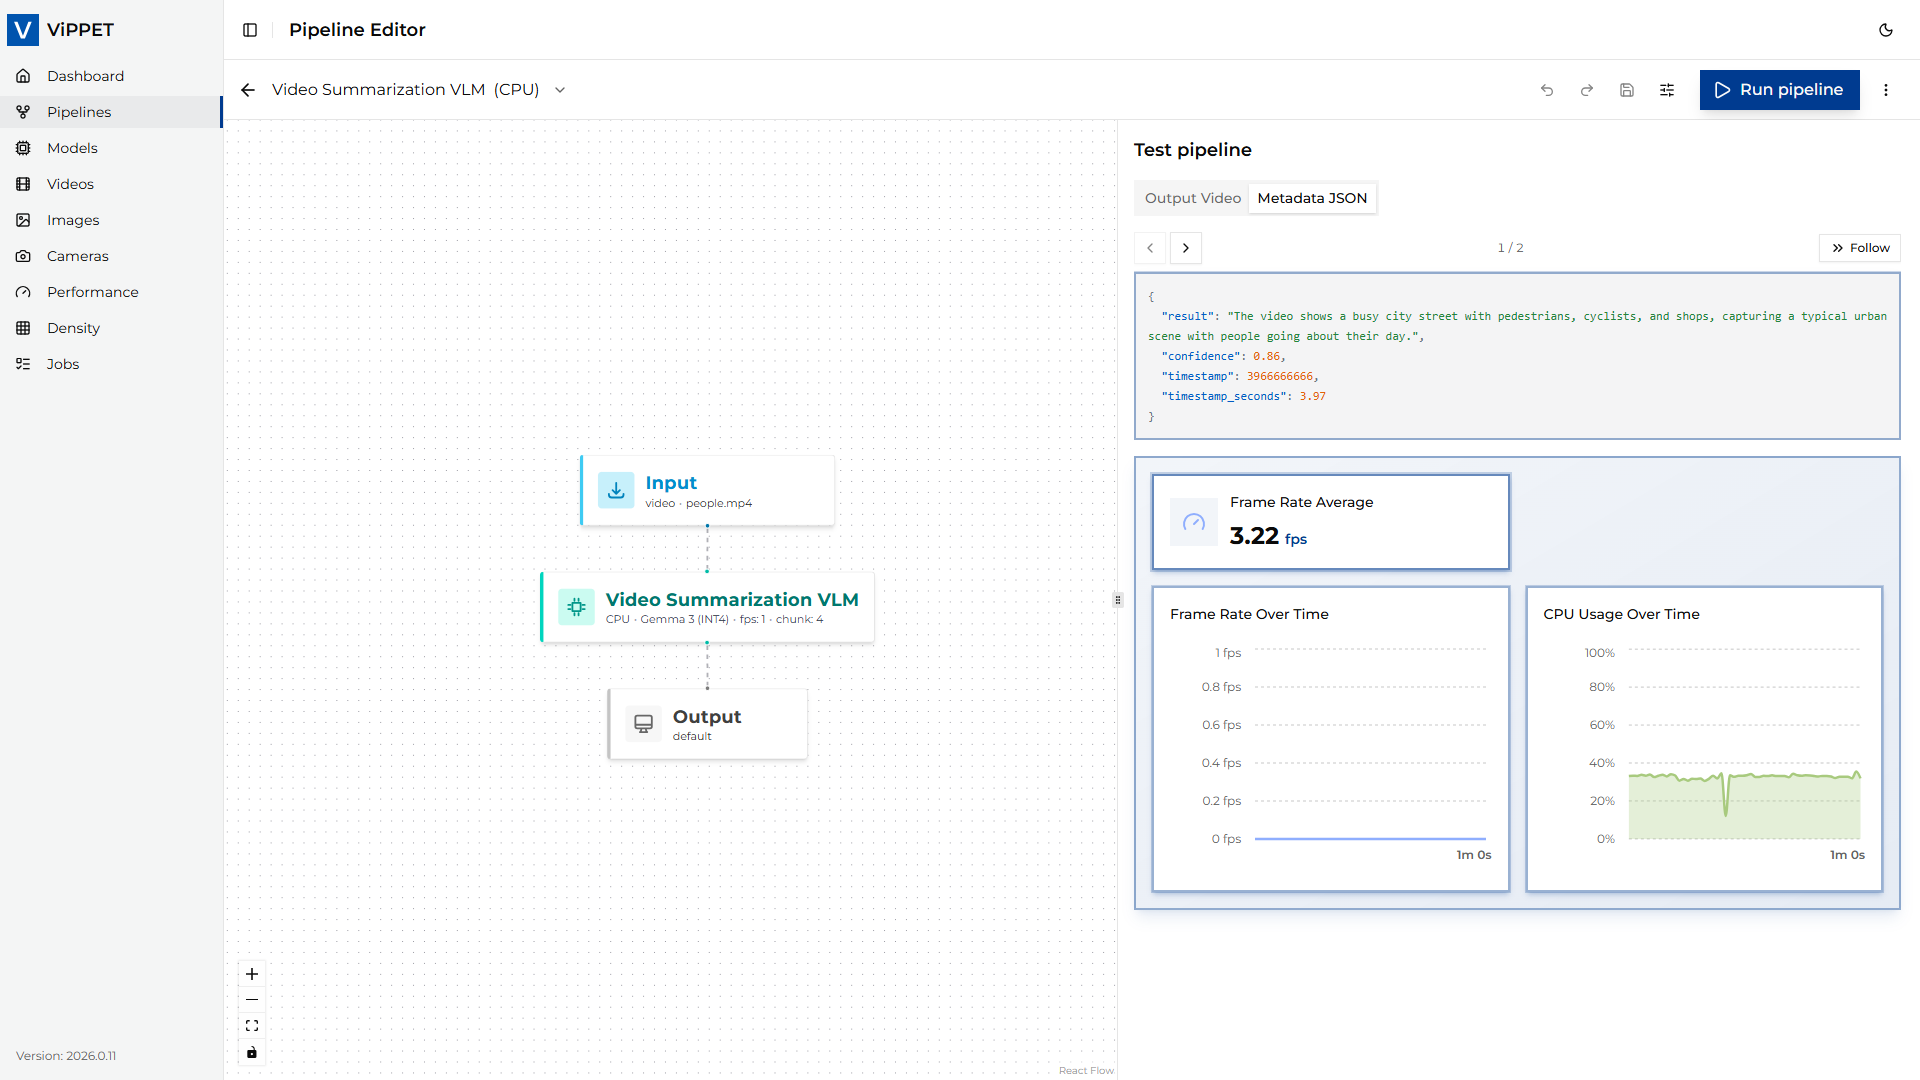
Step 4. Interpret the results#
When the job completes, two outputs are available:
Scene summaries (JSON Lines): the VLM writes one record per processed chunk to
videos/output/summary.jsonlin the shared volume. Each line is a JSON object whosesummary(or equivalent) field contains the generated text for that chunk, together with frame/timestamp information.Throughput (FPS): the
gvafpscounterelement reports the steady-state processing rate after a short warm-up (the first 10 frames are skipped viastarting-frame=10). The number is visible in the job logs and in the Performance results view.
To evaluate the pipeline across hardware, re-run it with a different variant selected and compare the reported FPS and generated summaries.