RealSense Camera with ROS 2 Sample Application#
This tutorial tells you how to:
Launch ROS nodes for a camera.
List ROS topics.
Confirm that RealSense camera topics are publishing data.
Retrieve data from the RealSense camera (data coming at FPS).
Visualize an image from the RealSense camera displayed in rviz2.
This RealSense with ROS 2 Sample Application can be run using two different types of RealSense cameras. The next section explains how to run this sample application using a RealSense camera connected through USB (for example, RealSense camera D435i). The subsequent section focuses on an RealSense Depth Camera D457 in MIPI mode, which is connected to an Axiomtek Robox500 ROS 2 AMR Controller.
Prerequisites#
Complete the GSG Robot Guide before continuing.
Using RealSense camera connected through USB#
Connect a RealSense camera (for example, RealSense D435i) to the host, through USB.
Install the
librealsense2andrealsense2tools:sudo apt-get install -y ros-jazzy-librealsense2-tools
sudo apt-get install -y ros-humble-librealsense2-tools
Download and install the RealSense camera with ROS 2 sample application:
sudo apt-get install -y ros-jazzy-realsense2-tutorial-demo
sudo apt-get install -y ros-humble-realsense2-tutorial-demo
Set up the ROS 2 environment:
source /opt/ros/jazzy/setup.bash
source /opt/ros/humble/setup.bash
Run the RealSense camera with ROS 2 sample application:
ros2 launch realsense2_tutorial realsense2_tutorial.launch.py
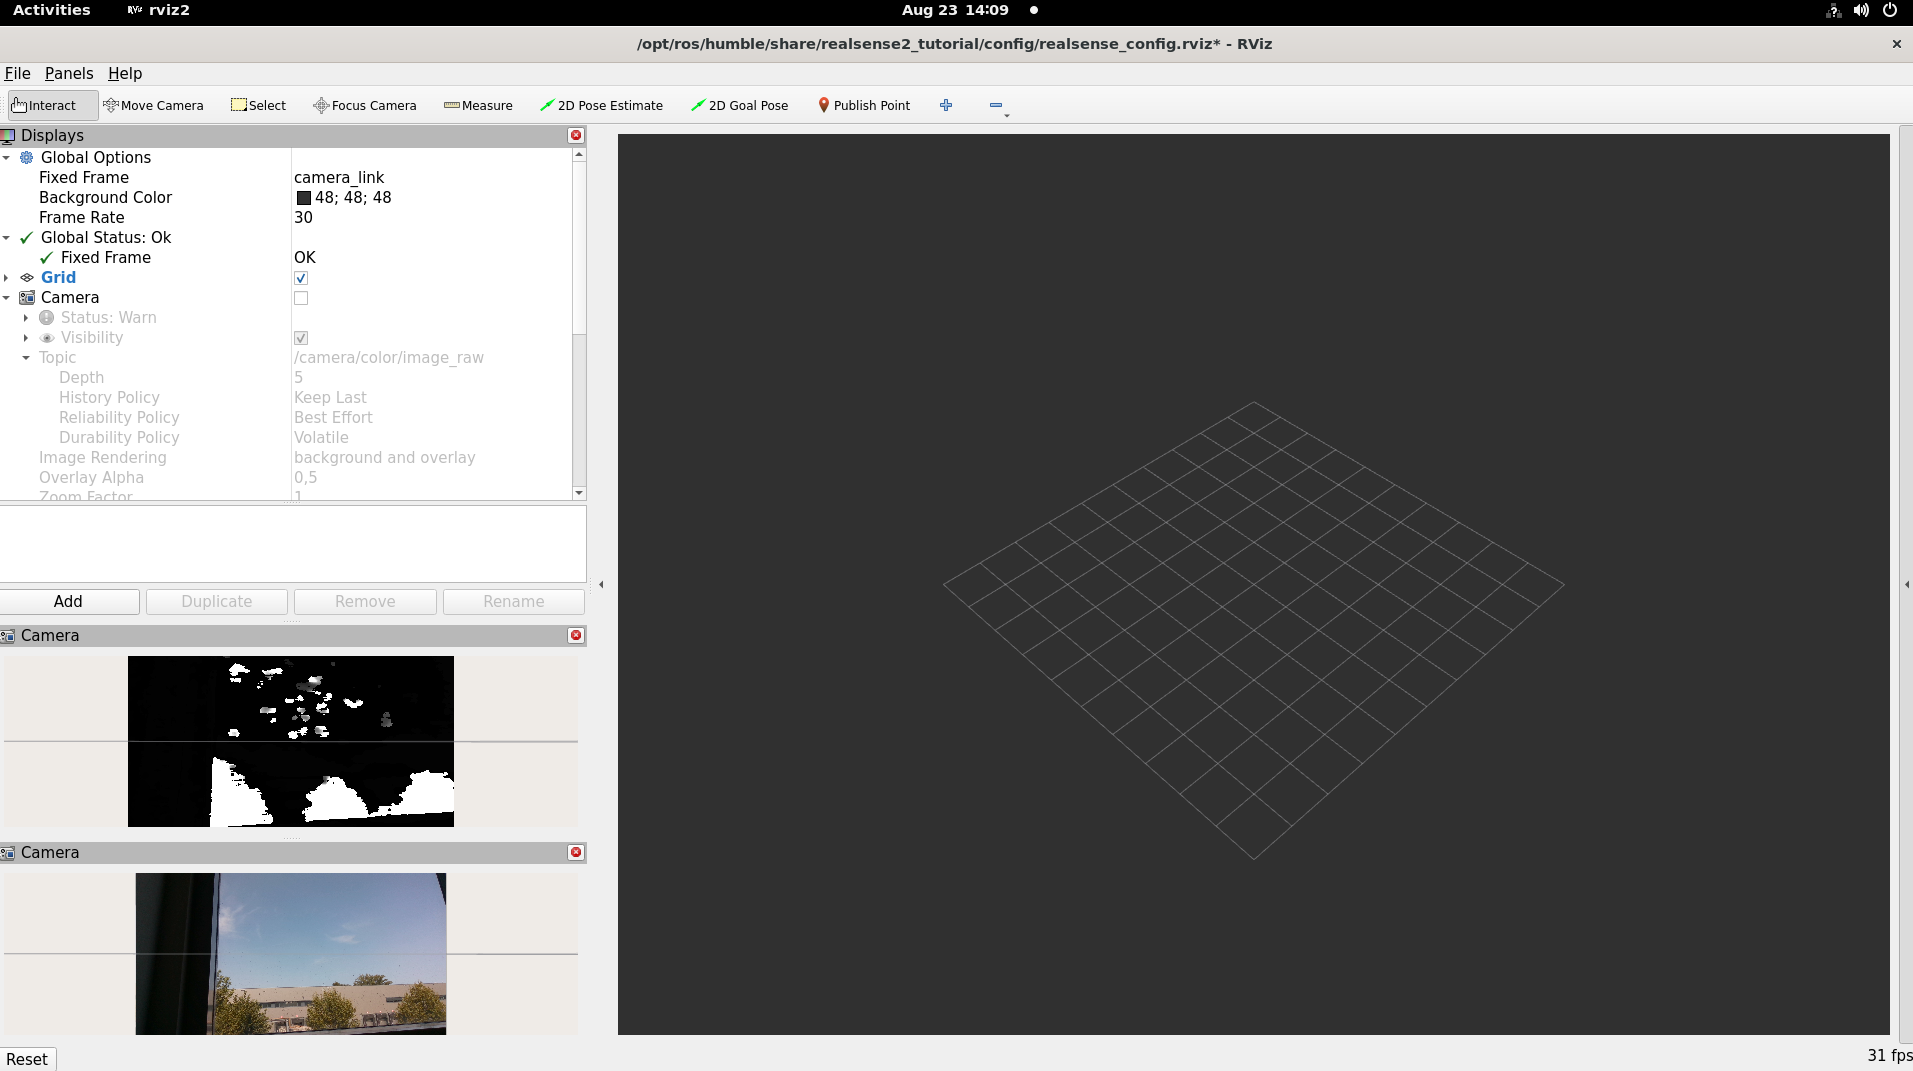
Expected output: The image from the RealSense camera is displayed in rviz2, on the bottom left side.
To close this, do the following:
Type
Ctrl-cin the terminal where the tutorial was run.
Using RealSense Depth Camera D457 on an Axiomtek Robox500 ROS 2 AMR Controller#
The following steps are required to set up the Axiomtek Robox500 ROS 2 AMR Controller to support the RealSense Depth Camera D457.
Axiomtek Robox500 ROS 2 AMR Controller Setup#
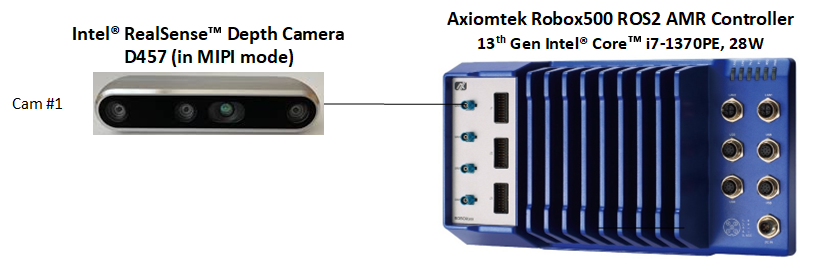
Connect a RealSense Depth Camera D457 to the Axiomtek Robox500 ROS 2 AMR Controller as shown in the below picture. Now, power-on the target.
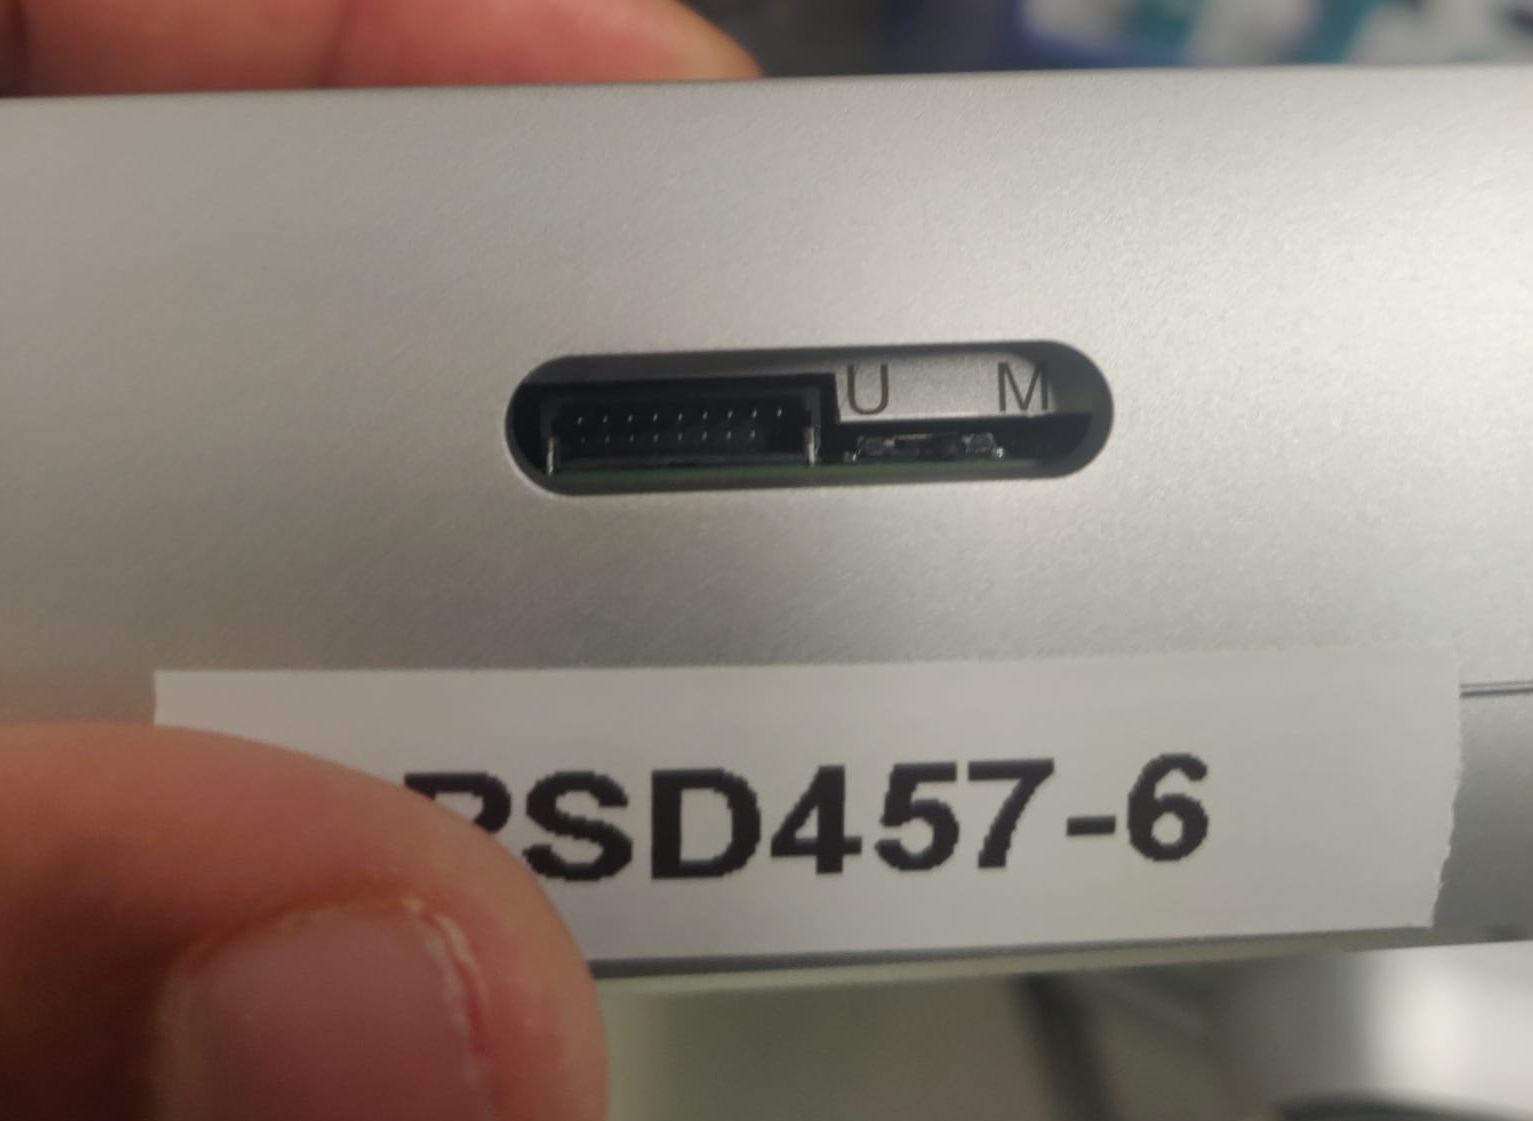
Note: Select the “MIPI” mode of the RealSense Depth Camera D457 by moving the select switch on the camera to “M”, as shown in the below picture:
BIOS settings#
Go to the BIOS menu by pressing “Del” or “Esc” button when the board is
powered on. The following BIOS settings should be set to enable
RealSense Depth Camera D457 support on an Axiomtek Robox500
ROS 2 AMR Controller.
Intel Advanced Menu -> Power & Performance -> CPU-Power Management Control -> C States -> < Disable > (Note: If enabled, fps drops)
Intel Advanced Menu -> System Agent (SA) Configuration -> MIPI Camera Configuration -> < Enable > (Note: Enable all four cameras in this menu)
Camera BIOS settings.
BIOS setting |
Camera 1 |
Camera 2 |
Camera 3 |
Camera 4 |
|---|---|---|---|---|
MIPI Port |
0 |
1 |
2 |
3 |
Lane user |
x2 |
x2 |
x2 |
x2 |
Port speed |
2 |
2 |
2 |
2 |
I2C Channel |
I2C5 |
I2C5 |
I2C5 |
I2C5 |
Device0 I2C Address |
12 |
14 |
16 |
18 |
Device1 I2C Address |
42 |
44 |
62 |
64 |
Device2 I2C Address |
48 |
4a |
68 |
6c |
Install librealsense2 and realsense2 tools#
sudo apt install -y ros-jazzy-librealsense2-tools
sudo apt install -y ros-humble-librealsense2-tools
Install intel-ipu6 (intel-ipu6-dkms) driver#
Create a
/etc/modprobe.d/blacklist-ipu6.conffile and add the lines of the listing below. This will prevent the loading of the existing defaultintel_ipu6_isyskernel module.# kernel builtin ipu6 driver and realsense D4XX driver clash with intel-ipu6-dkms installation. blacklist intel_ipu6_isys blacklist intel_ipu6_psys blacklist intel_ipu6
Reboot the target.
Install the
intel-ipu6-dkms:sudo apt install -y intel-ipu6-dkms
Run the following command for
dkmsto force-install theintel-ipu6driver:dkms install --force ipu6-drivers/20230621+iotgipu6-0eci8
Check the
dkmsstatus by using the following command:dkms status ipu6-drivers/20230621+iotgipu6-0eci8, 5.15.0-1048-intel-iotg, x86_64: installed
If the
dkmsstatus is not “installed”, then rerun the command from step number 4.modprobethe installedintel-ipu6driver:sudo modprobe intel-ipu6-isys
Note: The
modprobecommand must be run after every system reboot. This is because theintel-ipu6-isyskernel module is not loaded by OS at boot. It must be loaded manually using the above command.After installation, check the status of the loaded
intel-ipu6-isyskernel module. The kernel module loaded must be/lib/modules/5.15.0-1048-intel-iotg/updates/dkms/intel-ipu6-isys.koas shown below:modinfo intel-ipu6-isys | head -3 filename: /lib/modules/5.15.0-1048-intel-iotg/updates/dkms/intel-ipu6-isys.ko description: Intel ipu input system driver license: GPL
Add the user to the video and render group#
# Add the $USER to the video group
sudo usermod -a -G video $USER

# Add the $USER to the render group
sudo usermod -a -G render $USER
Install and run the RealSense camera with ROS 2 sample application#
Download and install the RealSense camera with ROS 2 sample application:
sudo apt-get install -y ros-jazzy-realsense2-tutorial-demo
sudo apt-get install -y ros-humble-realsense2-tutorial-demo
Set up the ROS 2 environment:
source /opt/ros/jazzy/setup.bash
source /opt/ros/humble/setup.bash
Run the following command to bind the RealSense Depth camera D457 with
intel-ipu6driver with metadata enabled:rs_ipu6_d457_bind.sh
Run the RealSense camera with ROS 2 sample application:
ros2 launch realsense2_tutorial realsense2_tutorial.launch.py use_sub_camera:=false
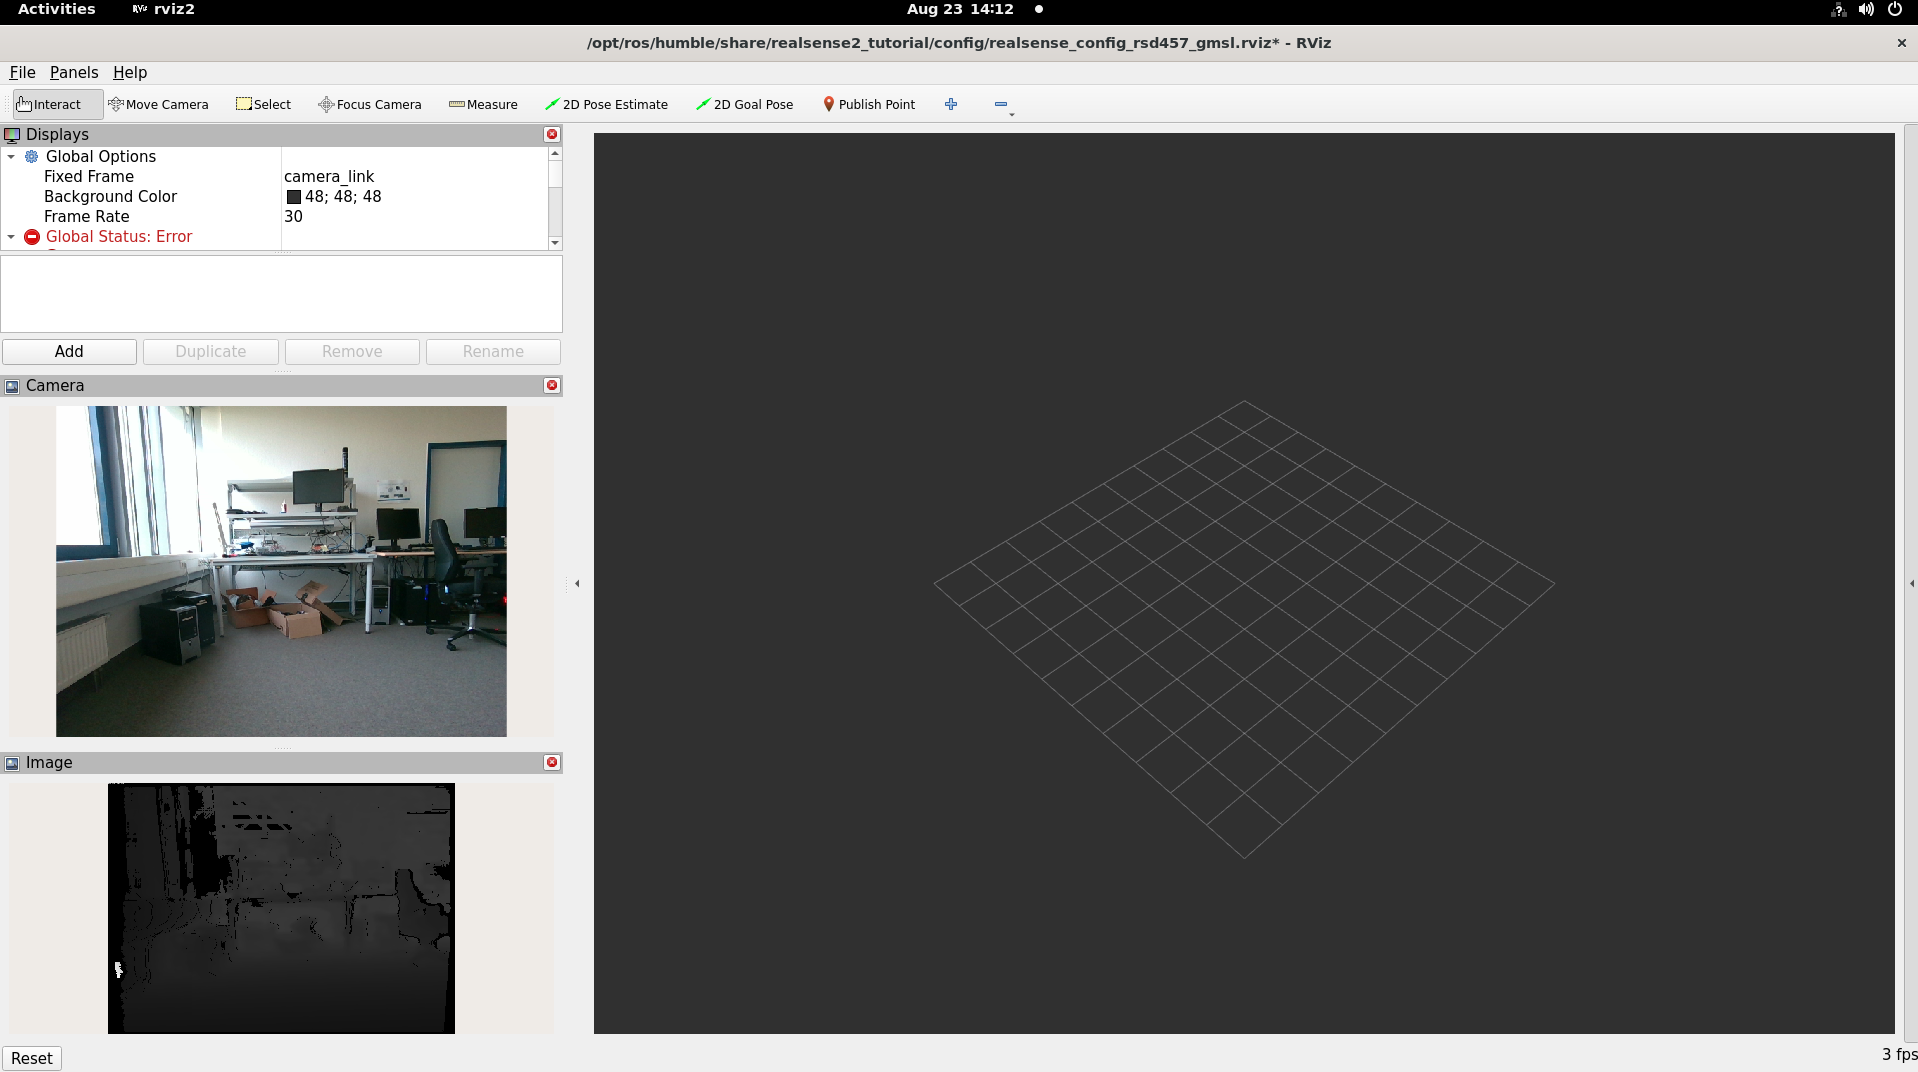
Expected output: The image from the RealSense camera is displayed in rviz2, on the bottom left side.
To close this, do the following:
Type
Ctrl-cin the terminal where the tutorial was run.