iRobot Create 3#
iRobot Create 3 is a mobile robotics platform, which developers can use to gain hands-on experience with the technologies and concepts that are foundational to the field of autonomous mobile robots. This practical understanding is invaluable for those looking to enter the robotics industry or further their knowledge in this rapidly evolving field.
Before starting, review the iRobot Create 3 mobile robotics platform documentation to be able to perform the configuration changes needed for the tutorial.
Prerequisites#
Complete the GSG Robot Guide before continuing.
iRobot Create 3 hardware extensions#
iRobot Create 3 contains a compute unit running ROS 2 that provides access to the on-board sensors and actuators. For this tutorial, the following modifications have been applied to the robot:
two support layers added on top of the robot,
Intel® board mounted on the bottom layer,
RealSense™ camera mounted on the front of the top layer and connected to a USB port on the Intel® board,
Slamtec RPLIDAR 2D (Slamtec RPLIDAR A3 laser range scanner or Slamtec RPLIDAR A2 laser range scanner (A2M8)) sensor on a mount in the center of the top layer and connected to two USB ports on the Intel® board,
custom battery in the cargo bay to power the Intel® board and accessories, namely the camera and the lidar,
an Ethernet adapter connected to the iRobot Create 3 adapter board and to the Intel® board,
a rear caster wheel attached to the cargo bay, as described in the iRobot® Create® 3 Mechanical System documentation.
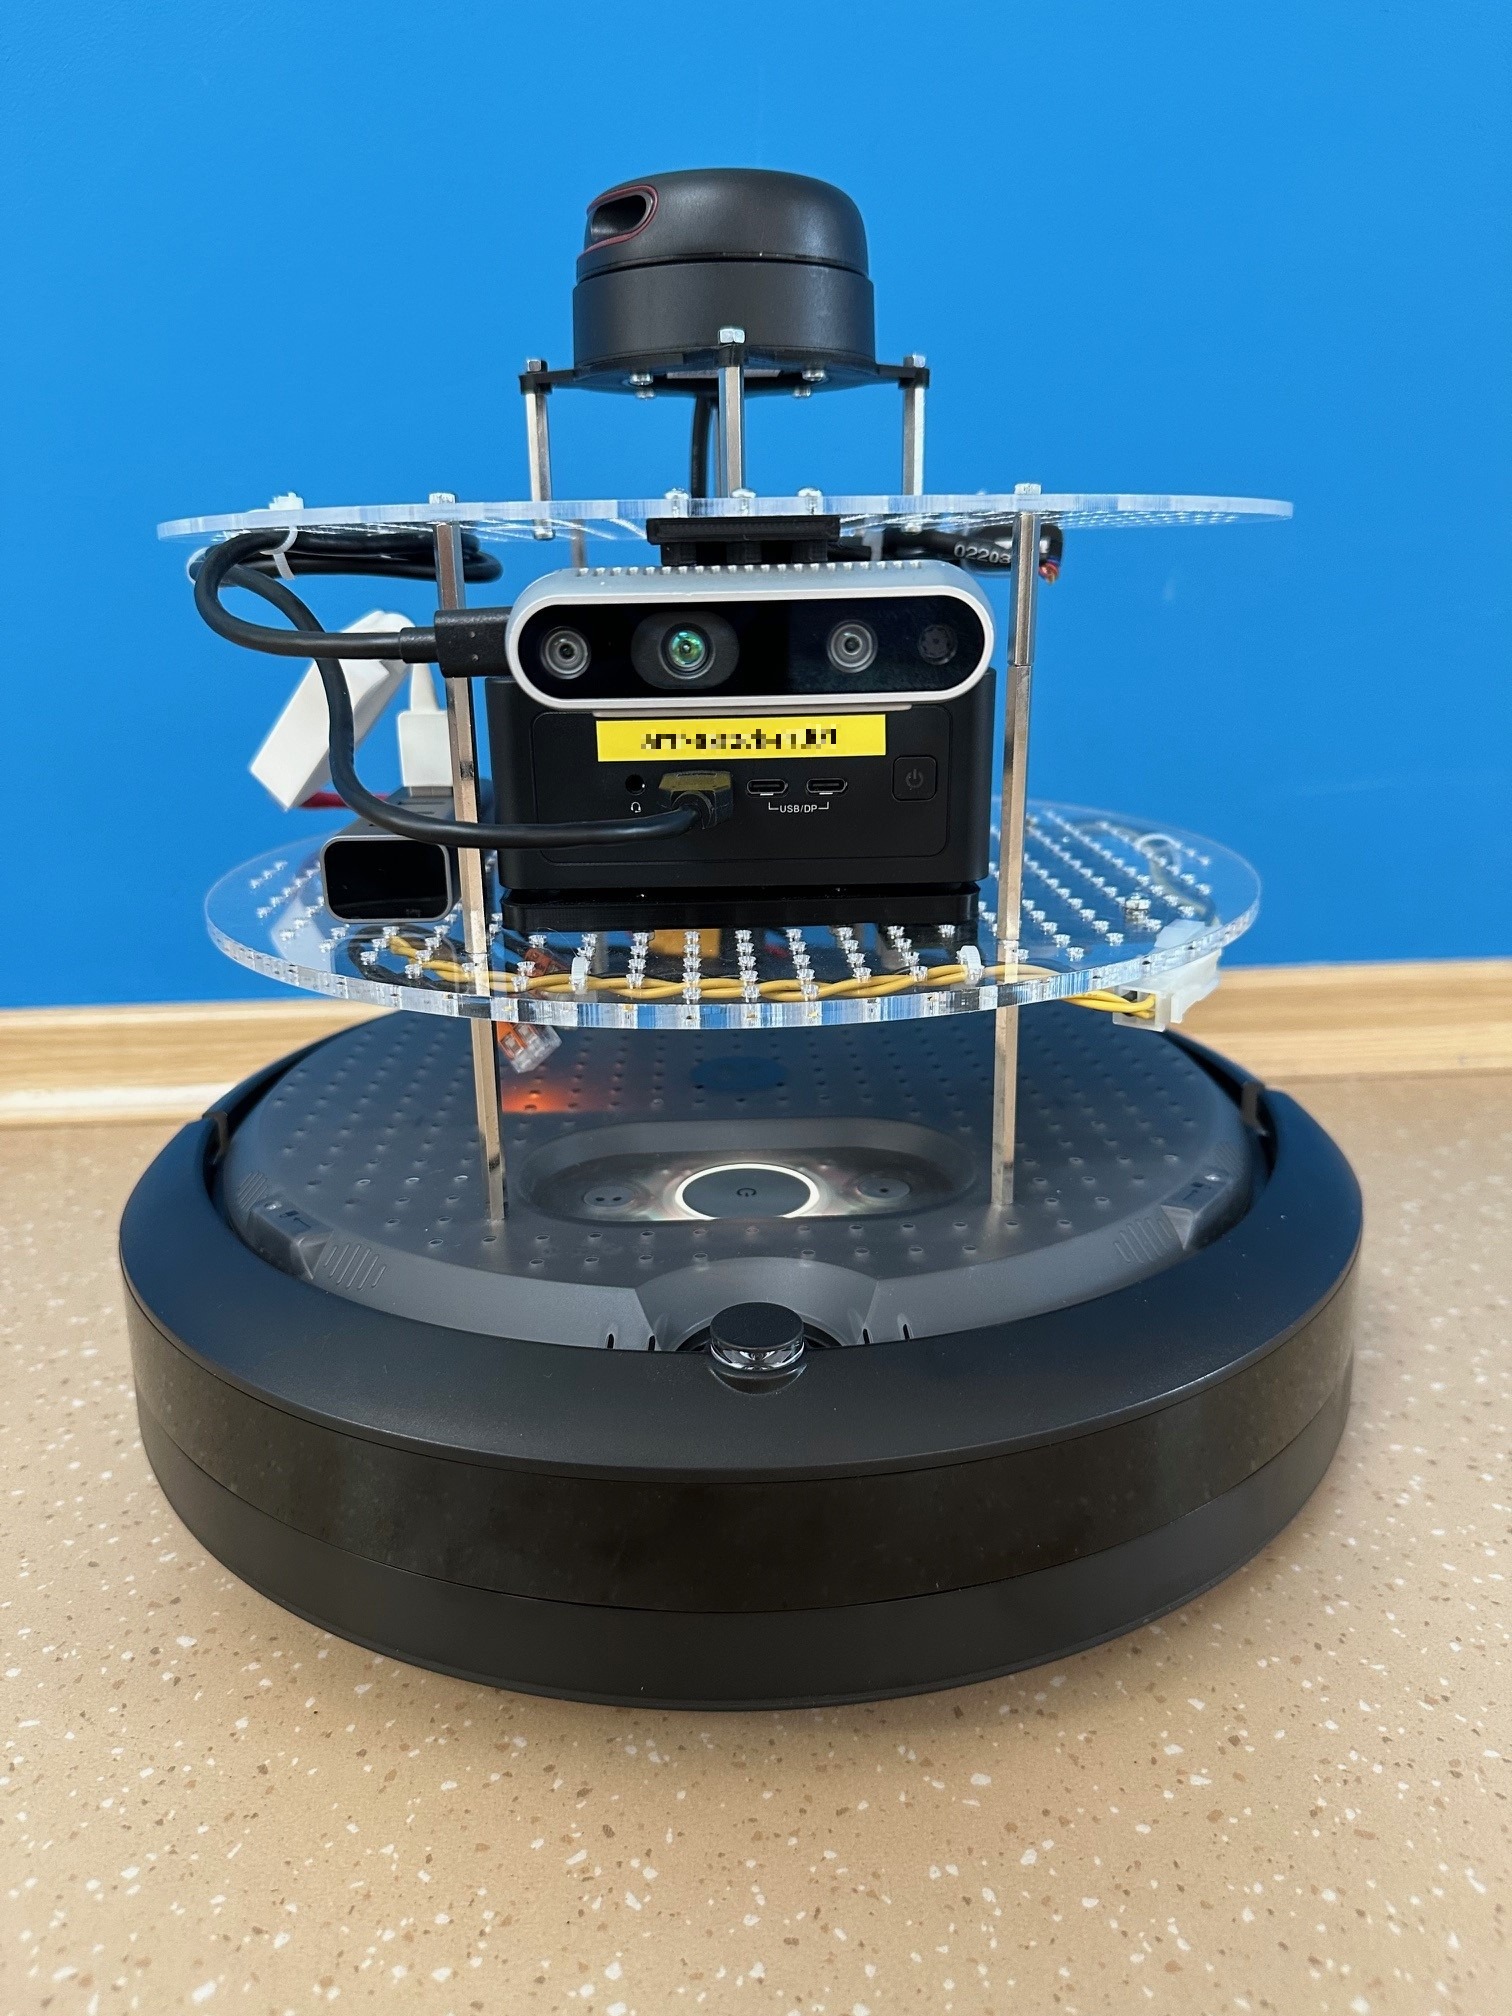
iRobot Create 3 robot front view.

iRobot Create 3 robot rear view.
iRobot Create 3 software configuration#
Update the robot to use the latest ROS 2 firmware for your selected OS distribution, and configure it to access your WiFi network following the iRobot® Create® 3 Setup documentation.
With the robot connected to your WiFi network continue configuring it using its web interface. Refer to the iRobot Create 3 mobile robotics platform documentation for the exact steps to follow.
Wired (Ethernet) network#
The Intel® board and the compute unit of the iRobot Create 3 should be connected using an Ethernet adapter with a USB Type-C connector. The USB Type-C plug should be connected to the adapter board of the iRobot Create 3, while the Intel® board should be connected to the Ethernet adapter using an RJ-45 cable.
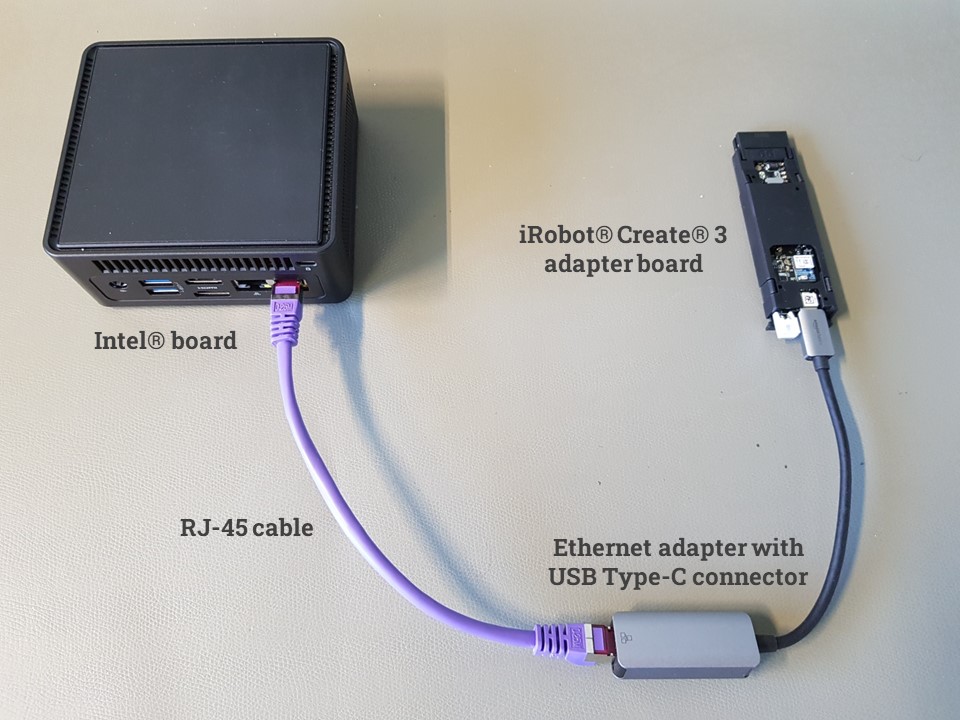
Ethernet via USB connection between iRobot Create 3 adapter board and Intel® board.
The iRobot Create 3 robot is configured to use the address
192.168.186.2/24 on the USB interface. You can change the network
part of the address by following the instructions on page
iRobot Create 3 Webserver - Set Wired Subnet.
On the Intel® board, the network interface connected to the robot has to be configured with a static IP address of the same subnet.
NTP server#
Time synchronization is very important in ROS 2. For this reason, the iRobot Create 3 includes an NTP server, which can be configured as described on page iRobot® Create® 3 Webserver - Edit ntp.conf.
Alternatively, you can set up an NTP server on the Intel® board by following the iRobot Create 3 documentation Set up NTP on compute board. Use the IP address of the Ethernet interface connected to the robot.
ROS 2 Middleware (RMW) Configuration & Fast DDS discovery server#
To define what ROS 2 middleware implementation shall be used by the
iRobot Create 3, follow the configuration guidelines on page
iRobot Create 3 Webserver - Application.
Set the RMW_IMPLEMENTATION option to rmw_fastrtps_cpp, as shown in
the figure below.
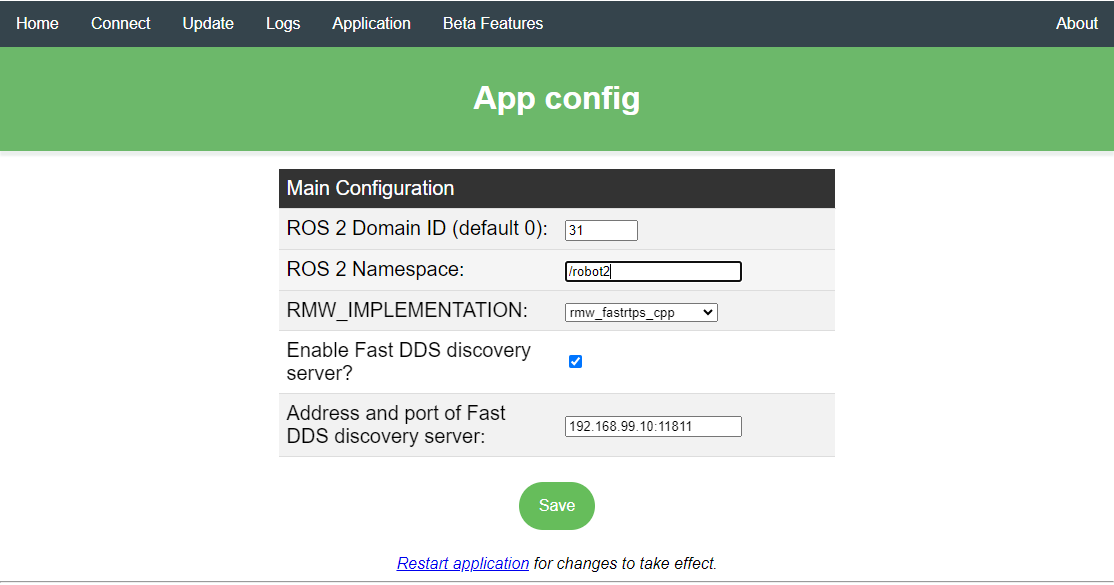
iRobot Create 3 ROS 2 application configuration page. On this
robot the iRobot Create 3 Webserver - Set Wired Subnet
is set to 192.168.99.2, Fast DDS discovery server is enabled
and runs on the Intel® board reachable at IP 192.168.99.10
over the Ethernet connection. ROS 2 Domain ID is set but it is not
used when the discovery server is enabled.
To speed up node discovery, enable the iRobot® Create® 3 Fast DDS Discovery Server. Use the IP address set above for the Intel® board on the USB connection to the iRobot Create 3 as the Fast DDS Discovery Server IP address.
Note: When the discovery server is enabled, the
ROS_DOMAIN_IDis not used.
Robot namespace#
Set a ROS 2 namespace (e.g., /robot2) for your robot, as described on page
iRobot Create 3 Webserver - Application. This value should be passed to the
launch file as argument irobot_ns.