How to Test Density#
This article explains how to run density tests in ViPPET and interpret the results.
A density test finds the maximum number of streams that can run while keeping the target
minimum FPS per stream. Compared to a standard performance test (fixed stream count),
density testing increases the load and searches for the highest stable stream count that
still meets your FPS requirement.
Therefore, it answers the question: How many concurrent streams can this platform sustain at my required FPS floor?
Density Testing Algorithm#
The density testing algorithm is designed to find the maximum number of concurrent video streams that can be processed while maintaining a minimum performance threshold (FPS floor). The algorithm uses a two-phase approach:
Phase 1: Exponential Growth#
Start with 1 stream and run the pipeline.
Double the stream count after each successful run that meets the FPS threshold.
Continue exponentially (
1 -> 2 -> 4 -> 8 -> 16...) until the per-stream FPS drops below the specifiedfps_floor.Track the best configuration that still meets the performance requirements.
Phase 2: Binary Search Refinement#
Switch to binary search once performance drops below the threshold.
Set bounds:
Lower bound = last successful stream count (
N/2).Upper bound = current failing stream count (
N).
Bisect the range and test the midpoint.
Adjust bounds based on results:
If
FPS >= threshold: update best config, move lower bound up.If
FPS < threshold: move upper bound down.
Continue until bounds converge.
Stream Distribution#
Multiple pipelines can be tested simultaneously.
Stream allocation is proportional based on
stream_rateratios (must sum to100%).Rounding handling: the last pipeline gets remaining streams to account for rounding errors.
Algorithm result#
The algorithm returns the optimal configuration with:
Maximum number of streams that meet the FPS requirement.
Distribution of streams across pipelines.
Achieved per-stream FPS.
Output file paths for video results.
Running density testing#
Density testing helps you find the maximum number of concurrent streams that still meet a required FPS floor.
Configuration#
Before running the test, configure the workload in the Density tab:
Open Density tab.
Set FPS Floor (for example,
30).Add one or more pipelines.
For each pipeline, set Stream Rate so all pipelines sum to
100%.Set iteration duration in seconds (for example,
30).
What is happening:
stream_rate defines proportional stream allocation across selected pipelines.
ViPPET uses these ratios to distribute total streams during each test iteration.
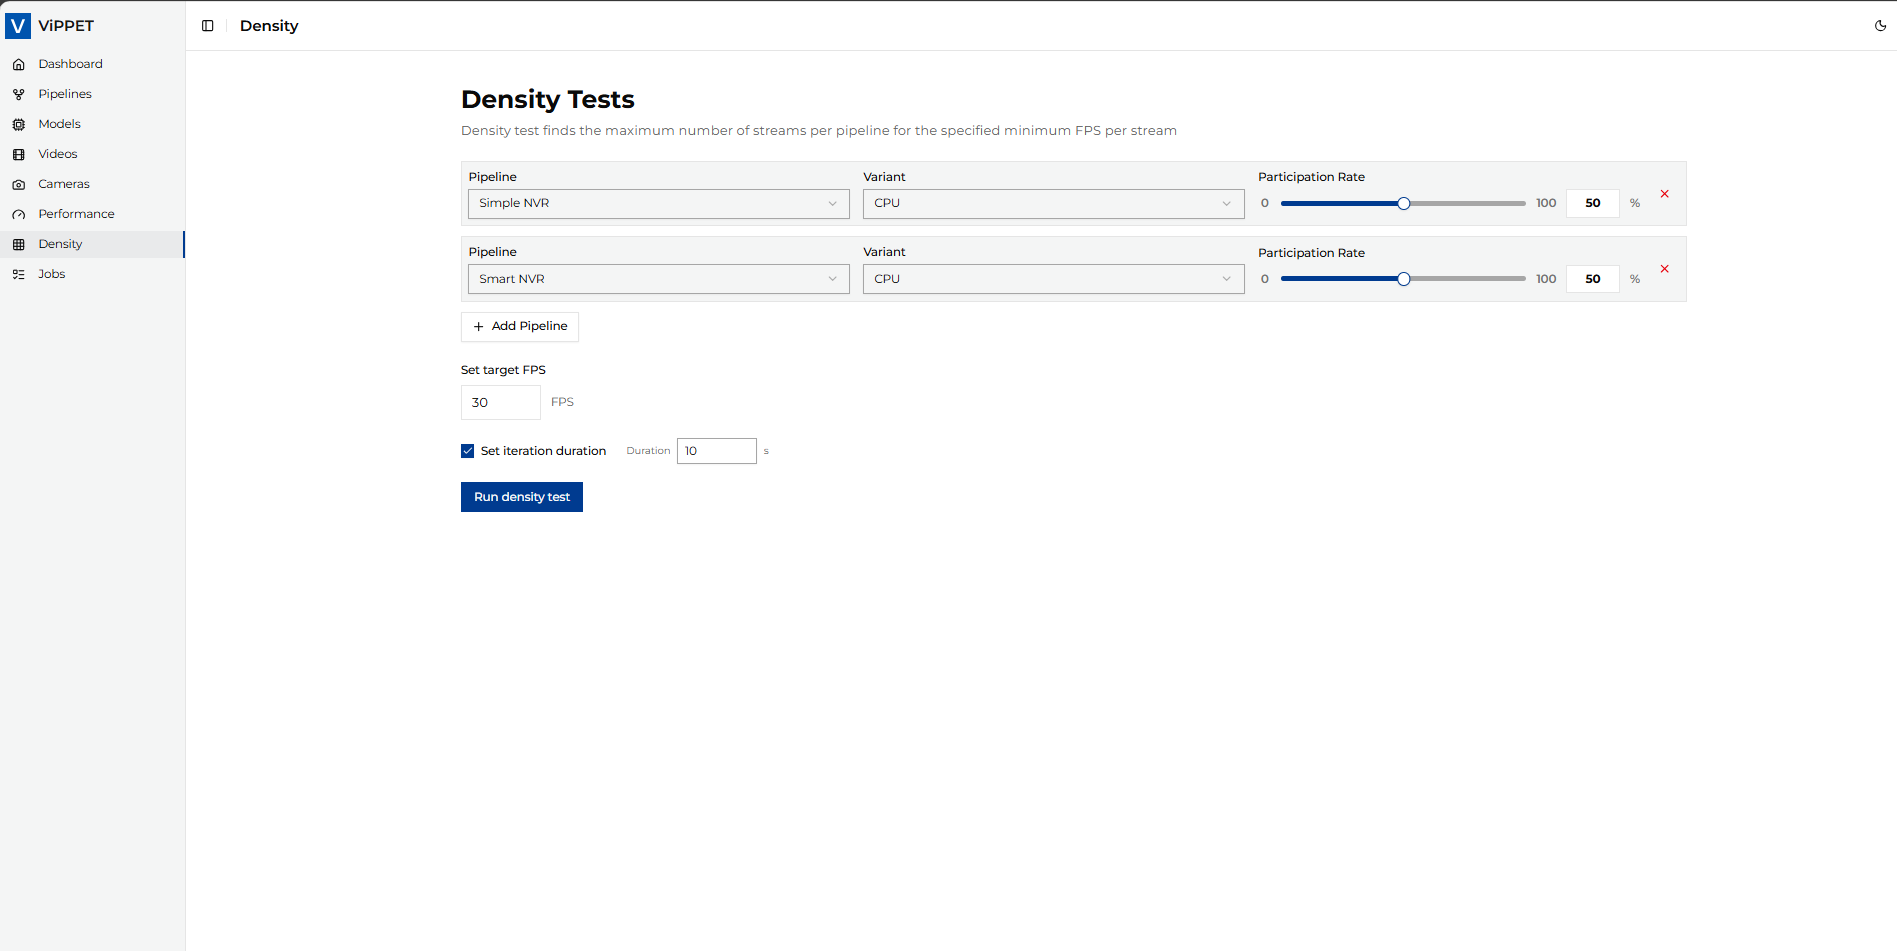 Figure 1: Density test configuration view
Running#
After configuration, click Run density test.
What is happening:
ViPPET starts with a small stream count and increases load (exponential growth).
When FPS drops below
fps_floor, ViPPET refines the maximum sustainable stream count using binary search.The process ends when the algorithm converges on the best stable configuration.
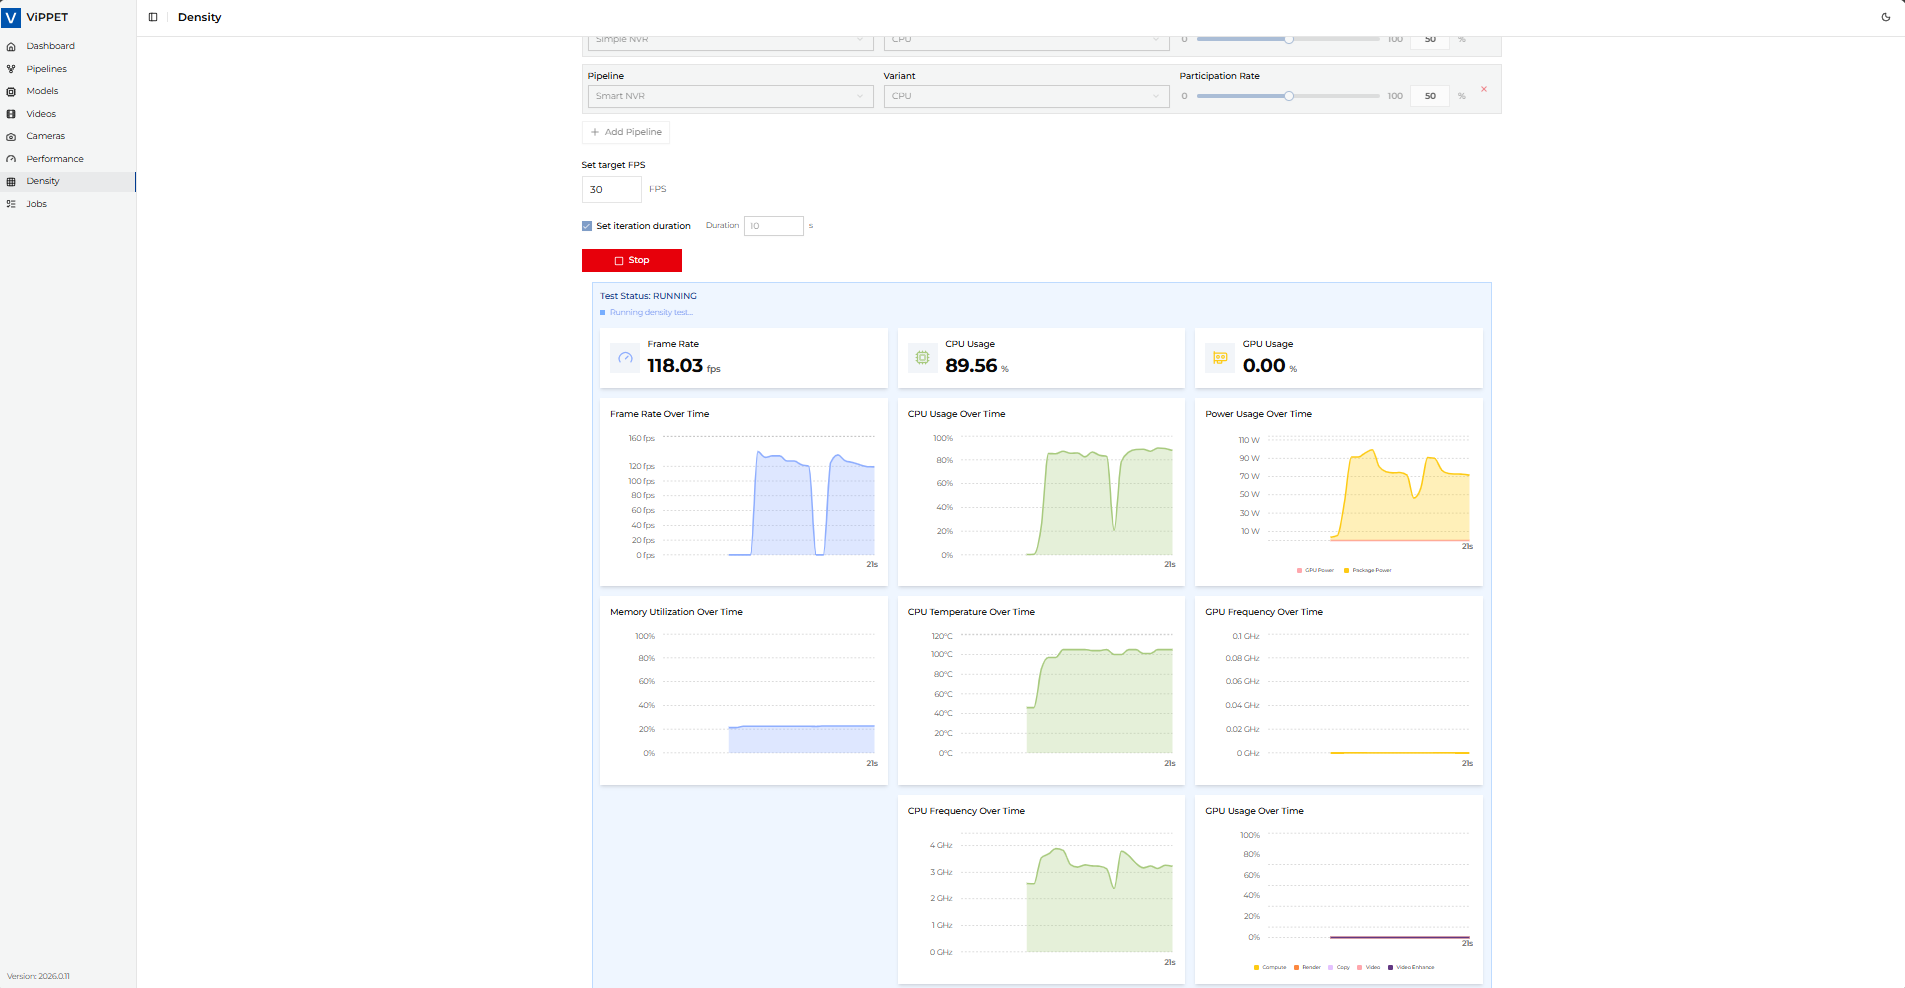 Figure 2: Density test in progress
Test results#
When the job completes, ViPPET reports:
Per stream FPS
Total streams
Stream distribution per pipeline
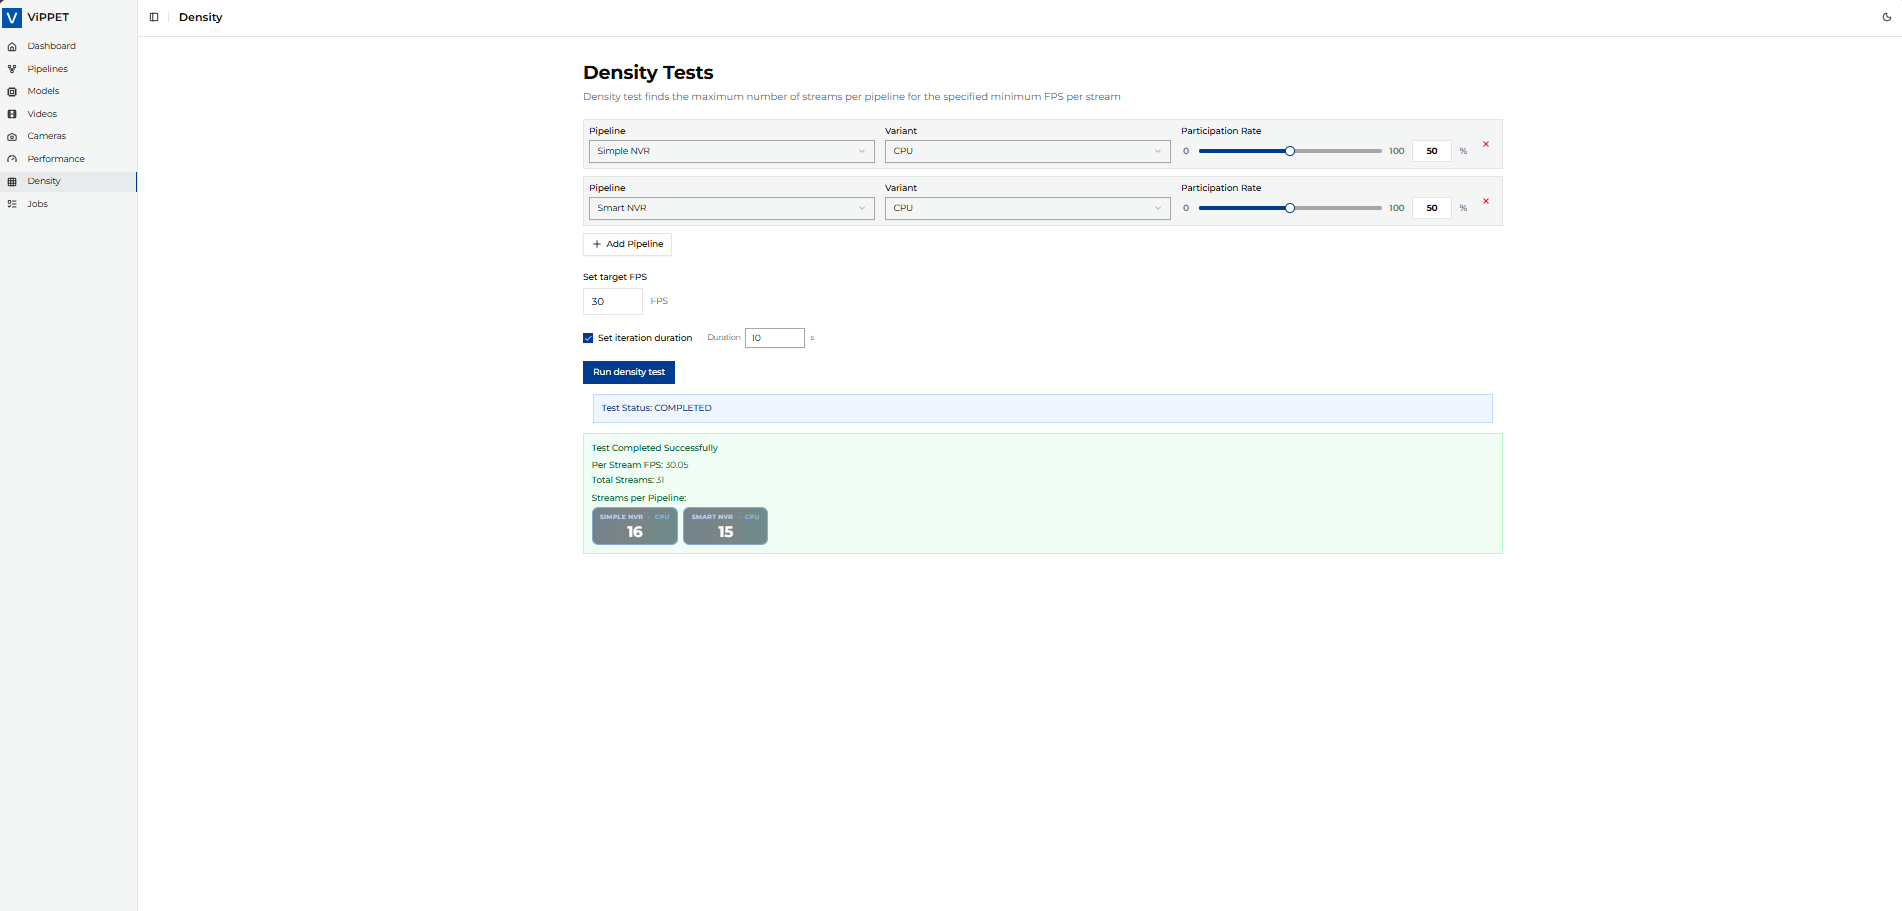 Figure 3: Density test results summary
Stream rate rules#
stream_rate defines how total streams are distributed among selected pipelines.
Example:
Pipeline A:
60Pipeline B:
40Total:
100(valid)
Result interpretation#
Use density results together with performance metrics:
Higher total streams at the same FPS floor indicates better density.
Per-stream FPS should stay at or above the configured floor.
For stable comparison between platforms, keep the same FPS floor, input data, and pipeline configuration.
Compare results across devices using the same test profile.