Pipeline configuration#
This article explains step-by-step how to configure and test AI pipelines using ViPPET’s Pipeline Builder, from creating a new pipeline using DLStreamer launch string, editing the pipeline elements, to demonstrating running pipelines on both CPU and GPU to compare performance.
Step 1. Add new pipeline#
First, you need to add a new pipeline. To do this, click on Add New Pipeline button and provide the following information:
Name - Unique name for the pipeline
Description - Pipeline’s high-level description
Pipeline Description - DLStreamer launch string
Once you provide this information, click the Add button. Once the pipeline description is validated, the pipeline is shown as a graph in the Pipeline Builder view.
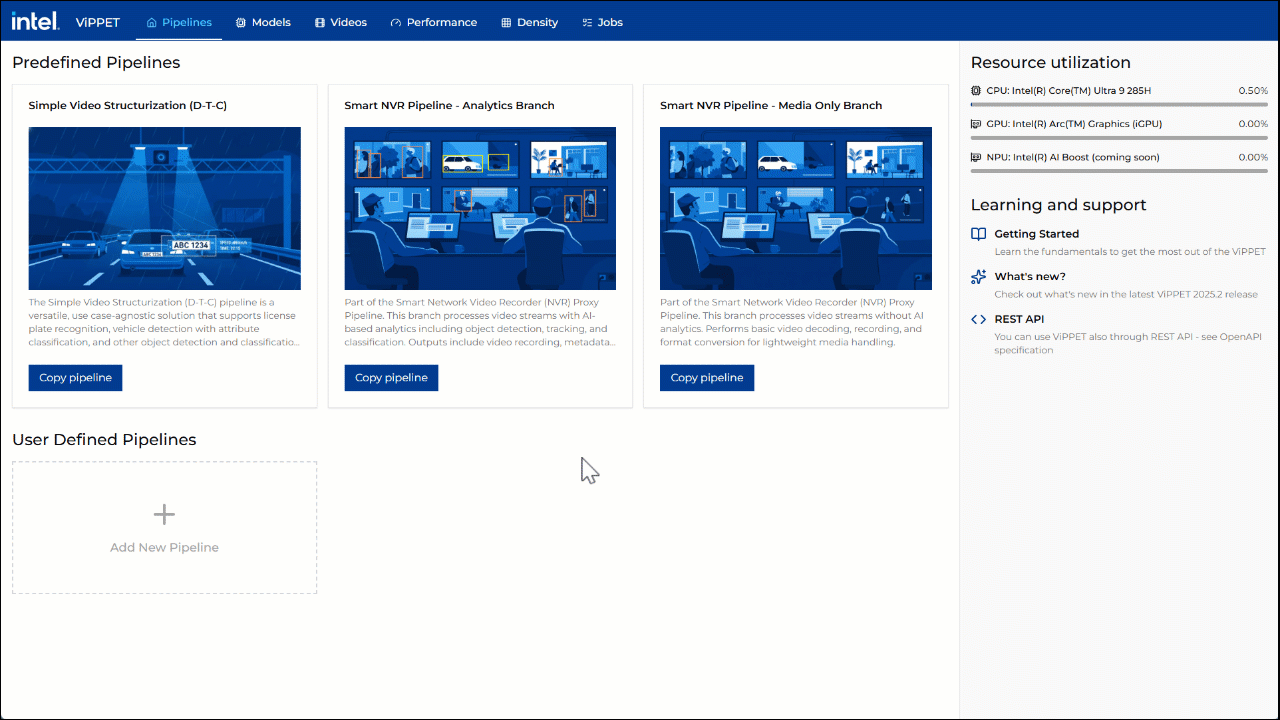 Figure 1: Adding new pipeline
Step 2. Edit pipeline parameters#
In the Pipeline Builder, you can view and configure the elements of the pipeline. For example, you can change the model and device parameters in GVADetect and GVAClassify elements.
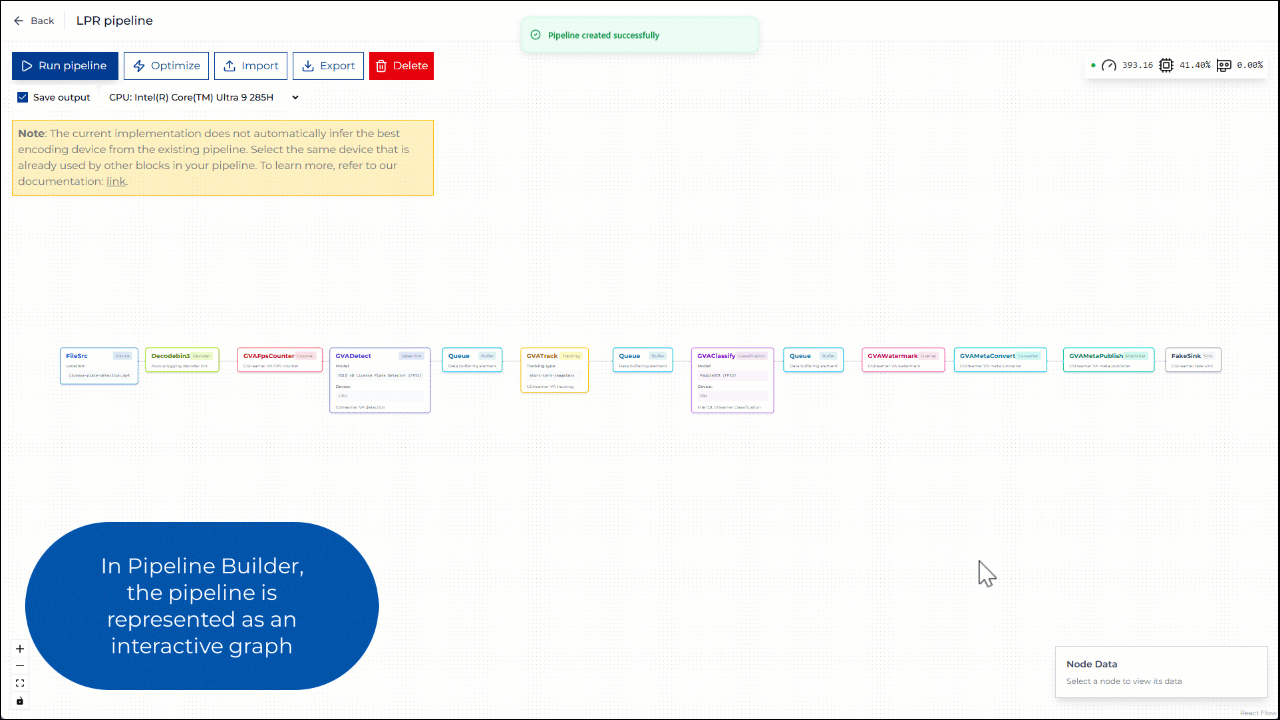 Figure 2: Editing pipeline parameters
Step 3. Run pipeline on CPU#
You can run the pipeline and save the output video using CPU-based encoding. Once the pipeline starts, CPU utilization should visibly increase. The generated output video is then available for inspection.
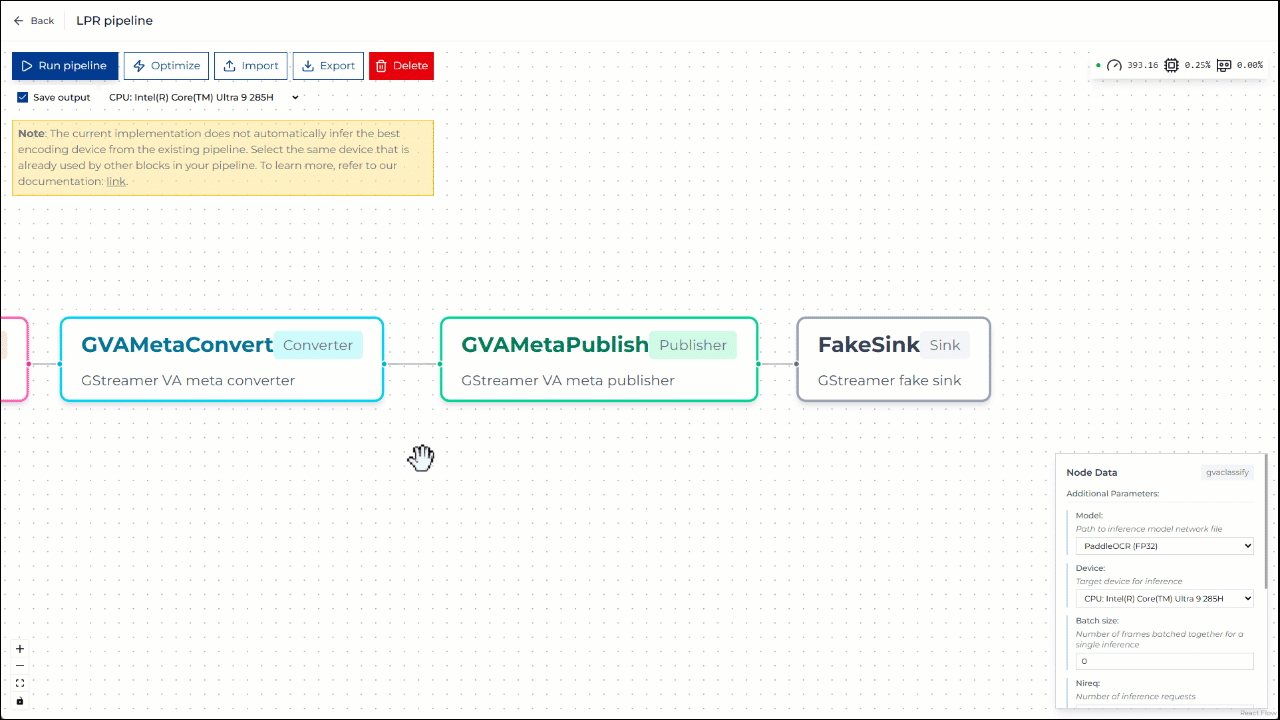 Figure 3: Running pipeline on CPU
Step 4. Run pipeline on GPU#
You can run the pipeline on a GPU to evaluate potential performance improvements. This requires updating the device settings in the detection and classification components. After configuring the pipeline, you execute it and record the output. During execution, GPU utilization should visibly increase.
With output saving enabled, the pipeline might not achieve maximum performance. You can then rerun the pipeline with output saving disabled to measure the impact of I/O overhead.
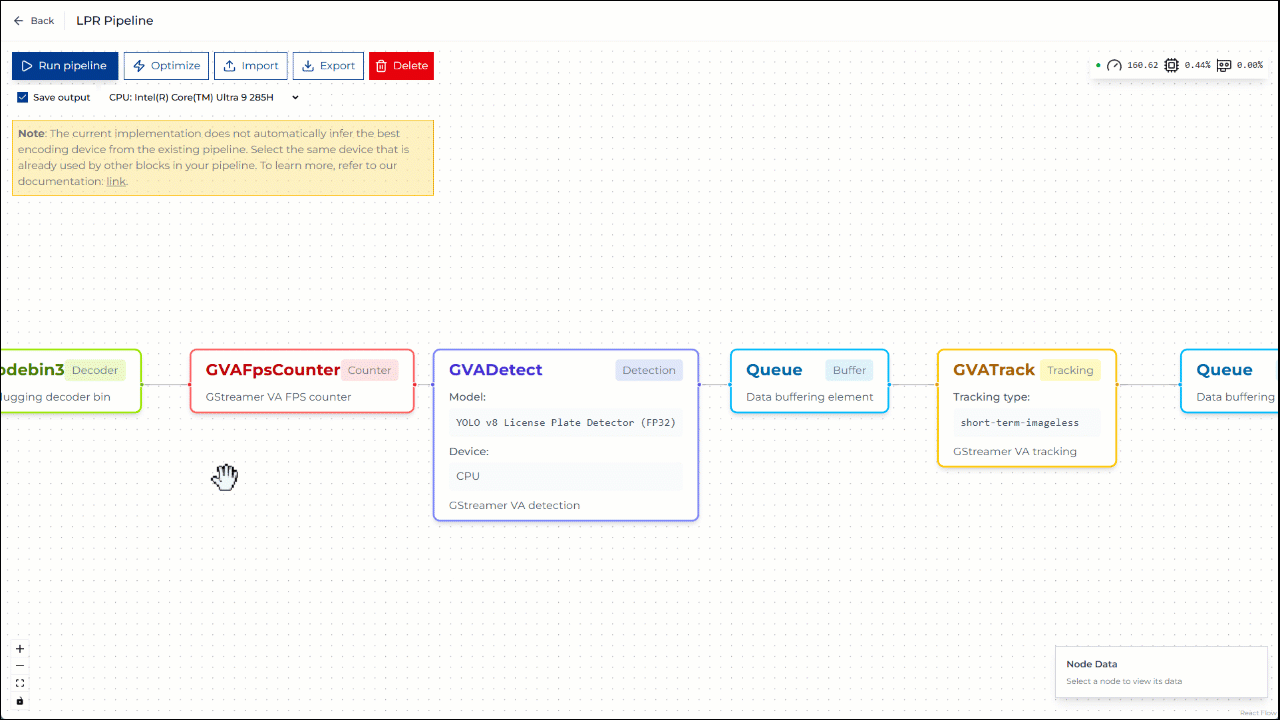 Figure 4: Running pipeline on GPU