Create Cluster#
Warning
Multi-node cluster creation is not supported. This limitation is expected to be resolved in a future release. For now, only single-node clusters can be created. We recommend factoring this in when making your future deployments.
Warning
DISRUPTIVE UPGRADE WARNING Upgrade from 3.0 to 3.1 requires edge node re-onboarding due to architecture changes (RKE2 → K3s). Plan for edge nodes service downtime and manual data backup/restore procedures in edge nodes.
In the Create Cluster feature, you can create a single-node cluster
with customizable settings. Within this setup, You have the option to:
Select cluster templates to determine the desired cluster composition.
Note
You can also create a single-node cluster during the host configuration process. For more information, see Provision Host.
To create a single node cluster, do the following:
On the Cluster List page, click Create Cluster. The Create Cluster page appears.
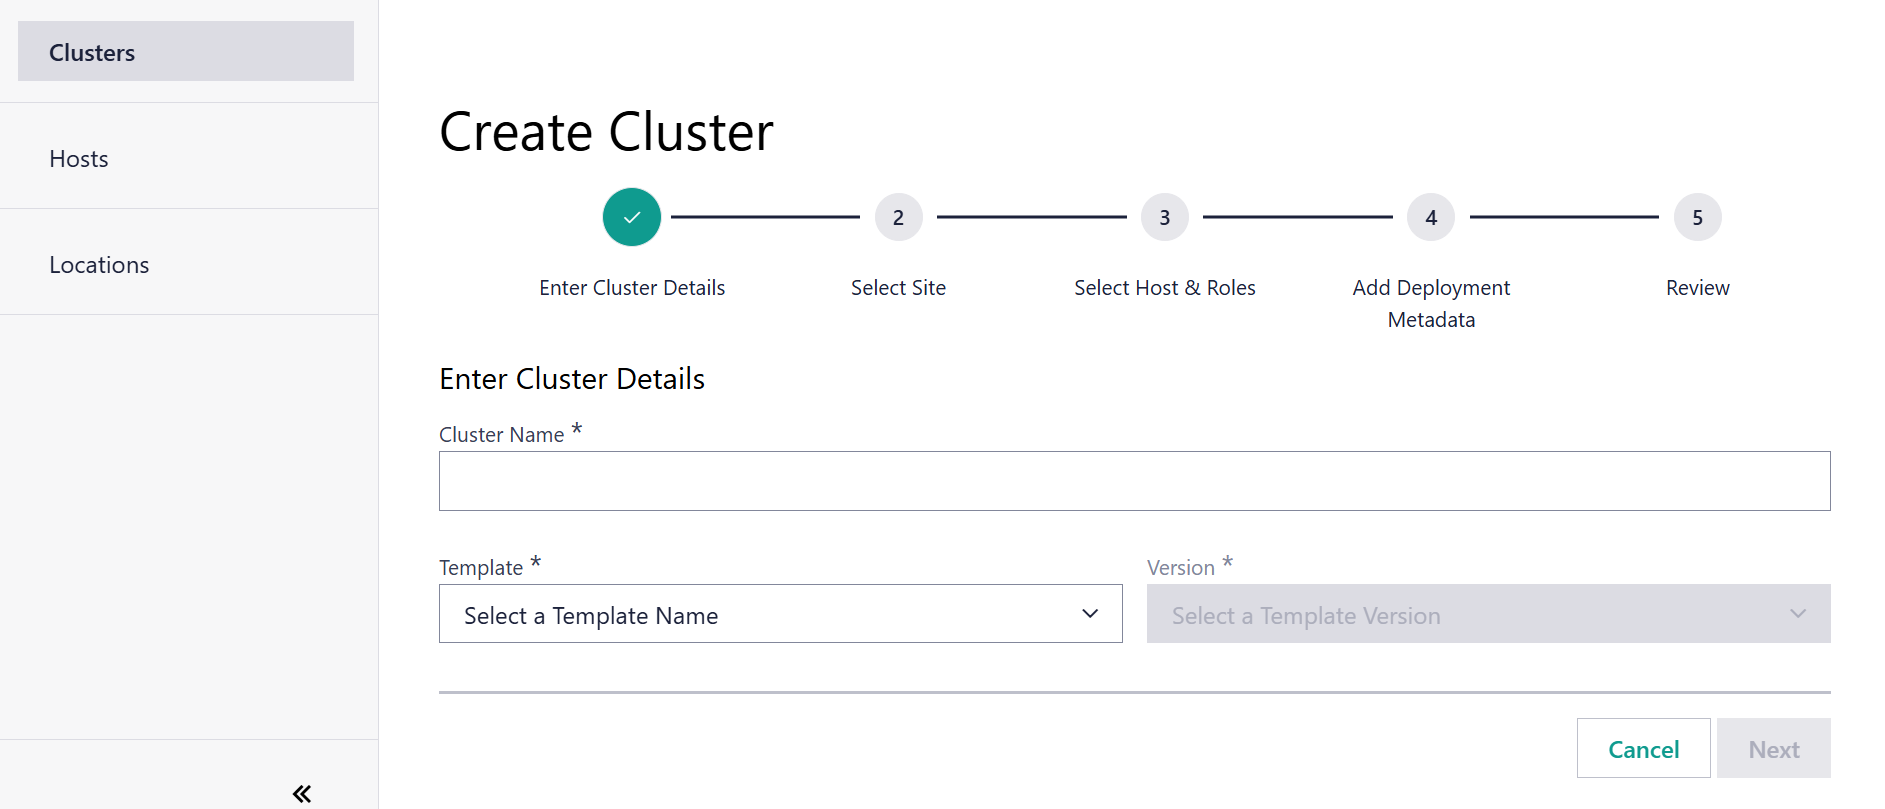
On the Create Cluster page, the first step is to Specify Cluster Name and Template:
Enter the cluster name in the Cluster Name field.
Select the cluster template in the Cluster Template Name field.
Select the cluster template versions in the Cluster Template Versions field.
Note
As part of cluster creation, you need to follow the naming convention: Cluster name only allows alphanumeric values and the special characters “.” and “-”. Incorrect naming will result in not being able to proceed to the last step of cluster creation.
Click Next. The Select Site step appears.
In the Select Site step, expand the regions by clicking on the “>” icon to view the sites and subregions contained within the region. Drill down to the site you are interested in and select the radio button next to the site name.
Click Next. The Select Host & Roles step appears.
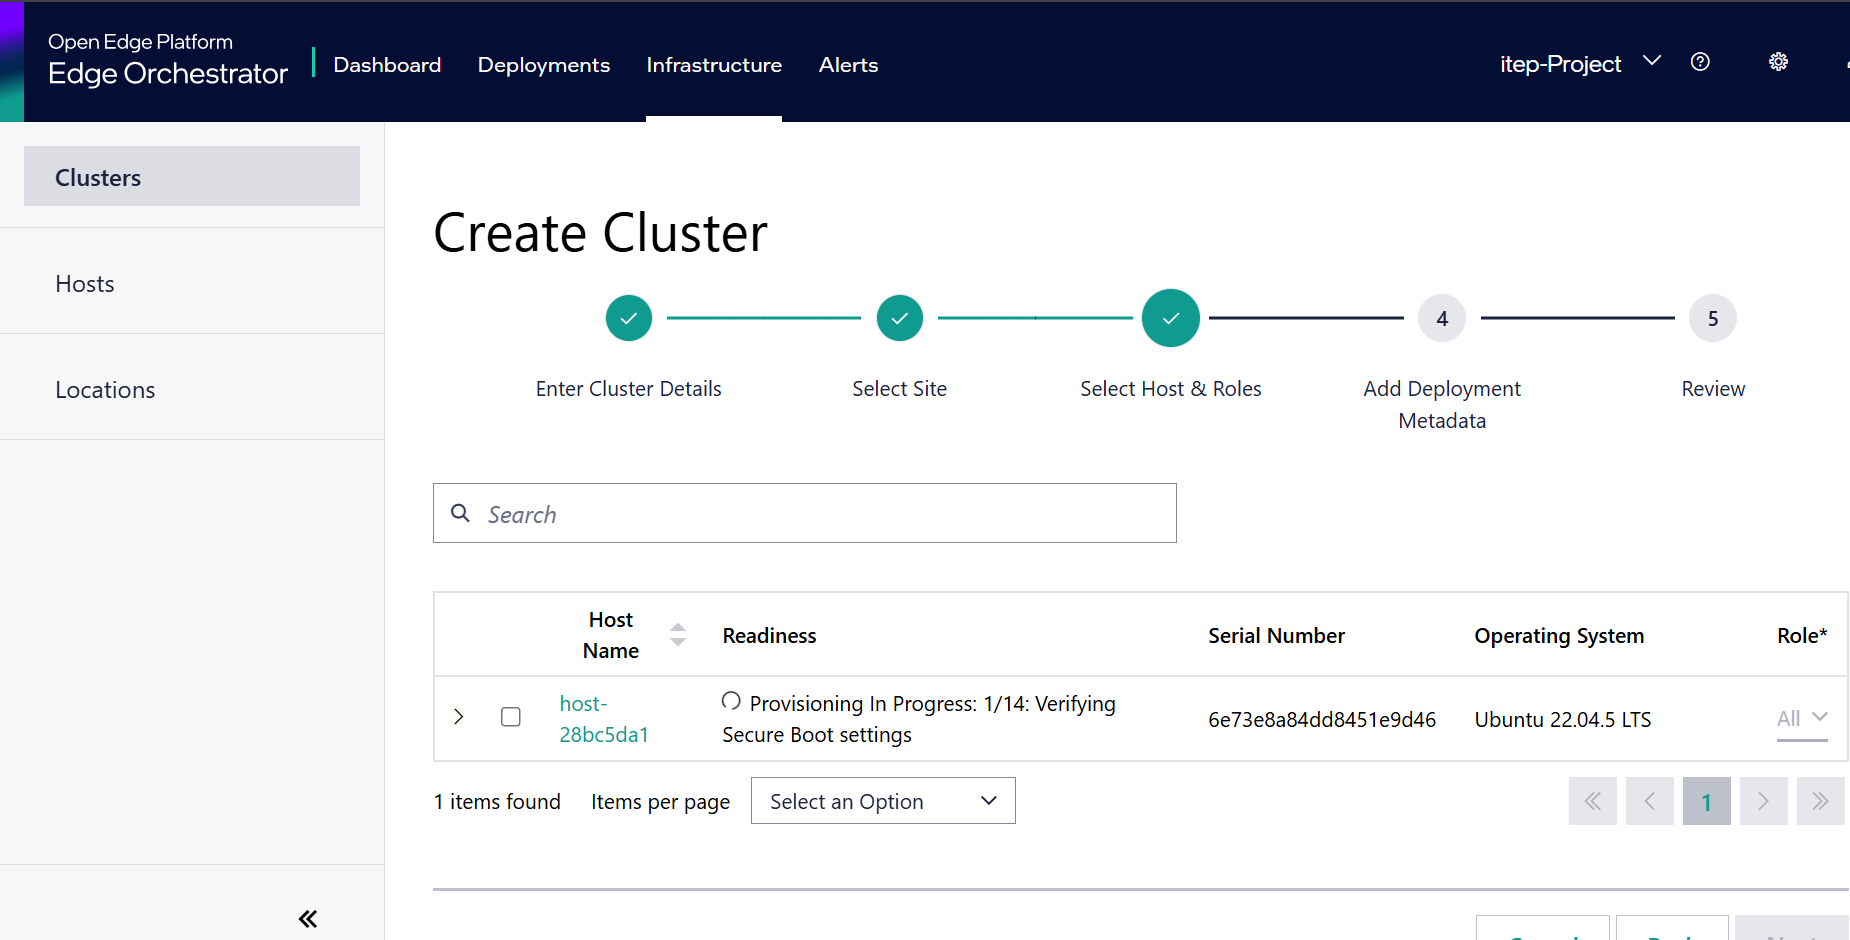
A list of configured hosts that are part of the selected Site appears. Select one host by clicking the checkbox next to each host.
You may also select the Role that each host is assigned. The role selected here dictates which Kubernetes components are run on the host. Currently, only the All role, hosts both the Kubernetes control plane services and user applications, is supported for single-node clusters.
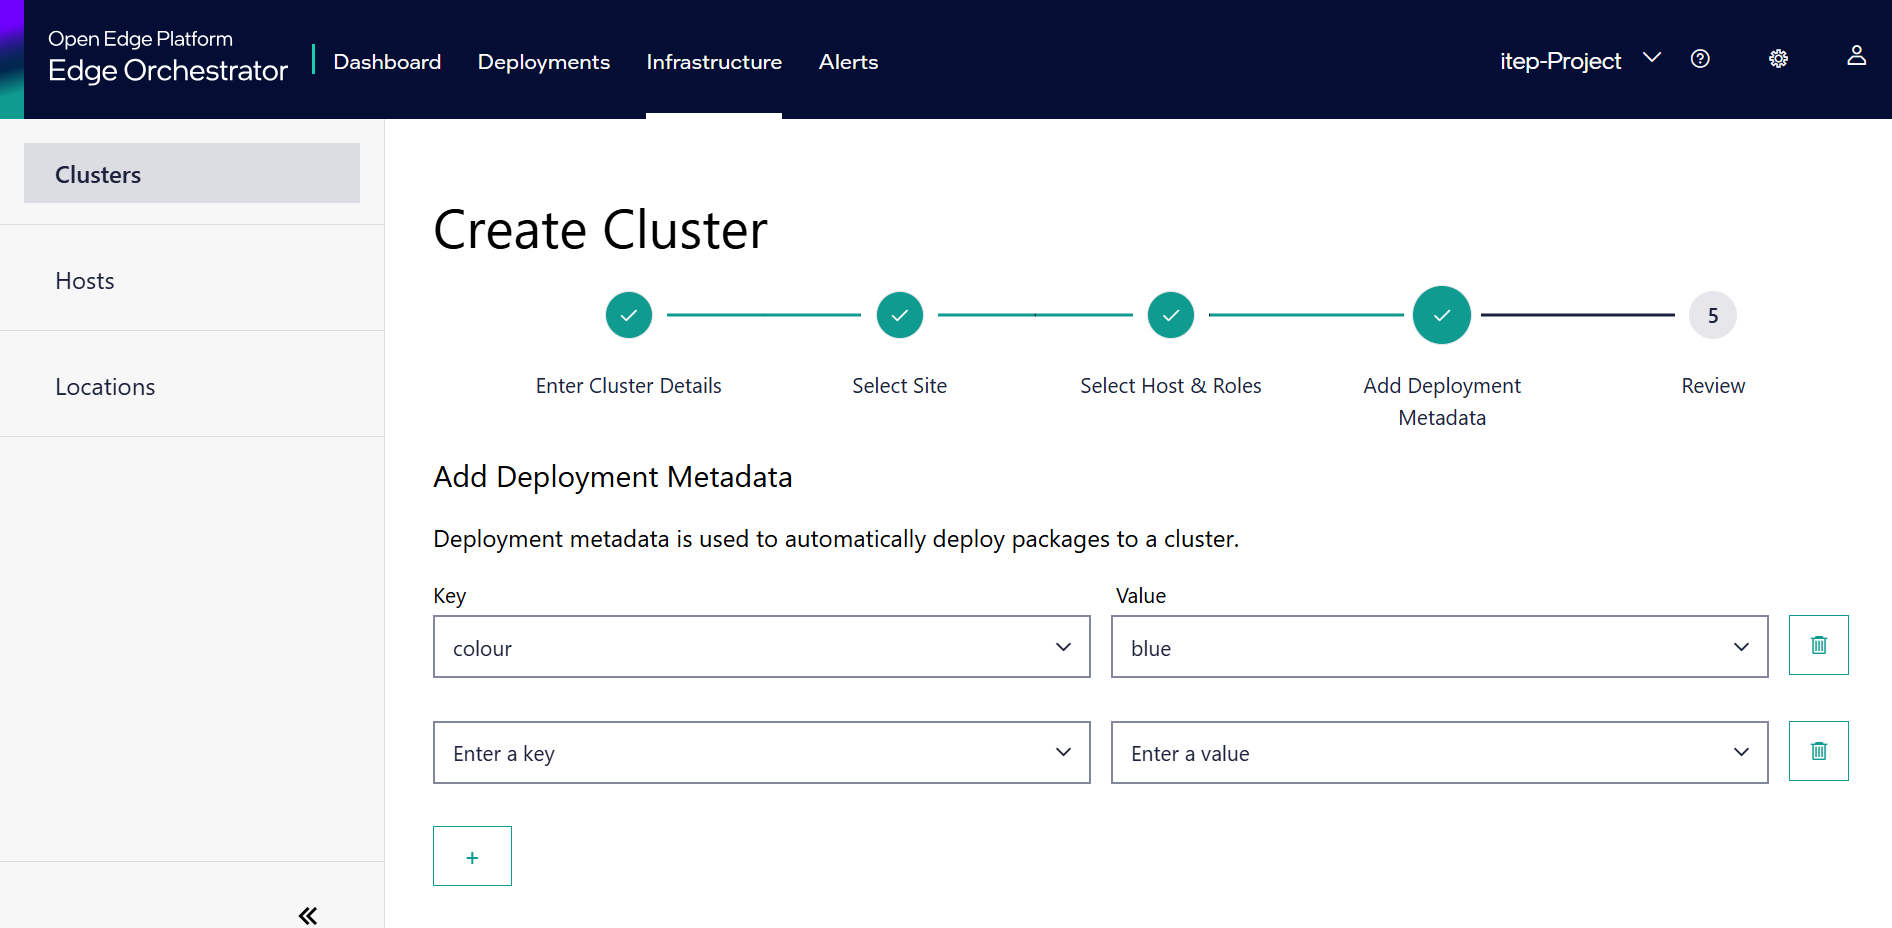
Click Next. The Add Deployment Metadata step appears.
In the Add Deployment Metadata step, label the cluster with metadata that will be used to identify targets for application deployment. In the Key and Value fields, select the metadata category and corresponding value. For more information about metadata, see Automated Deployment.
Click Next. The Review step appears.
Review the settings summary and click Create to create the new cluster.
The created cluster appears in the Cluster List page. Once the Kubernetes cluster is fully created on the host, the cluster status changes to “active”.
Note
If no valid DNS server is available on the system, K3s may fall back to using 8.8.8.8 (Google’s public DNS). Ensure that your DNS configuration is properly set up on your system to avoid unexpected behavior.