Import Helm Chart#
The Import Helm Chart feature allows you to specify the URL of an OCI helm chart, and Edge Manageability Framework will automatically fetch that chart and create a deployment package for you. This feature is most useful for relatively simple helm charts that have few values that need to be configured, though with some additional work, you can customize values to support even complex charts.
Note: Some Helm Charts publicly available on the Internet may require features that you have not yet configured in Edge Manageability Framework. For example, some charts may require a Load Balancer. This is particularly common in Bitnami charts, such as the Wordpress chart that is used in the example below. In this case, you will need to first configure a Load Balancer before the package can be deployed.
Importing a helm chart causes three objects to be created in Edge Manageability Framework:
An Application object, which specifies the helm chart name and version and a default profile, with a default set of values.
A Deployment Package object, which contains a link to the Application object.
A Registry object, which contains the OCI URL of the helm chart.
All three of these objects are named after the helm chart. All three may be subsequently edited to customize the deployment package.
Import Helm Chart Steps#
To import a helm chart, follow these steps:
In the Deployment Package page, click Deployment Package Actions. This will open a drop-down. Select Import Helm Chart.
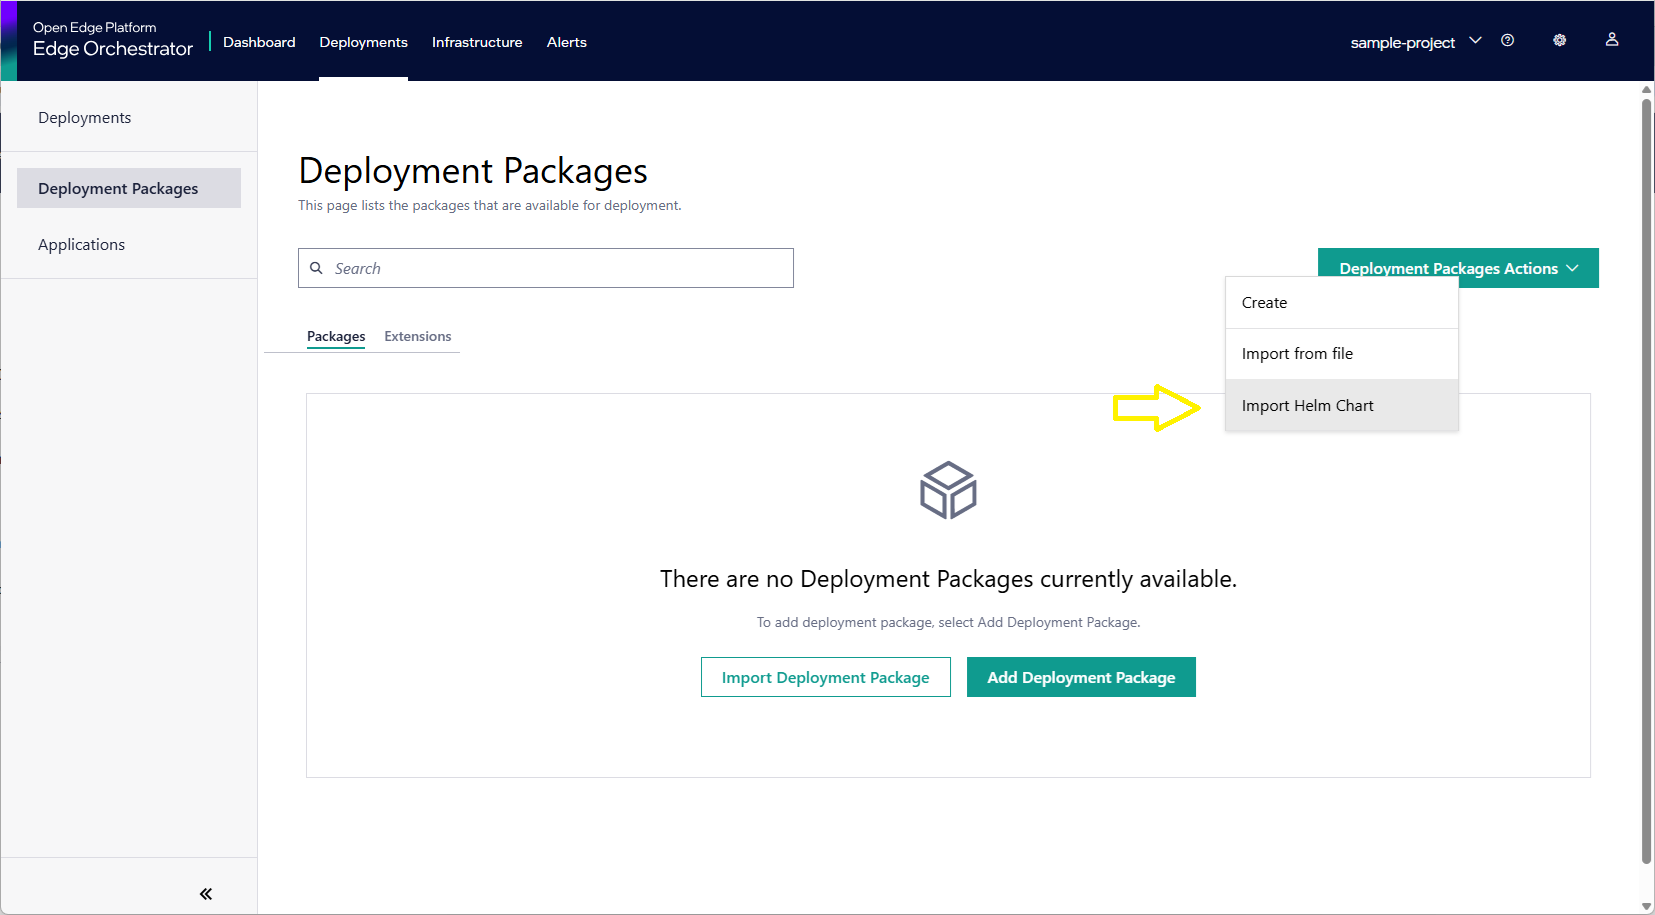
The Import Helm Chart page appears:
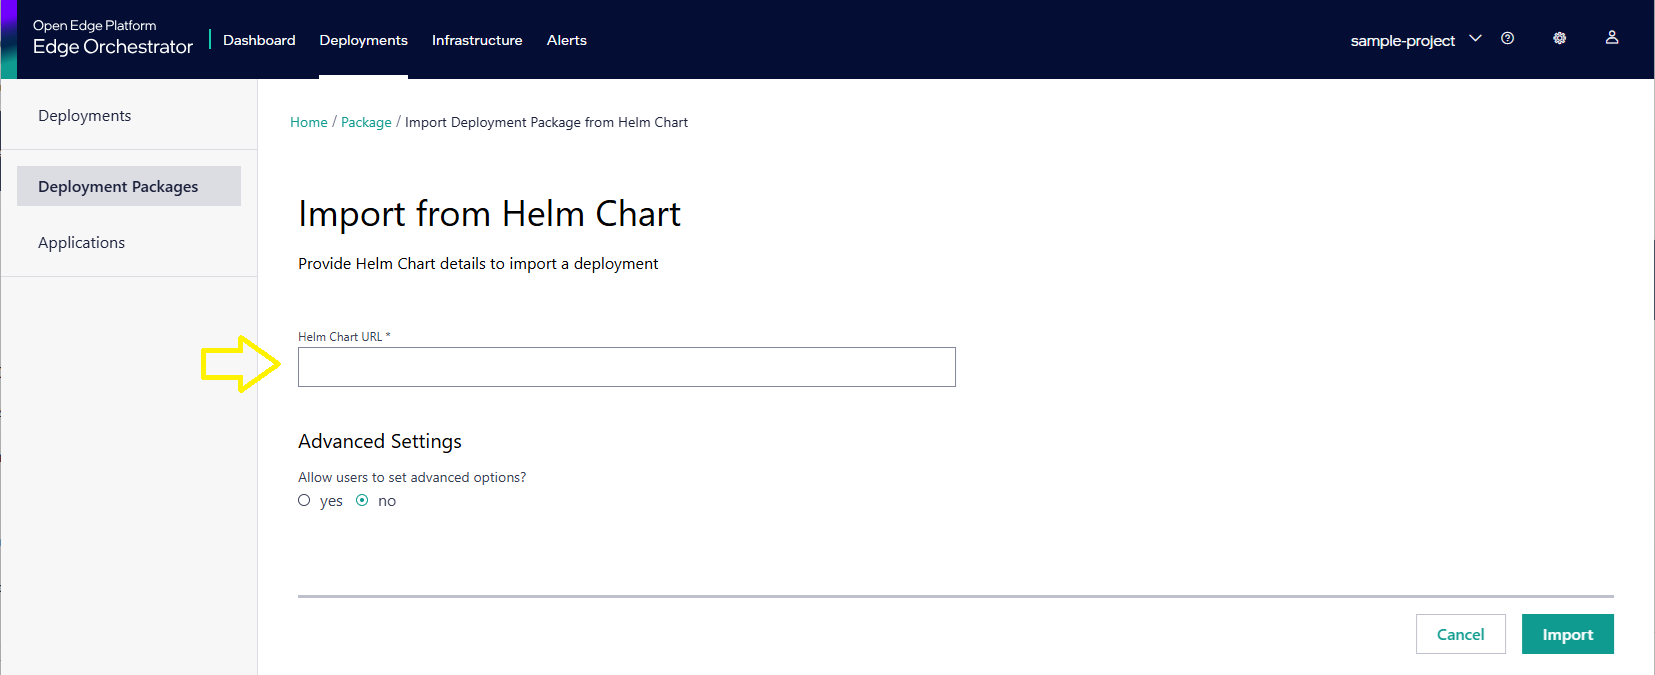
In the Import Helm Chart page, you will first need to enter the OCI URL of the helm chart you want to import. This can be a public or private OCI registry. The URL must point to a valid OCI helm chart. You can also specify a version of the chart to import, or leave it blank to import the latest version.
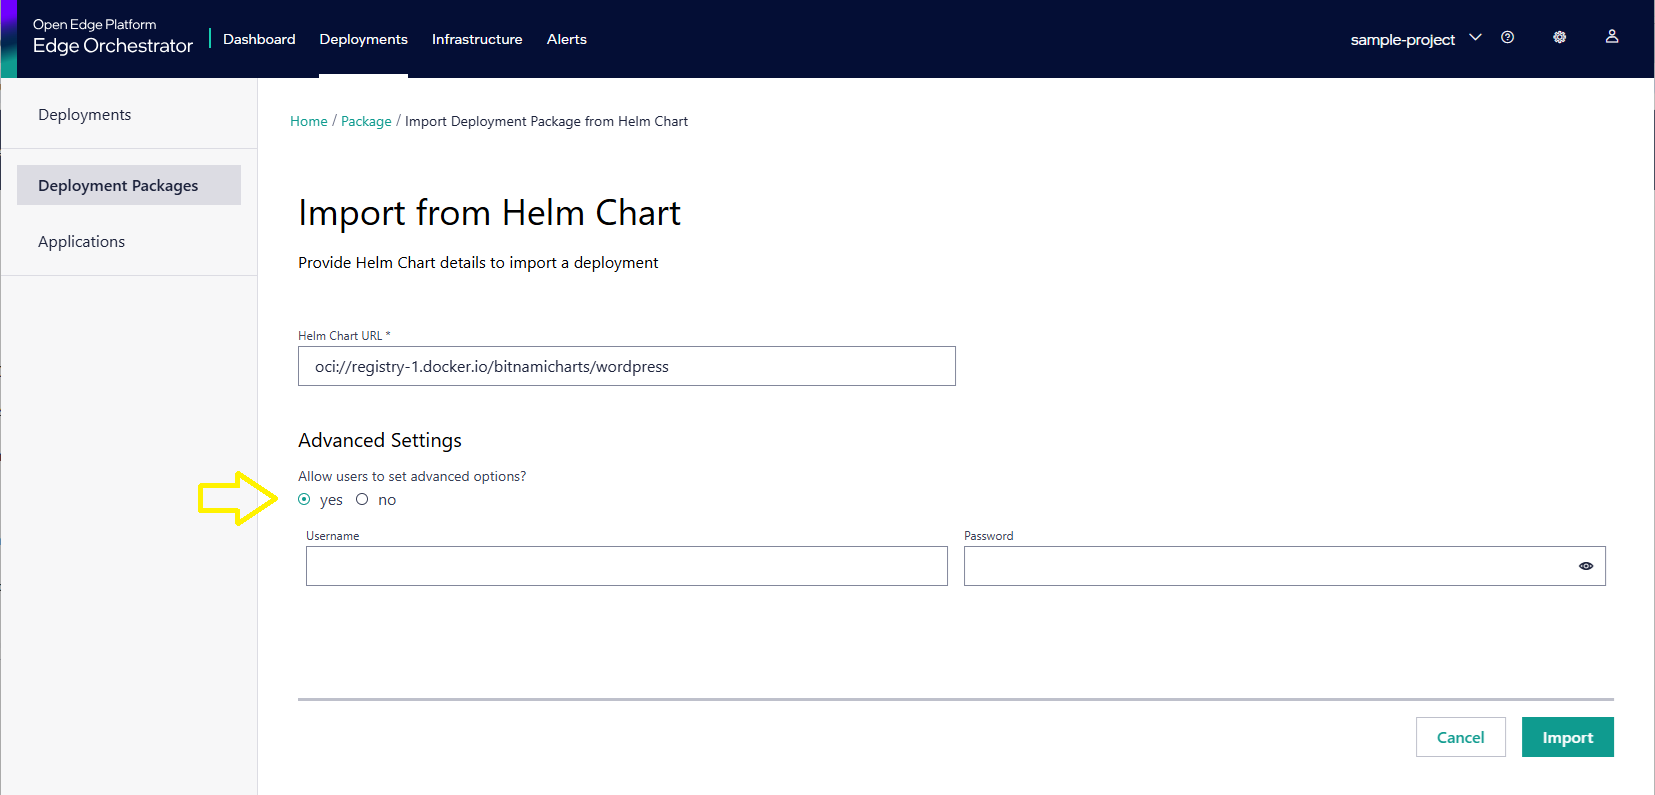
For example, the url oci://registry-1.docker.io/bitnamicharts/wordpress would fetch the latest version of the Bitnami Wordpress Helm Chart. The url oci://registry-1.docker.io/bitnamicharts/wordpress:25.0.4 would fetch the specific version 25.0.4 of the same chart.
Optionally, you can click the advanced settings radio button to open up settings for username and password. This is useful for private helm registries.
Note: The credentials you enter will only be used to fetch the helm chart for the purposes of creating a deployment package. Due to security concerns, the credentials are not automatically stored in the system. Should you wish to store your credentials, you will need to edit the registry object that is automatically created.
Click Import to import the helm chart. Your new deployment package will be created with the name and version of the helm chart.
After you have imported the deployment package, the package is displayed in the Deployment Package list.

Further Customization of Deployment Package#
The Application object is automatically created with a default profile that contains a stub values.yaml. Should you wish to further customize the values.yaml, this can be done by find the imported application in the Applications page, clicking on the Edit button, and then editing the Profile. This will allow you to edit the values.yaml file that is used when deploying the package. You may also add additional profiles to the application, which will allow you deploy the profile in multiple configurations.