Ubuntu 24.04 LTS Desktop Image Creation#
In a typical EMF flow, Ubuntu canonical Server-based images are used for edge node provisioning. However, if you prefer to use an Ubuntu Desktop image, you can achieve this by leveraging automated scripts to prepare the image from an ISO file
Prerequisites#
You need Ubuntu 22 LTS or Ubuntu 24 LTS development system for generating the raw image.
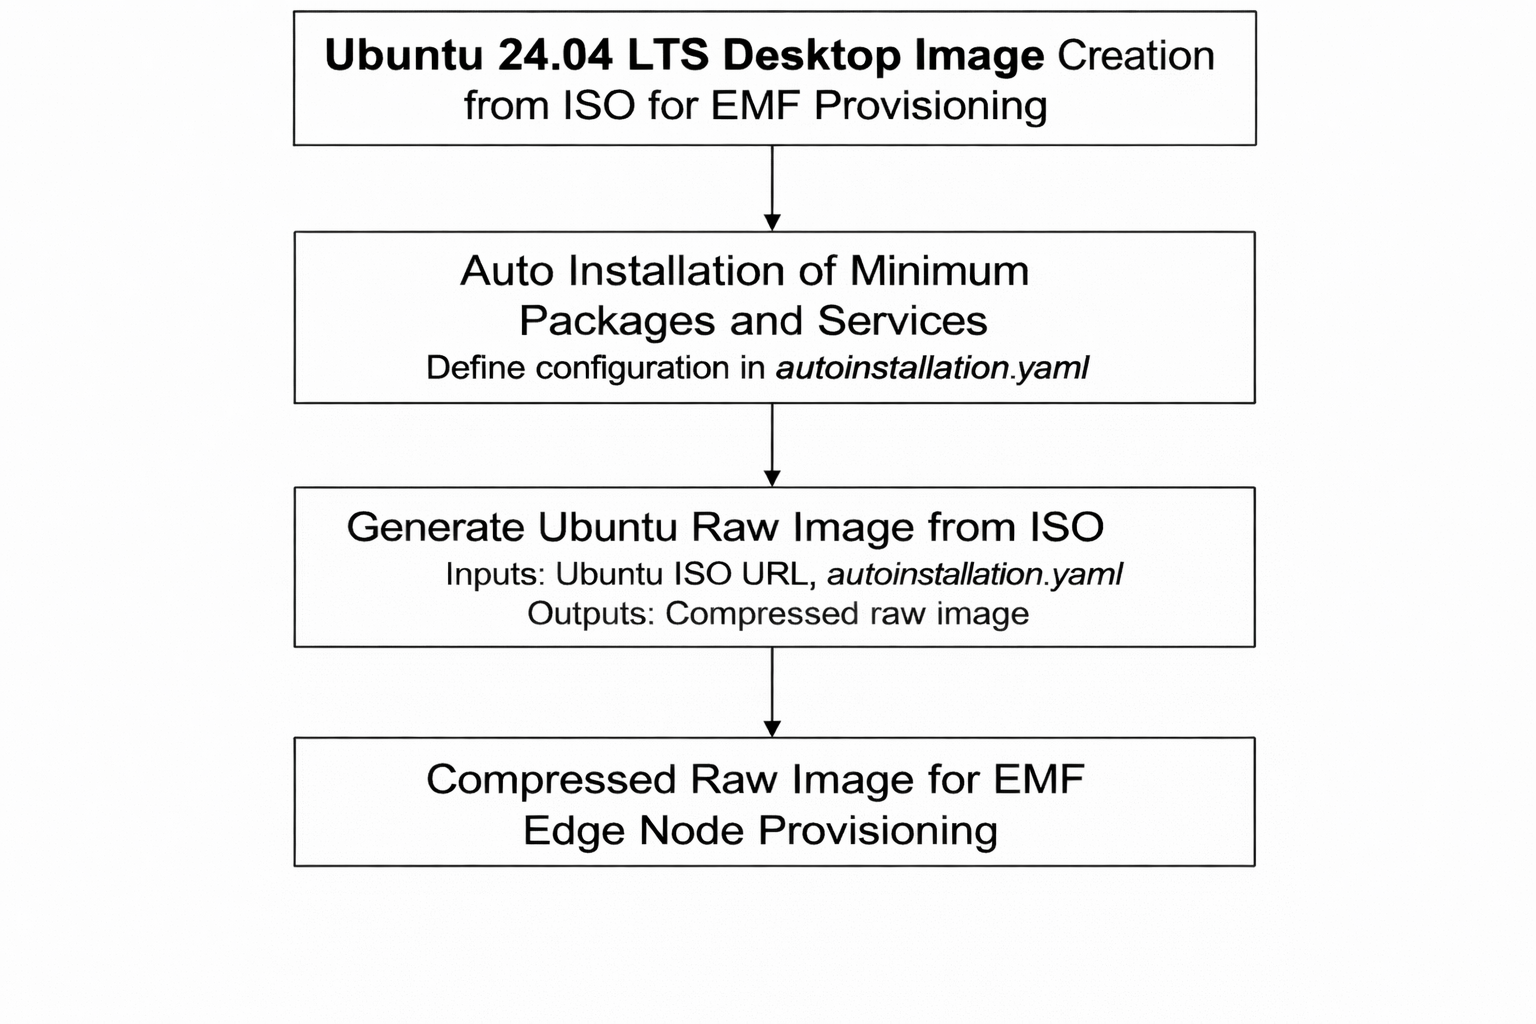
Workflow Diagram#
To generate an Ubuntu Desktop raw image from an ISO file, you primarily need two components as mentioned below.
1.autoinstallation.yaml: Defines system settings, required packages, and services to install during the ISO-based installation process.
2.Prepare_ubuntu_raw_img.sh: A script that creates the raw image from the ISO file
Creating Ubuntu Desktop Raw Image#
- The Prepare_ubuntu_raw_img.sh script generates the raw image using the following inputs:
autoinstallation.yaml (Ensure proper indentation; incorrect formatting will cause image generation to fail.)
Ubuntu Desktop ISO URL (Provide the official ISO link for Ubuntu Desktop 24.04 LTS).
Automated Scripts#
Prepare_ubuntu_raw_img.sh
#!/bin/bash

# SPDX-FileCopyrightText: (C) 2026 Intel Corporation
# SPDX-License-Identifier: Apache-2.0

####################################################
#
# File Name: Prepare_Ubuntu_Image.sh
# Details: This script is to generate Ubuntu RAW
#          Image from ISO file
#
###################################################
set -e

# --- Configuration ---
ISO_URL=""
OUTPUT_IMG="ubuntu-desktop-24.04.raw.img"
USER_DATA=""
SEED_ISO="seed.iso"
DISK_SIZE="10G"

# Check root
if [ "$EUID" -ne 0 ]; then
    echo "Please run as root (use sudo)"
    exit 1
fi

usage() {
echo "Usage : `basename $0` -i <iso_link> -c autoinstall.yaml "
echo "Options are below"
echo "  -i , --isolink  | provide the iso artifactory link"
echo "  -c , --configuration file | provide the autoinstall.yaml file"
}

while getopts "i:c:h:" option
do
   case "$option" in
   i) ISO_URL="$OPTARG" ;;
   c) USER_DATA="$OPTARG" ;;
   h|?) usage
      exit 0
  ;;
esac
done

# Validate required arguments
if [ -z "$ISO_URL" ] || [ -z "$USER_DATA" ]; then
    echo "Error: Both -i (ISO URL) and -c (config file) are required"
    usage
    exit 1
fi

#  Install dependency pkgs ---
echo "Installing dependencies..."
sudo apt update && sudo apt install -y qemu-system-x86 qemu-utils xorriso cloud-image-utils wget dosfstools e2fsprogs parted coreutils

ISO_FILE=$(basename "$ISO_URL")

# Download ISO ---
if [ ! -f "$ISO_FILE" ]; then
    echo "Downloading Ubuntu $ISO_FILE..."
    wget -O "$ISO_FILE" "$ISO_URL"
fi

#  Extract vmlinuz and initrd ---
echo "Extracting boot files from ISO..."
mkdir -p ./iso_mount
sudo mount -o loop "$ISO_FILE" ./iso_mount
cp ./iso_mount/casper/vmlinuz .
cp ./iso_mount/casper/initrd .
sudo umount ./iso_mount
rmdir ./iso_mount

#  Prepare Build Files ---
echo "Creating seed ISO and blank disk..."
touch meta-data
cloud-localds "$SEED_ISO" "$USER_DATA" meta-data
if [ -f "$OUTPUT_IMG" ]; then
    rm -rf "$OUTPUT_IMG"
    rm -rf "$OUTPUT_IMG".gz > /dev/null 2>&1
    rm -rf "$OUTPUT_IMG"* > /dev/null 2>&1
fi
qemu-img create -f raw "$OUTPUT_IMG" "$DISK_SIZE"

#  Run QEMU Installation ---
echo "Starting Installation (Minimal Desktop)..."
echo "Note: This will output logs directly to this terminal."

qemu-system-x86_64 \
    -enable-kvm \
    -m 8192 \
    -smp 4 \
    -bios /usr/share/qemu/OVMF.fd \
    -drive file="$OUTPUT_IMG",format=raw,if=virtio,cache=unsafe \
    -drive file="$ISO_FILE",format=raw,readonly=on,if=virtio \
    -drive file="$SEED_ISO",format=raw,readonly=on,if=virtio \
    -kernel vmlinuz \
    -initrd initrd \
    -append "autoinstall ds=nocloud fsck.mode=skip quiet console=ttyS0 console=tty0" \
    -vnc :1 \
    -serial mon:stdio \
    -no-reboot

sync
sleep 5
sync
echo "Installation finished."

# Post-Install: Image Verification ---

echo "Image Verification"
qemu-system-x86_64 \
    -enable-kvm \
    -m 4096 \
    -smp 4 \
    -bios /usr/share/qemu/OVMF.fd \
    -drive file="$OUTPUT_IMG",format=raw,if=virtio \
    -nographic \
    -serial mon:stdio &

# Capture the Process ID of QEMU
QEMU_PID=$!

echo "QEMU PID: $QEMU_PID"

echo "Waiting for VM to shut down cleanly..."
wait "$QEMU_PID"

echo "VM exited cleanly "

# Label the partitions for generated Image

echo "Creating the partition labels for the Image"

# Mount image as loop device with partition scanning
LOOP_DEV=$(sudo losetup -Pf --show "$OUTPUT_IMG")

# Wait a second for kernel to register partitions
sleep 2

echo "Applying label 'uefi' to partition 1..."
sudo fatlabel "${LOOP_DEV}p1" uefi || echo "Failed to label p1"

echo "Applying label 'rootfs' to partition 2..."
sudo e2label "${LOOP_DEV}p2" rootfs || echo "Failed to label p2"

# Also set GPT Partition Names for clarity in tools like GParted
sudo parted "${LOOP_DEV}" name 1 uefi
sudo parted "${LOOP_DEV}" name 2 rootfs

# Detach loop device
sudo losetup -d "$LOOP_DEV"

# Cleanup ---
rm vmlinuz initrd "$SEED_ISO" meta-data

# Compress the Image to .gz using pigz
echo "Creating Imge Compression,Please Wait"
if pigz -9 -k "$OUTPUT_IMG"; then
    echo "DONE: $OUTPUT_IMG.gz created successfully."
else
    echo "ERROR: pigz failed."
    exit 1
fi

# Generate the sha-checksum file
echo "Generating the CheckSum File,Please Wait"

if sha256sum $OUTPUT_IMG.gz >  $OUTPUT_IMG.gz.sha256sum ; then
    echo "Sha256sum generated successfully for the image $OUTPUT_IMG.gz"
else
    echo "Failed to generate the Sha256sum file,Please check!!"
fi

echo "################################################"
echo " Image Creation SUCCESS!"
echo " Raw Image Created: $OUTPUT_IMG.gz"
echo " CheckSum File Created: $OUTPUT_IMG.gz.sha256sum"
echo " Partition 1 (FAT32): uefi"
echo " Partition 2 (EXT4):  rootfs"
echo "################################################"
autoinstallation.yaml#
#cloud-config
# See the autoinstall documentation at:
# https://canonical-subiquity.readthedocs-hosted.com/en/latest/reference/autoinstall-reference.html
autoinstall:
  active-directory:
    admin-name: ''
    domain-name: ''
  apt:
    disable_components: []
    fallback: offline-install
    geoip: true
    mirror-selection:
      primary:
      - country-mirror
      - arches: &id001
        - amd64
        - i386
        uri: http://archive.ubuntu.com/ubuntu/
      - arches: &id002
        - s390x
        - arm64
        - armhf
        - powerpc
        - ppc64el
        - riscv64
        uri: http://ports.ubuntu.com/ubuntu-ports
    preserve_sources_list: false
    security:
    - arches: *id001
      uri: http://security.ubuntu.com/ubuntu/
    - arches: *id002
      uri: http://ports.ubuntu.com/ubuntu-ports
  codecs:
    install: false
  drivers:
    install: false
  user-data:
    users:
    - name: user
      shell: /bin/bash
      passwd: $6$i2P96xaVS20An4xS$wf.l8QHtdl6yPjU.Y3H0WDPQRnHqmw5vj75gShMmytqUoxz0VrkPeUy5CWDDW/oRH7q6tJhWLoAqITx/muOXK1
      groups: [adm,sudo]
      lock-passwd: false
      sudo: ALL=(ALL) NOPASSWD:ALL
    write_files:
    - path: /usr/local/bin/first-boot-fix.sh
      owner: root:root
      permissions: '0755'
      content: |
        #!/bin/bash

        # 1. Kill the installer's "lock" files
        rm -f /etc/cloud/cloud-init.disabled
        rm -f /etc/cloud/cloud-init.d/99-installer.cfg


        # 2. Disable disk growth
        cat > /etc/cloud/cloud.cfg.d/99-disable-growpart.cfg <<'EOF'
        growpart:
          mode: off

        resize_rootfs: false
        EOF

        # 3. Set the datasource
        echo 'datasource_list: [ NoCloud, None ]' > /etc/cloud/cloud.cfg.d/99-custom-datasource.cfg

        # 3. Re-arm cloud-init
        echo "policy: enabled" > /etc/cloud/ds-identify.cfg
        echo "datasource: NoCloud" >> /etc/cloud/ds-identify.cfg

        cloud-init clean --logs --machine-id

        # 4. Wait for APT locks
        echo "Checking for active APT processes..."
        while fuser /var/lib/dpkg/lock-frontend /var/lib/apt/lists/lock >/dev/null 2>&1; do
           sleep 2
        done

        # 5. FAST NETWORK CHECK

        echo "Testing repo connectivity..."
        until apt-get update -o Acquire::ConnectTimeout=5 -o Acquire::Retries=0 -qq > /dev/null 2>&1; do
           echo "Repositories unreachable. Checking again in 5s..."
           sleep 5
        done

        # 6. Install the packages you removed from the autoinstall section
        apt-get update
        apt-get install -y openssh-server net-tools wget cloud-utils curl vim

        # 7. Self-destruct
        systemctl disable first-boot-fix.service
        rm -f /etc/systemd/system/first-boot-fix.service
        shutdown -h now

    - path: /etc/systemd/system/first-boot-fix.service
      owner: root:root
      permissions: '0644'
      content: |
        [Unit]
        Description=Reset Cloud-Init on First Boot
        After=network.target
        Before=cloud-init.service

        [Service]
        Type=oneshot
        ExecStart=/usr/local/bin/first-boot-fix.sh
        RemainAfterExit=yes

        [Install]
        WantedBy=multi-user.target
    runcmd:
      - systemctl daemon-reload
      - systemctl enable first-boot-fix.service
      - systemctl start first-boot-fix.service

  kernel:
    package: linux-generic-hwe-24.04
  keyboard:
    layout: us
    toggle: null
    variant: ''
  locale: en_US.UTF-8
  network:
    ethernets:
      ens3:
        dhcp4: true
    version: 2
  oem:
    install: auto
  # Provide Proxy server ,if applicable
  proxy:
  source:
    id: ubuntu-desktop-minimal
    search_drivers: false
  ssh:
    allow-pw: true
    authorized-keys: []
    install-server: false
  storage:
    version: 1
    layout:
      name: direct
  timezone: Asia/Kuala_Lumpur
  updates: security
  version: 1
  interactive-sections: []

  late-commands:
    - curtin in-target --target=/target -- apt-get update || true
    - curtin in-target --target=/target -- apt-get upgrade -y || true
    - curtin in-target --target=/target -- sed -e 's@^GRUB_TIMEOUT_STYLE=hidden@# GRUB_TIMEOUT_STYLE=hidden@g' -e 's@^GRUB_TIMEOUT=0@GRUB_TIMEOUT=5@g' -e 's@^GRUB_CMDLINE_LINUX=\"\"@GRUB_CMDLINE_LINUX=\"console=tty0 console=ttyS0,115200n8\"@g' -i /etc/default/grub
    - curtin in-target --target=/target -- update-grub
    - curtin in-target --target=/target -- apt list --installed > /opt/Bom-list.txt
  shutdown: poweroff
Script Execution#
sudo ./Prepare_ubuntu_raw_img.sh -i iso_url -c autoinstallation.yamlExample: sudo ./Prepare_ubuntu_raw_img.sh -i https://releases.ubuntu.com/24.04/ubuntu-24.04.3-desktop-amd64.iso -c autoinstall.yaml
On successful execution, the script creates a raw.gz image on same location where the script executed with correctly labelled partitions as shown below. - Partition 1 (FAT32): uefi - Partition 2 (EXT4): rootfs
Cloud-init services are enabled in the raw image (they are disabled by default in desktop images) for zero touch edge node provisioning.
Finally, the generated image can be hosted on a release service or NGINX server to initiate the provisioning flow
Troubleshooting#
Once the script has started, you can monitor the image generation progress using VNC Viewer. Please ensure VNC Viewer is installed on your Ubuntu system before proceeding. Steps to Connect: 1. Open VNC Viewer and enter your development system IP address followed by the port number
Format: <IP_ADDRESS>:<PORT_NUMBER>
- Example:
Development System IP: 10.20.30.40
VNC Port from script: 1
VNC Viewer Input: 10.20.30.40:1
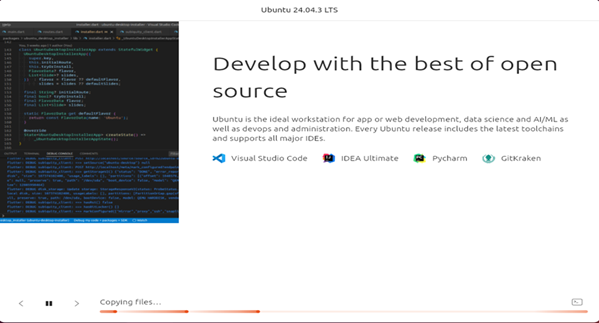
This will allow you to view the installation progress in real-time, in general it will take 20 ~30 minutes to complete the installation. You will see below screen on the vnc-viewer for successful installation.
Success_Screen1:#

Success_Screen2:#
After successful installation the VM will automatically shut down.
Important Note#
If the installation screen remains on screen 1 without progressing to screen 2 after 15-20 minutes this indicates a potential syntax error or issue in the autoinstallation.yaml file.
Action Required#
Double-check the autoinstallation.yaml file for errors
Fix any identified issues
Rerun the script