Create Your Own Robot Kit#
This tutorial guides guides you through creating an autonomous mobile robot capable of exploring and mapping an area. It involves adding an Intel® compute system, placing a Intel® RealSense™ camera on top of any robot base, and using the Autonomous Mobile Robot software.
Use the Robot Teleop Using a Keyboard ROS 2 node to validate that the robot kit’s hardware setup has been done correctly.
Requirements#
Hardware Requirements#
The robot base should contain:
Intel® compute system with Autonomous Mobile Robot installed
Intel® RealSense™ camera
Robot base support (chassis) for the Intel® compute system and the Intel® RealSense™ camera
Wheels
Motor
Motor controller
Batteries for all components
Software Requirements#
The robot base should feature a ROS 2 node with the ability to:
Publish information from the motor controller firmware into ROS 2 topics like wheel odometry.
Receive information from other ROS 2 nodes and transmit this data to the motor controller firmware. For example, it should be capable of receiving movement commands from ROS 2 Navigation 2 stack on the cmd_vel topic.
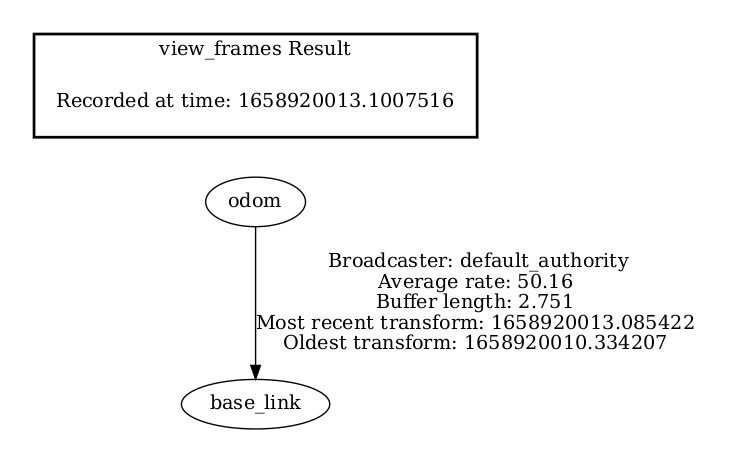
Provide robot specific information like the tf tree data with correct tf transformations. For example,
odomandbase_linkand their transformations.When using multiple robots, the ability to change these names for each robot like
robot1_odomandrobot1_base_link(more information can be found here).
Note
This ROS 2 node runs on the compute system and retrieving information from the motor robot’s controller via a wired connection, usually a USB connection.
Steps To Create Your Own Robot Kit#
Step 1: Prerequisites#
To create a functional autonomous mobile robot, follow the instructions of the manufacturer.
The standard assembly involves the following steps:
Mount the motors onto the lower chassis board and then assemble the wheels.
Fix the motor controller on the chassis board and establish connections with the motors.
Attach the Intel® RealSense™ camera and the SSD drive to the upper chassis board.
Mount the Intel® compute system to the the upper chassis board.
Connect the two chassis boards.
Establish a connection between the Intel® compute system and both Intel® RealSense™ camera and motor controller via USB.
Connect both the the Intel® compute system and the motor controller to a power source.
Power the Intel® compute system using a power source.
Turn on the power switch of motor controller.
Step 2: Integration into Autonomous Mobile Robot#
Start the robot base ROS 2 node on the native system OS or inside a Docker container. To ensure proper functionality, ensure that both the robot base node and the rest of the Autonomous Mobile Robot pipeline are configured with the same ROS_DOMAIN_ID.
Step 3: Robot Base Node ROS 2 Node#
Introduction to Robotic Base Node#
The Autonomous Mobile Robot pipeline assumes that the robot base ROS 2 node:
Publishes
odomandbase_linkodomis used by the Navigation 2 package and others to get information from sensors, especially the wheel encoders. For more information refer to Navigation 2 tutorial on Odometry.base_linkrepresents the center of the robot to which all other links are connected.
Creates the transform between
odomandbase_linkIs subscribed to
cmd_velwhich is used by the Navigation 2 package to give instructions to the robot like spin in place or move forward
The Autonomous Mobile Robot provides the following examples with the ros-humble-aaeon-ros2-amr-interface Deb package:
/opt/ros/humble/share/ros2_amr_interface/params/aaeon_node_params_uncalibrated_imu.yaml
/opt/ros/humble/share/ros2_amr_interface/params/aaeon_node_params.yaml
These samples are for the AAEON UP Xtreme* i11 Robotic Development Kit.
Robotic Base Node Deep Dive#
This section details the commands required to startup the motor controller of an AAEON UP Xtreme i11 Robotic Development Kit.
To start the node on the AAEON UP Xtreme i11 Robotic Development Kit, you can reference and initiate it as follows:
Ensure that the
ros-humble-aaeon-ros2-amr-interfaceDeb package is installed.sudo apt update sudo apt install ros-humble-aaeon-ros2-amr-interface
Check the device name of the motor controller.
sudo dmesg | grep ttyUSB
The output should contain the
ch341-uartdevice providing the interface to the motor controller board.[1452443.462213] usb 1-9: ch341-uart converter now attached to ttyUSB0 [1452444.061111] ch341-uart ttyUSB0: ch341-uart converter now disconnected from ttyUSB0
Ensure the AAEON UP Xtreme i11 Robotic Development Kit node configuration file has the proper USB device configured as value of
port_name.vi /opt/ros/humble/share/ros2_amr_interface/params/aaeon_node_params.yamlStart the motor control node.
AAEON_NODE_CONFIG_FILE=/opt/ros/humble/share/ros2_amr_interface/params/aaeon_node_params.yaml

# Launch the AAEON Robot Motor Board Interface
ros2 run ros2_amr_interface amr_interface_node --ros-args \
   --params-file $AAEON_NODE_CONFIG_FILE \
   --remap /amr/cmd_vel:=/cmd_vel \
   --remap /amr/battery:=/sensors/battery_state
You can check the following:
ROS 2 topics
ros2 topic list
# The result for UP Xtreme i11 Robotic Kit is similar to:
# /amr/cmd_vel
# /amr/imu/raw
# /amr/initial_pose
# /amr/odometry
# /parameter_events
# /rosout
# /sensors/battery_state
# /tf
# The result for the Pengo robot contains multiple topics but the crucial to this pipeline are:
# /cmd_vel
# /joint_states
# /rosout
# /odom
# /parameter_events
# /tf
odomandbase_linkframesros2 run tf2_tools view_frames.py cp frames.pdf /home/<user> # Open the pdf through file explorer, it should look similar to:
