Get Started#
Overview#
Smart NVR is a GenAI-powered video analytics application that transforms traditional network video recorders with intelligent event detection and real-time insights at the edge. This guide will walk you through deploying and configuring the application to extract valuable insights from your video data.
Prerequisites#
System Requirements#
System must meet minimum requirements.
3-4 devices for distributed deployment.
Smart NVR operates in a distributed architecture requiring multiple services across 3-4 devices for optimal performance:
Device |
Service |
Purpose |
|---|---|---|
Device 1 |
VSS Search |
Video search functionality |
Device 2 |
VSS Summary |
Video summarization |
Device 3 |
VLM Microservice |
AI-powered event descriptions (optional) |
Device 3/4 |
Smart NVR App |
Main application interface |
Software Dependencies#
Docker: Installation Guide
Must be configured to run without sudo (Post-install guide)
Git: Installation Guide
Required Services#
Before setting up Smart NVR, ensure these services are running on their respective devices:
1. VSS (Video Search and Summarization) Services#
Deploy these on separate devices:
VSS Search: Handles video search functionality
VSS Summary: Provides video summarization capabilities
2. VLM Microservice (Optional)#
Required only when enabling AI-powered event descriptions (NVR_GENAI=true):
Runs the VLM model defined in the Frigate config file
Use
VLM_MAX_COMPLETION_TOKENSto limit response length during deployment
Quick Start#
Step 1: Build from Source#
Go to the target directory of your choice and clone the suite.
If you want to clone a specific release branch, replace main with the desired tag.
To learn more on partial cloning, check the Repository Cloning guide.
git clone --filter=blob:none --sparse --branch main https://github.com/open-edge-platform/edge-ai-suites.git
cd edge-ai-suites
git sparse-checkout set metro-ai-suite
cd metro-ai-suite/smart-nvr
Step 2: Configure Environment#
Set up the required environment variables:
# Docker Registry Details
export REGISTRY_URL="intel"
export TAG="latest"

# VSS Service Endpoints
export http_proxy=<http-proxy>
export https_proxy=<https-proxy>
export no_proxy=<no_proxy>

# VSS Service Endpoints
export VSS_SUMMARY_IP=<vss-summary-device-ip>
export VSS_SUMMARY_PORT=<vss-summary-port>        # Default: 12345
export VSS_SEARCH_IP=<vss-search-device-ip>
export VSS_SEARCH_PORT=<vss-search-port>          # Default: 12345

# MQTT Configuration
export MQTT_USER=<mqtt-username>
export MQTT_PASSWORD=<mqtt-password>

# Feature Toggles
export NVR_GENAI=false                  # Set to 'true' to enable AI-powered event descriptions
export NVR_SCENESCAPE=false             # Set to 'true' to enable Scenescape integration
Step 3: Launch Application#
# Start all services
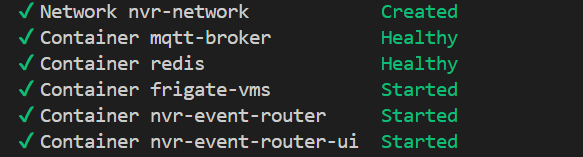
source setup.sh start
This launches all required containers:
Step 4: Access the Interface#
Open your browser and navigate to:
http://<host-ip>:7860
Step 5: Stop Services#
# Stop all services when done
source setup.sh stop
Advanced Configuration#
Enabling AI-Powered Event Descriptions#
To enable Smart NVR’s GenAI capabilities for intelligent event descriptions:
Ensure VLM Service Availability
Verify the VLM microservice is running and accessible at the configured endpoint.
Set Environment Variable
export NVR_GENAI=true
export VLM_SERVING_IP=<vlm-serving-device-ip>
export VLM_SERVING_PORT=<vlm-serving-port>
Run the application
Re-run the application after configuring the rest of environment variables. Ensure that the environment value
export NVR_GENAI=trueis set.Important:
This feature is experimental and may be unstable due to underlying Frigate GenAI implementation.
Requires VLM microservice to be running.
Disabled by default for system stability.
SmartNVR uses either Frigate or Scenescape for GenAI capabilities. GenAI in both cannot be enabled at the same time. If Scenescape is enabled, its capabilities are prioritized over Frigate, with Frigate used in “dumb” mode.
If NVR_SCENESCAPE=true. then NVR_GENAI must be set to false. Otherwise, an error is thrown.
Scenescape Integration#
For traffic analytics capabilities with Scenescape (vehicle counting, traffic flow analysis), see the Scenescape Integration Guide.
Custom Build Configuration#
If using custom build flags, ensure the same environment variables are set before running the setup script.
Next Steps#
Explore Features: Learn about application capabilities in the How to Use Guide
Troubleshooting: If you encounter issues, check the Troubleshooting Guide