Ubuntu Installation with Full Disk Encryption#
Full Disk Encryption (FDE) protects Smart Intersection application data and configurations by encrypting the entire disk. This ensures that sensitive traffic analysis data and system configurations remain secure even if the hardware is compromised.
Once FDE is enabled, the encrypted disk can only be accessed with the security key configured during installation.
Step 1: Prepare Ubuntu Installation Media
Download the official Ubuntu 24.04.2 LTS release from the Ubuntu website
Create a bootable Ubuntu USB drive
Enter the boot manager menu and select the bootable USB with Ubuntu 24.04.2
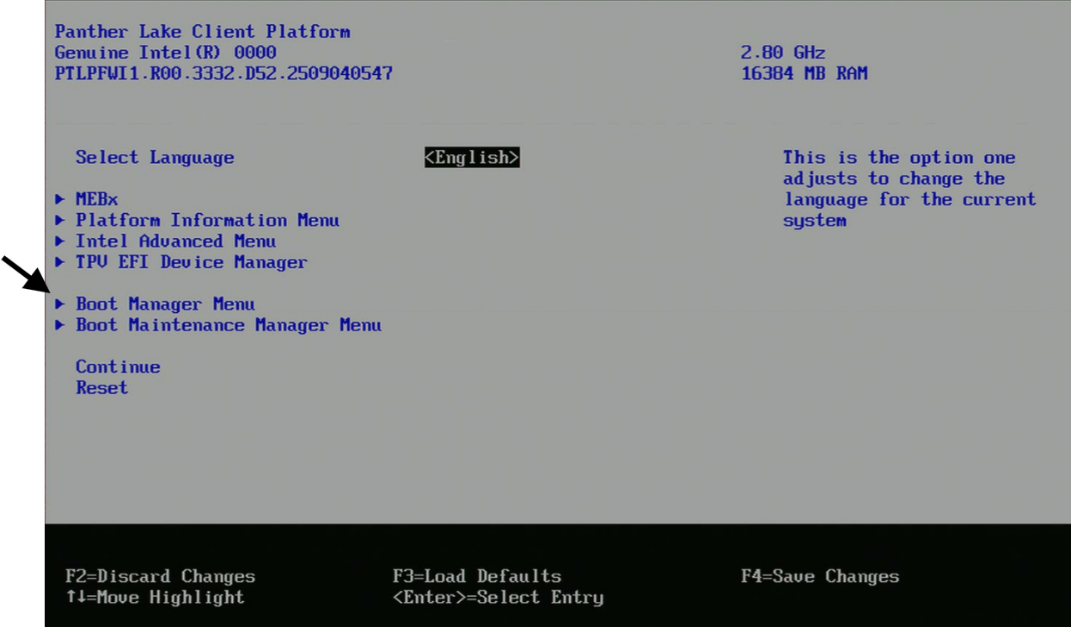
Step 2: Begin Ubuntu Installation
Boot from the bootable USB and select “Try or Install Ubuntu”.
Step 3: Configure Basic Settings
Configure language, accessibility options, keyboard layout, and other basic settings. Optionally connect to wired internet if available.
Step 4: Select Installation Type
Select “Install Ubuntu” option.
Step 5: Choose Installation Mode
Select “Interactive Installation” for full control over security settings.
Step 6: Configure Applications
In the Applications page, select “Default selection”. If you made a wired connection earlier, select both checkboxes.
Step 7: Enable Disk Encryption
In the Disk setup page:
Select “Erase disk and install Ubuntu”
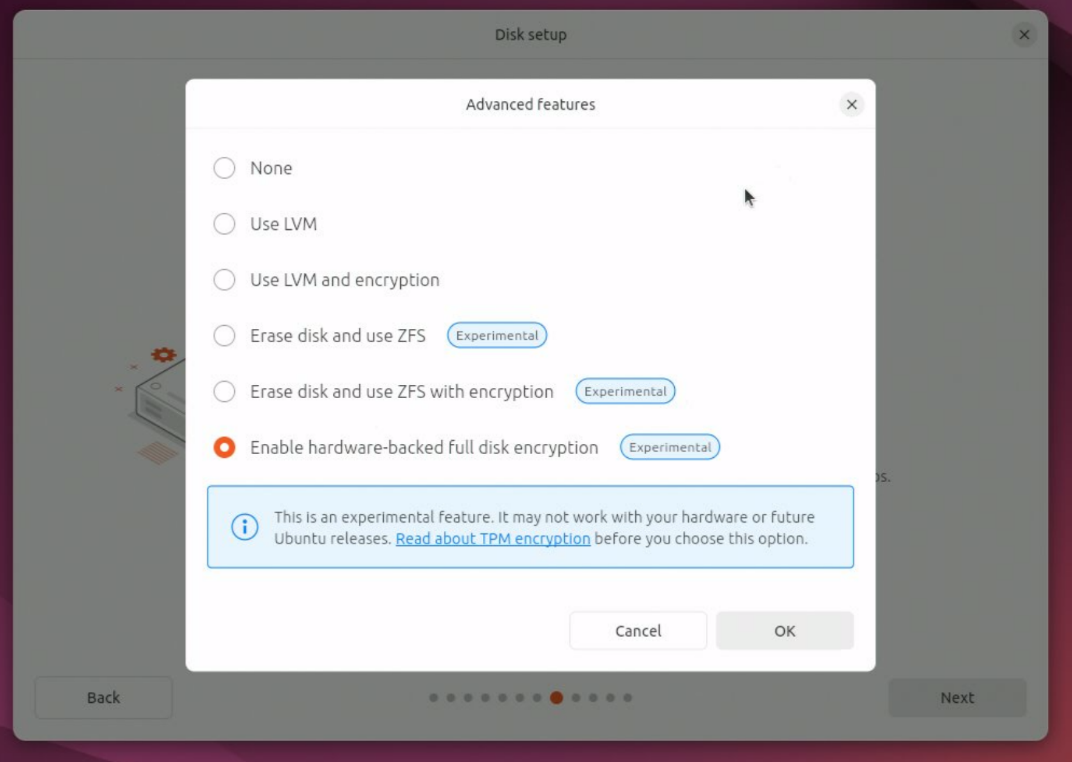
Click the “Advanced features” button to access encryption options
Step 8: Choose Encryption Method
There are two FDE methods available. Choose based on your Smart Intersection security requirements:
Method 1: Software-based Encryption
Select “Use LVM and encryption”
This encrypts your entire drive using LVM
Requires a strong passphrase that you’ll enter at boot time to decrypt and access your system
Method 2: Hardware-backed Full Disk Encryption
Uses dedicated security chips (TPM or Secure Enclave) to store encryption keys
Provides stronger protection than software-only encryption
Note: To enable this option, you must first enable Secure Boot in BIOS/UEFI settings and clear/reset the TPM module
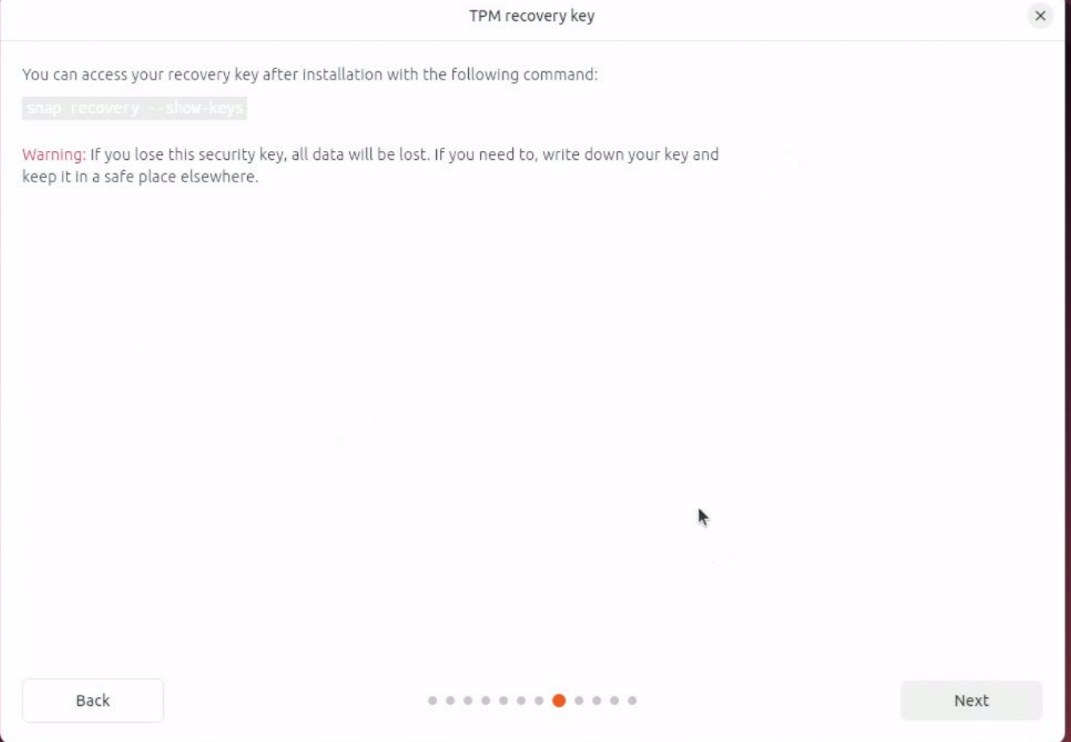
If Hardware-backed full disk encryption is enabled, you can skip Steps 9 and 12 as the TPM chip will automatically handle key management and drive decryption.
TPM Recovery Key: Use the following command to show TPM recovery keys:
sudo snap recovery --show-keys
Step 9: Create Security Key (Software-based Encryption Only)
Create a Security Key that will be required to decrypt the Ubuntu drive before accessing the Smart Intersection application.
Step 10: Complete Installation Configuration
Complete the installation by configuring:
Username and password
Timezone settings
Review your choices before proceeding
Step 11: Finalize Installation
Complete the installation process
Restart the PC when prompted
Remove the bootable drive when instructed after restart
Step 12: First Boot with Encryption (Software-based Encryption Only)
Enter your Security Key from Step 9 as the encryption password to unlock the disk
The Ubuntu login screen will appear
Ubuntu installation with FDE is now completed and ready for Smart Intersection deployment