Helm* Chart for Tutorial Web UI#
In this step, you will add the Tutorial Web UI Deployment and Service to the Helm* chart.
Remove Unwanted Files#
To simplify the deployment, you must remove the following files from the templates directory:
cd tutorial-web-ui
rm templates/hpa.yaml
rm templates/ingress.yaml
Modify the Deployment#
values.yaml#
Add values: You can add some variables to the
values.yamlfile that will be useful later:# Add this to the values.yaml file at the top before "replicaCount:" tutorialServer: proto: http host: tutorial-server port: 8000 streamTimeout: 60s
Change Port: Change the
service.portin thevalues.yamlfile to match the port used in the Dockerfile.# Change this to the values.yaml file under "service:" service: type: ClusterIP port: 8080
Update repository: In the same file, change the
image.repositoryto match the container image:# Change this to the values.yaml file under "image:" image: repository: tutorial-web-ui-image pullPolicy: IfNotPresent
SecurityContext: Update the
securityContextto make the deployment secure:securityContext: capabilities: drop: - ALL readOnlyRootFilesystem: true runAsNonRoot: true runAsUser: 101 # nginx
templates/service.yaml#
You can use a special feature of the Application Orchestration - the Application Server Proxy (Service Link), which allows proxy directly to a service run on an Edge Node. See the Service Link documentation in the User Guide Package an Application for the Registry.
Add annotations: To prepare for this, add the following to the templates/service.yaml file under “metadata,” so that we can add annotations at a later date:
# Add this to the service.yaml file under "metadata:" indented 2 spaces
{{- if .Values.service.annotations }}
annotations: {{- .Values.service.annotations | toYaml | nindent 4 }}
{{- end }}
Chart.yaml#
App Version: Modify the Chart.yaml file changing the
appVersionto match the tag0.1.0you will give the Docker* image in Load the Helm* Charts and Images into the OCI Local Registry :# Change this to the Chart.yaml file under "appVersion:" appVersion: "0.1.0"
templates/deployment.yaml#
Because NGINX* has a highly secure configuration, it cannot create
temporary files in the /tmp folder of the read-only file system.
Add Volume: Modify the templates/deployment.yaml file to add a volume mount for the
/tmpdirectory.# Add to the end of the file under "spec.template.spec: indented by 6 spaces" volumes: - name: tmp emptyDir: { }
Add VolumeMount: Add the following to the spec.template.spec.containers section of the Deployment:
# Add to the end of the nginx container definition under "spec.template.spec.containers:" after "resources", indented by 10 spaces
volumeMounts:
  - name: tmp
    mountPath: /tmp
Checking the Helm Chart#
To check for errors, run helm lint at the tutorial-charts directory on the chart.
helm lint ./tutorial-web-ui
Then run helm template to check the output of the chart.
helm -n tutorial template --release-name foobar ./tutorial-web-ui --set image.tag=latest
Test the Helm Chart#
You can deploy this Helm chart alongside the Tutorial Server chart into the same namespace.
First load the container image into KinD:
kind load docker-image tutorial-web-ui-image:latest
Then you can install the Helm chart on the KinD cluster:
helm -n tutorial install --create-namespace tutorial-web-ui ./tutorial-web-ui --set image.tag=latest
At this stage it is possible to test the application using curl or a web
browser through a port-forward:
kubectl -n tutorial port-forward service/tutorial-web-ui 8080:80
In a web browser, open http://localhost:8080. You should see the UI.
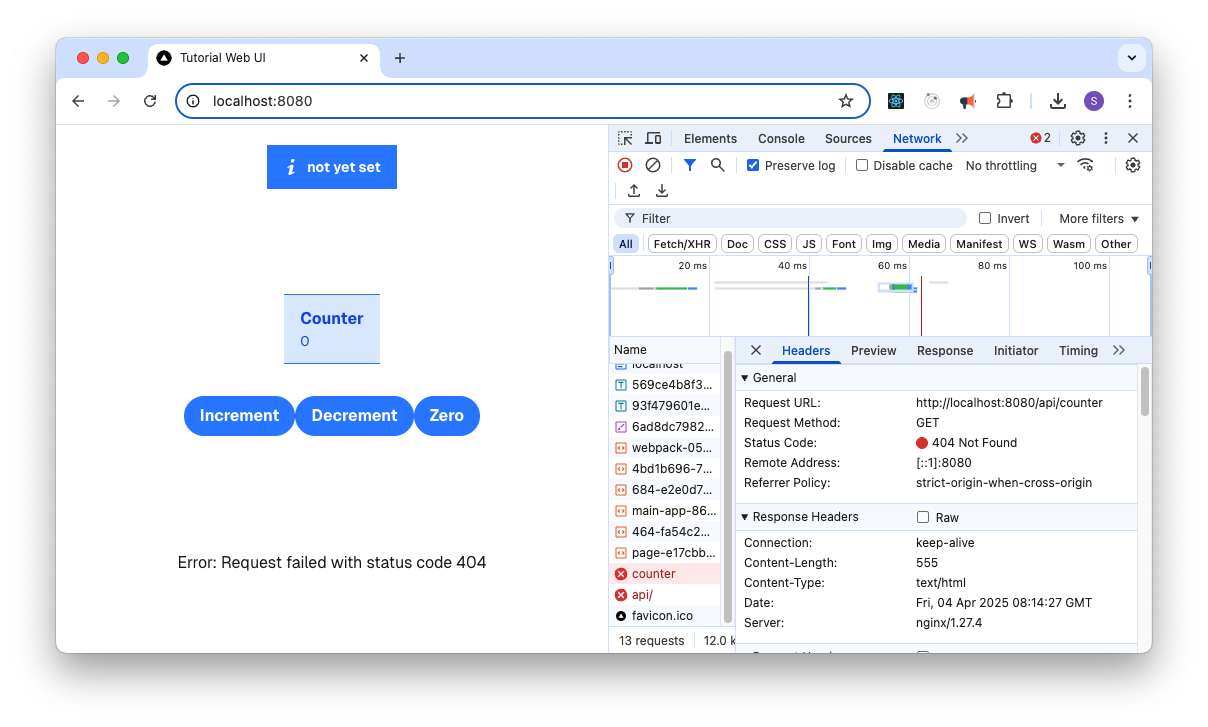
It is unable to connect to the Tutorial Server. It
is performing a GET against http://localhost:8000/api/counter.
We set this /api in the app/page.tsx file in
Develop the Tutorial Web UI. This is the base
of all Axios calls to the Tutorial Server, but as you can see from the
following snippet, the behavior is dependent on being in development mode or
not.
const AxiosInstance = axios.create({
    baseURL: process.env.NODE_ENV === 'development' ? 'http://localhost:8000' : '/api'
});
Note
In non-development mode, you are not giving this baseURL a hostname, and
so it will take the hostname of the web page, which is
http://localhost:8080 and adds on /api.
Hardcoding a value for hostname is not a good idea at this stage, as it would leave a brittle solution that would become high maintenance as it moves to production. During development it was fine, as you were able to control the environment.
The next step explains this in more detail.