Enable MLOps in Vision AI Detection Apps#
Applications for industrial edge insights vision can also be used to demonstrate MLOps workflow using Model Download microservice. With this feature, during runtime, you can download a new model using the microservice and restart the pipeline with the new model.
Contents#
Prerequisites#
This guide assumes that Model Download service has already downloaded the model to be updated to /tmp/models.
To learn how to setup Model Download, see here.
If not available, you can simulate this by downloading the appropriate sample model from the Edge AI Resources repository by using the link from the tabs below. Once downloaded, extract to /tmp/models directory.
Steps#
Note: If you are running multiple instances of the application, ensure to provide
NGINX_HTTPS_PORTnumber in the URL for the app instance, i.e., replace<HOST_IP>with<HOST_IP>:<NGINX_HTTPS_PORT>. If you are running a single instance and using anNGINX_HTTPS_PORTother than the default 443, replace<HOST_IP>with<HOST_IP>:<NGINX_HTTPS_PORT>.
Set up the sample application to start a pipeline. A named pipeline (
pallet_defect_detection_mlopsorpcb_anomaly_detection_mlops) is already provided in thepipeline-server-config.jsonfor this demonstration with the Pallet Defect Detection or PCB Anomaly Detection sample app.Note: Ensure that the pipeline inference element, such as gvadetect/gvaclassify/gvainference, does not have a
model-instance-idproperty set. If set, this would not allow the new model to be run with the same value provided in themodel-instance-id.Navigate to the
[WORKDIR]/edge-ai-suites/manufacturing-ai-suite/industrial-edge-insights-visiondirectory and set up the app.cp .env_pallet-defect-detection .env
cp .env_pcb-anomaly-detection .env
Update the following variables in the
.envfile.HOST_IP= # <IP Address of the host machine> MINIO_ACCESS_KEY= # MinIO service & client access key e.g. intel1234 MINIO_SECRET_KEY= # MinIO service & client secret key e.g. intel1234 MTX_WEBRTCICESERVERS2_0_USERNAME= # Webrtc-mediamtx username. e.g intel1234 MTX_WEBRTCICESERVERS2_0_PASSWORD= # Webrtc-mediamtx password. e.g intel1234
Run the setup script using the following command.
./setup.sh
Bring up the containers.
docker compose up -d
Check to see if the pipeline (
pallet_defect_detection_mlopsorpcb_anomaly_detection_mlops) is present among the list of loaded pipelines../sample_list.sh
Modify the payload in the appropriate
payload.jsonto launch an instance for the MLOps pipeline.apps/pallet-defect-detection/payload.json[ { "pipeline": "pallet_defect_detection_mlops", "payload": { "source": { "uri": "file:///home/pipeline-server/resources/videos/warehouse.avi", "type": "uri" }, "destination": { "frame": { "type": "webrtc", "peer-id": "pdd" } }, "parameters": { "detection-properties": { "model": "/home/pipeline-server/resources/models/pallet-defect-detection/deployment/Detection/model/model.xml", "device": "CPU" } } } } ]
apps/pcb-anomaly-detection/payload.json[ { "pipeline": "pcb_anomaly_detection_mlops", "payload":{ "source": { "uri": "file:///home/pipeline-server/resources/videos/anomalib_pcb_test.avi", "type": "uri" }, "destination": { "frame": { "type": "webrtc", "peer-id": "anomaly" } }, "parameters": { "classification-properties": { "model": "/home/pipeline-server/resources/models/pcb-anomaly-detection/deployment/Anomaly classification/model/model.xml", "device": "CPU" } } } } ]
Start the pipeline with the selected payload.
./sample_start.sh -p pallet_defect_detection_mlops
./sample_start.sh -p pcb_anomaly_detection_mlops
Note the instance-id of the pipeline launched.
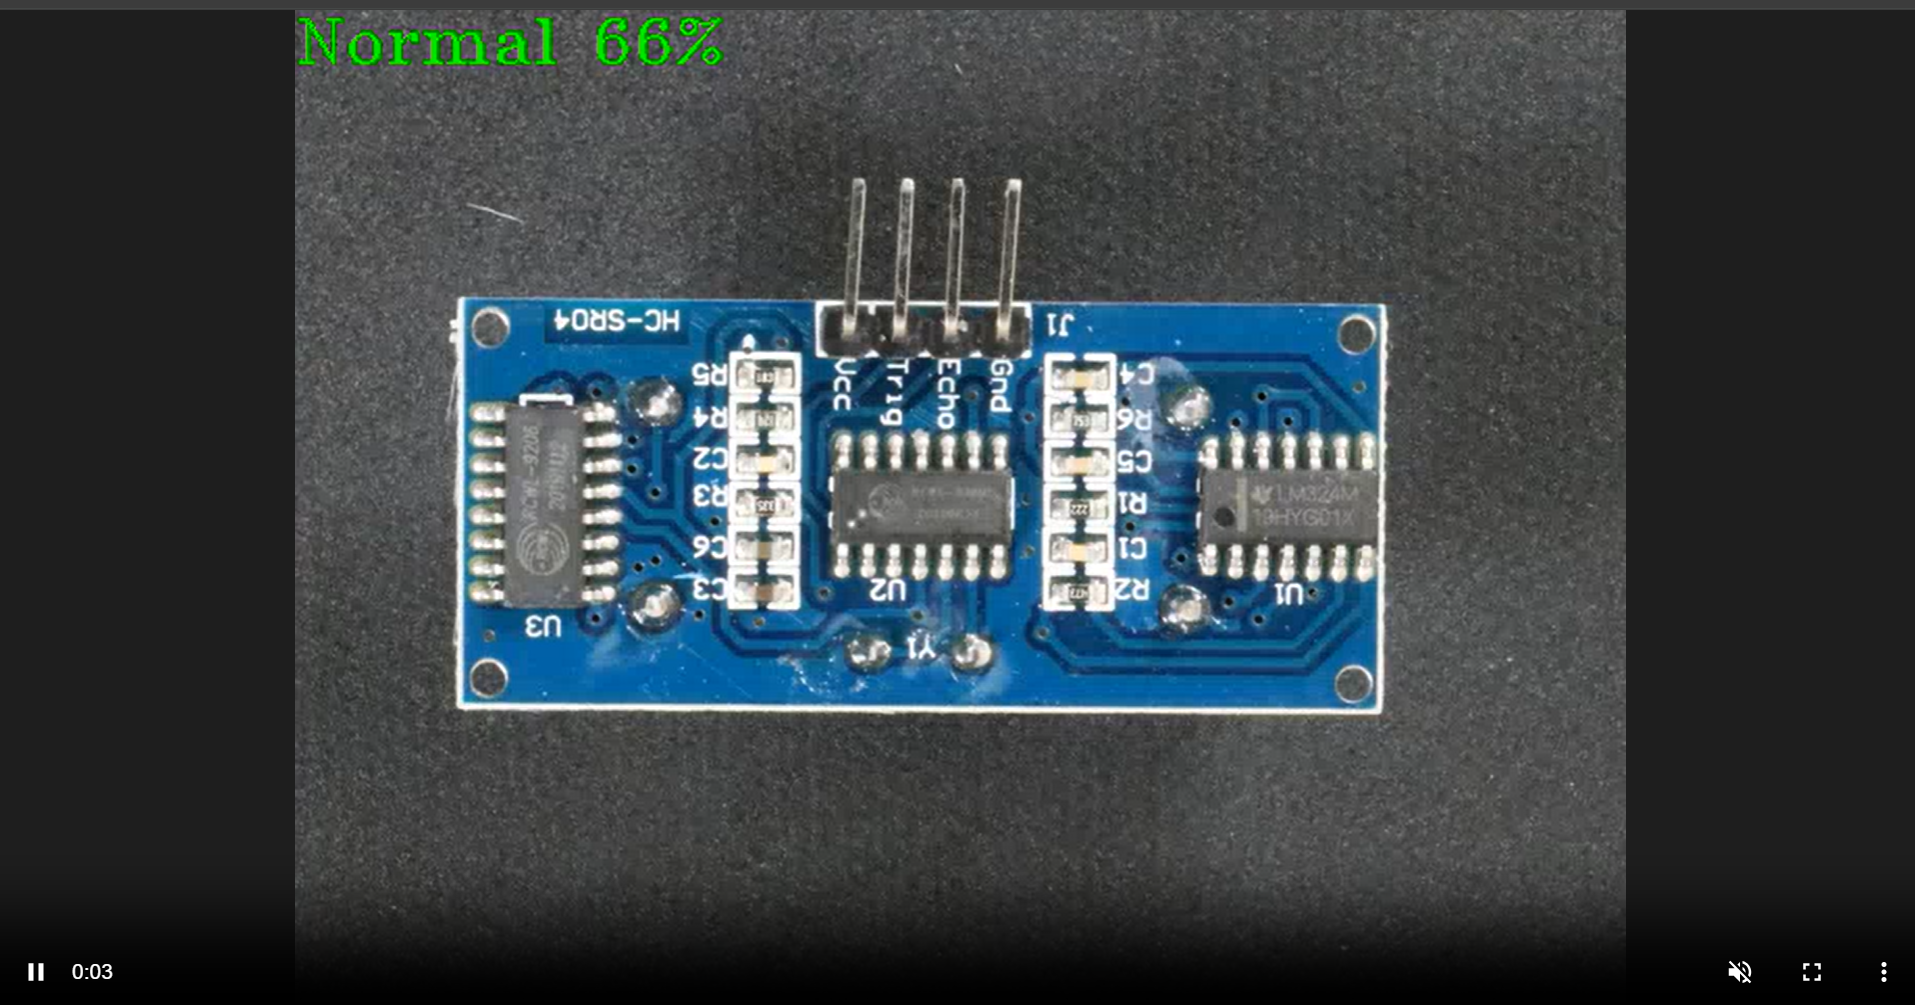
Verify the pipeline is running. You can View the WebRTC streaming on
https://<HOST_IP>/mediamtx/<peer-str-id>by replacing<peer-str-id>with the value used in the original cURL command to start the pipeline.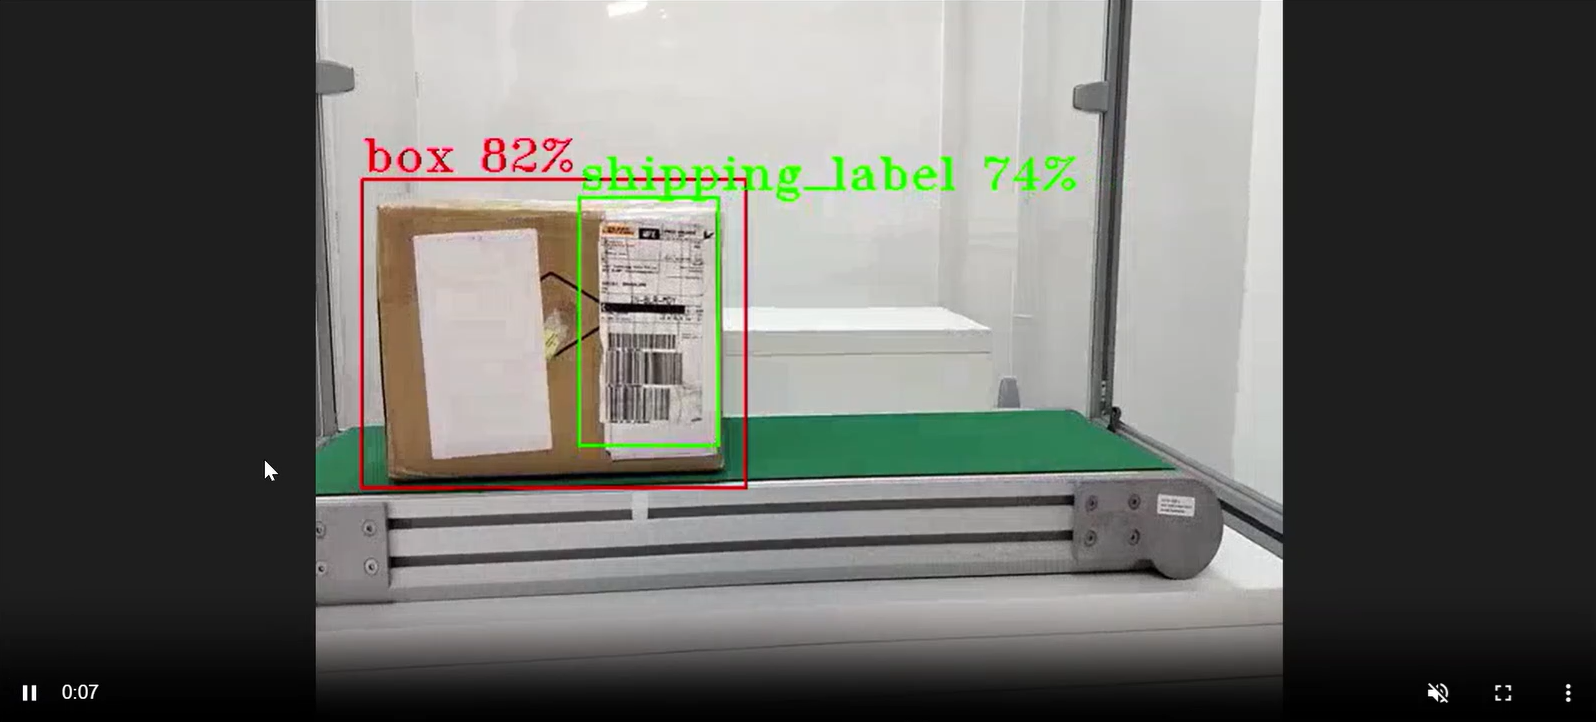
Downloading a Model with Model Download
At this point, restart the pipeline with a newer model. The new model can be a retrained version of the existing model or a different model altogether. We use the Model Download microservice to help download the model. It supports downloading public models as well as Geti™ models from a running Geti™ server. To learn more about the microservice, see how to get started with it.
For this demonstration, the guide assumes that:
the appropriate model (Pallet Defect Detection or PCB Anomaly Detection) has been retrained and is available for download from a Geti™ server using the Model Download service.
the downloaded location is accessible by the DL Streamer Pipeline Server. In our example, it is
/tmp/models.the
/tmpdirectory is already accessible by the sample application. If not, add it to thevolumessection ofdlstreamer-pipeline-serverservice in the docker-compose file.
Stop the running pipeline by using the pipeline instance-id noted in step 7.
curl -k --location -X DELETE https://<HOST_IP>/api/pipelines/{instance_id}
Modify the
payload.jsonto use the new model and start a new pipeline with it. Notice the model path in the payload has changed to the new model.apps/pallet-defect-detection/payload.json[ { "pipeline": "pallet_defect_detection_mlops", "payload": { "source": { "uri": "file:///home/pipeline-server/resources/videos/warehouse.avi", "type": "uri" }, "destination": { "frame": { "type": "webrtc", "peer-id": "pdd" } }, "parameters": { "detection-properties": { "model": "/tmp/models/pallet-defect-detection/deployment/Detection/model/model.xml", "device": "CPU" } } } } ]
Run the following.
./sample_start.sh -p pallet_defect_detection_mlops
apps/pcb-anomaly-detection/payload.json[ { "pipeline": "pcb_anomaly_detection_mlops", "payload":{ "source": { "uri": "file:///home/pipeline-server/resources/videos/anomalib_pcb_test.avi", "type": "uri" }, "destination": { "frame": { "type": "webrtc", "peer-id": "anomaly" } }, "parameters": { "classification-properties": { "model": "/tmp/models/pcb-anomaly-detection/deployment/Anomaly classification/model/model.xml", "device": "CPU" } } } } ]
Run the following.
./sample_start.sh -p pcb_anomaly_detection_mlops
View the WebRTC streaming on
https://<HOST_IP>/mediamtx/<peer-str-id>by replacing<peer-str-id>with the value used in the original cURL command to start the pipeline.
Additional resources#
Downloading models from Geti™ Server#
To learn how to download models from a running Geti™ server, see here.
Note: The downloaded model(s) must be accessible to the DL Streamer Pipeline Server container. If necessary, add it to volumes section of
dlstreamer-pipeline-serverin compose file, and restart the DLSPS service.