UI end-to-end tests (Playwright)#
The ViPPET UI comes with a Playwright end-to-end test suite located in
ui/tests/e2e/.
This page covers what a contributor needs in order to run the tests locally, wire them up in VS Code, extend them, and debug them on a headless remote host.
What is on disk#
ui/
├── playwright.config.ts               # Projects, base URL, reporters
├── tsconfig.playwright.json           # Strict TS config for the suite
└── tests/
    └── e2e/
        ├── demo-mode.spec.ts          # Basic Demo Mode smoke (chromium only)
        └── cross-browser/
            └── smoke.spec.ts          # Runs on every project
Worth knowing:
The default project is
chromium. It is the only one without atestMatch, so it picks up every file undertests/e2e/.The other projects (
firefox,webkit,chrome,msedge) havetestMatch: "tests/e2e/cross-browser/**". They run only the cross-browser suite.chromium,firefoxandwebkituse the browser binaries bundled with the installed@playwright/testversion. Reproducibility is pinned to that version.chromeandmsedgeusechannel: "chrome"/channel: "msedge". They run against the real Google Chrome / Microsoft Edge installed on the host, which is how the suite exercises real-world browser versions.The base URL is taken from
PLAYWRIGHT_BASE_URL. Default ishttp://localhost, which matches the Nginx-served UI frommake run. For a plain Vite dev server usehttp://localhost:5173.
One-time setup#
Two make targets automate the whole install for you. Pick one:
# Regular tests — installs UI Node deps + bundled Chromium only.
# Use this if you only run `npm run test:e2e -- --project=chromium`.
make ui-e2e-setup

# Cross-browser — additionally installs bundled Firefox, WebKit,
# and the real Google Chrome / Microsoft Edge system packages.
# Requires sudo (system deps and .deb packages).
make ui-e2e-setup-cross-browser
Both targets are sentinel-gated (see shared/.ui-*.stamp) so re-running
them is a no-op unless ui/package-lock.json changes.
What the targets actually do#
If you prefer to run the commands manually (for example on a system
without make), the equivalent commands are:
cd ui
npm install

# Bundled Chromium, Firefox, WebKit (used by projects: chromium, firefox, webkit)
npx playwright install --with-deps chromium firefox webkit

# Real Google Chrome and Microsoft Edge (used by projects: chrome, msedge)
sudo npx playwright install-deps chrome msedge
npx playwright install chrome msedge
Why the split? The first install unpacks self-contained builds into
~/.cache/ms-playwright/ and needs no elevated privileges. The Chrome
and Edge block installs the official Google / Microsoft .deb packages
system-wide (into /opt/google/chrome and /opt/microsoft/msedge) and
therefore needs sudo. Both are one-time.
Binaries land in ~/.cache/ms-playwright/ (bundled engines) or the
system (Chrome, Edge). Bumping @playwright/test in ui/package.json
and re-running npx playwright install is how the bundled engine
versions are updated; Chrome and Edge follow their own OS-level update
mechanism.
Running the tests#
The UI must be reachable at the configured baseURL before running
the tests. Start it in a separate terminal with make run (Nginx on
http://localhost) or npm run dev from ui/ (Vite on
http://localhost:5173).
All commands run from ui/.
Common commands#
# Everything (all projects, all specs)
npm run test:e2e

# Chromium only — quickest sanity check
npm run test:e2e -- --project=chromium

# Only the cross-browser suite, skipping real Chrome / Edge
# (useful if you have not installed them yet)
npx playwright test tests/e2e/cross-browser \
  --project=chromium --project=firefox --project=webkit

# Only a specific file
npx playwright test tests/e2e/demo-mode.spec.ts

# List everything that would run, without executing (great for debugging config)
npx playwright test --list
Non-default base URL#
PLAYWRIGHT_BASE_URL=http://localhost:5173 npm run test:e2e
Reporting#
An HTML report is written to ui/playwright-report/. On failures, traces,
screenshots and videos are attached automatically.
cd ui
npx playwright show-report
# or, from the repo root:
npx playwright show-report ui/playwright-report
show-report starts a local server (default port 9323). Under
VS Code Remote-SSH the port is auto-forwarded — click Open in Browser
in the notification to view the report on your local machine.
To view a single trace file directly:
npx playwright show-trace ui/test-results/<test-dir>/trace.zip
VS Code integration#
The Playwright Test for VSCode
extension (extension ID: ms-playwright.playwright, publisher: Microsoft)
integrates with the Test Explorer, adds a Pick locator helper, and can
open the trace viewer inside a VS Code tab.
Install it in the right place#
When you connect through Remote-SSH, install the extension on the remote host, not on the local VS Code:
Open Extensions (
Ctrl+Shift+X).Search for
Playwright Test for VSCode.Click Install in SSH:
<host>(not the plain Install button).Reload the window (
Ctrl+Shift+P→Developer: Reload Window).
Point it at the ViPPET config#
The extension auto-discovers every playwright.config.* in the
workspace. Open the Testing view (flask icon in the Activity Bar).
At the bottom of the panel there is a PLAYWRIGHT section listing the
discovered configs and their projects. For ViPPET:
Tick
ui/playwright.config.ts.Tick the projects you want the extension to use.
chromiumalone is a good default for the fastest inner loop; enablefirefox,webkit,chrome,msedgewhen you specifically want cross-browser coverage from the extension.
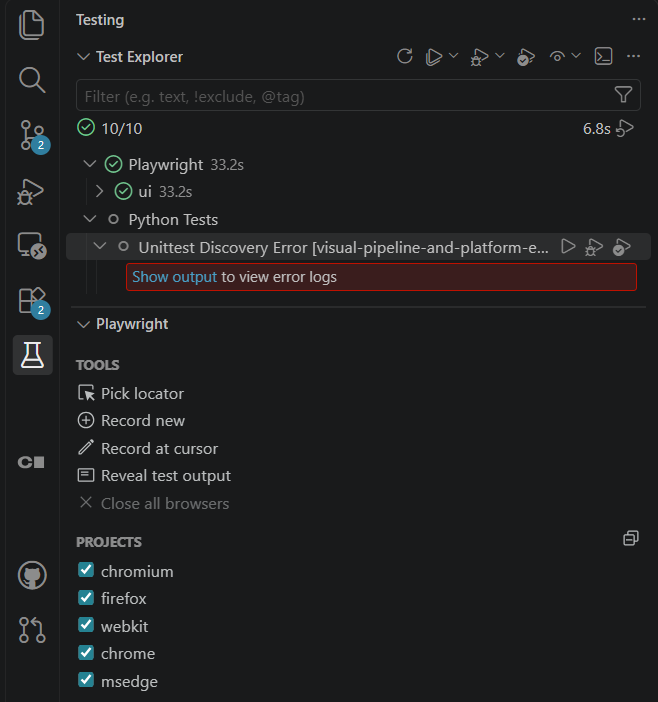
The test tree in the Testing view now shows the ViPPET suite. Each test
has inline Run / Debug icons; the extension respects the projects
you ticked above.
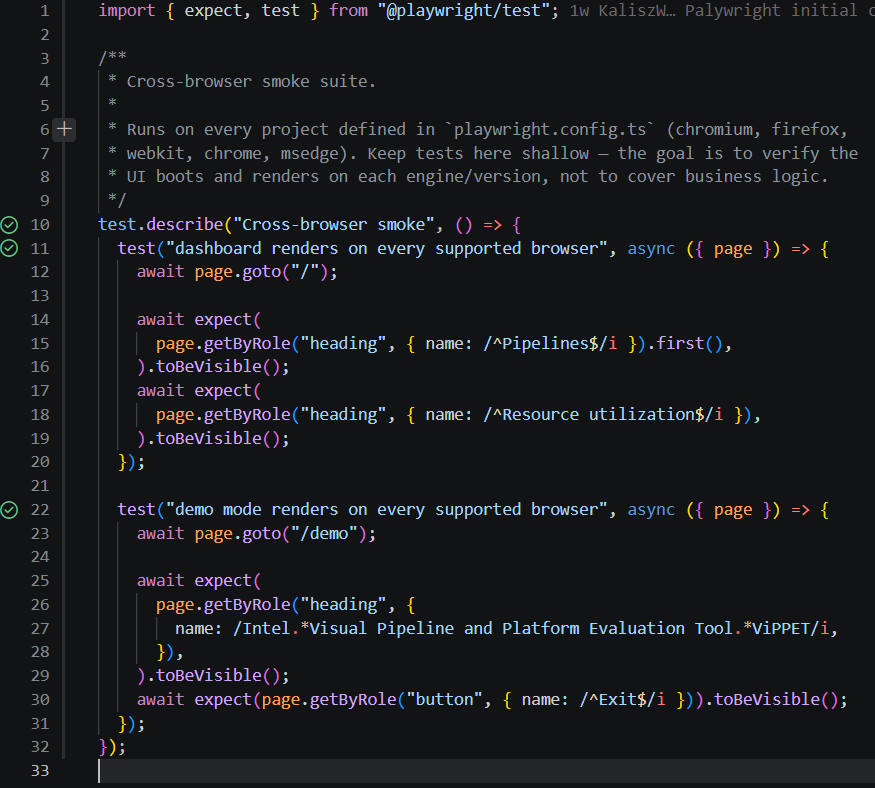
Optional workspace-level defaults (env vars, browser reuse) can be added
under .vscode/settings.json, for example:
// tools/visual-pipeline-and-platform-evaluation-tool/.vscode/settings.json
{
  "playwright.env": {
    "PLAYWRIGHT_BASE_URL": "http://localhost"
  },
  "playwright.reuseBrowser": true,
  "playwright.showTrace": true
}
Debugging on a headless remote host#
VS Code Remote-SSH does not forward X11, and ViPPET dev hosts are
typically headless. --headed and --ui need a display and will fail
with Looks like you launched a headed browser without having a XServer running. The workflow is:
Run tests headless with tracing on:
npm run test:e2e -- --project=chromium --trace=on
Open the HTML report:
npx playwright show-report
Click the failing test → Trace tab. You get a time-travel timeline of DOM snapshots, actions, network and console — the same information the Electron-based UI Mode shows.
The Playwright VS Code extension opens the same trace viewer inside a VS Code tab, no external browser needed.
Adding new tests#
Business-logic smoke, Chromium-only → new file under
ui/tests/e2e/.Cross-engine coverage → new file under
ui/tests/e2e/cross-browser/. Every project picks it up automatically.
Follow the existing conventions:
Use
getByRole/getByLabel/getByTextlocators. They work well with the Radix / shadcn components used across the UI.Keep cross-browser tests shallow. Their job is to prove that the UI boots and renders on each engine, not to cover feature logic.
Do not hard-code hostnames. Use relative paths in
page.goto("/...")and letbaseURLdo the routing.
Recording a test#
With the extension installed, right-click a spec file in the Testing view and choose Record new test. The extension launches a browser, records your interactions, and appends a runnable test to the file. On headless hosts, this only works if you run it locally (see below).
If you have a workstation with a display, another option is to check the
repo out locally and use npm run test:e2e:ui for the Electron-based
Playwright UI Mode. Point it at a running remote UI with
PLAYWRIGHT_BASE_URL=http://<remote-host>/.
Troubleshooting#
Symptom |
Cause |
Fix |
|---|---|---|
|
Ran from the repo root, so |
|
|
Real Google Chrome / Microsoft Edge is not installed on the host. |
Either install them ( |
|
The UI is not running at |
Start it with |
|
|
Use the trace viewer via |
Firefox / WebKit missing binaries |
|
|
Extension shows tests but does not run Firefox |
The PLAYWRIGHT panel at the bottom of the Testing view has |
Tick the desired projects there. |