How to Use the Intel® SceneScape 3D UI for Camera Calibration#
This guide provides step-by-step instructions to use the Intel® SceneScape 3D UI to manage and calibrate cameras in a 3D scene. By completing this guide, you will:
Navigate the 3D UI.
Add, modify, or delete cameras.
Calibrate cameras interactively within a 3D scene.
This task is important for developers or customers using Intel® SceneScape to visually manage and align camera data with 3D environments. If you’re new to Intel® SceneScape, see the Intel® SceneScape README.
Prerequisites#
Before you begin:
SceneScape Installed: Intel® SceneScape must be installed and accessible via your browser.
3D Scene Loaded: A glTF/GLB file should be uploaded and attached to a scene.
Permissions: Ensure you have permissions to create or modify camera data.
Steps to Use the 3D UI#
Step 1: Launch the 3D UI#
Log in to Intel® SceneScape.
On the homepage, identify a scene and click its
3Dbutton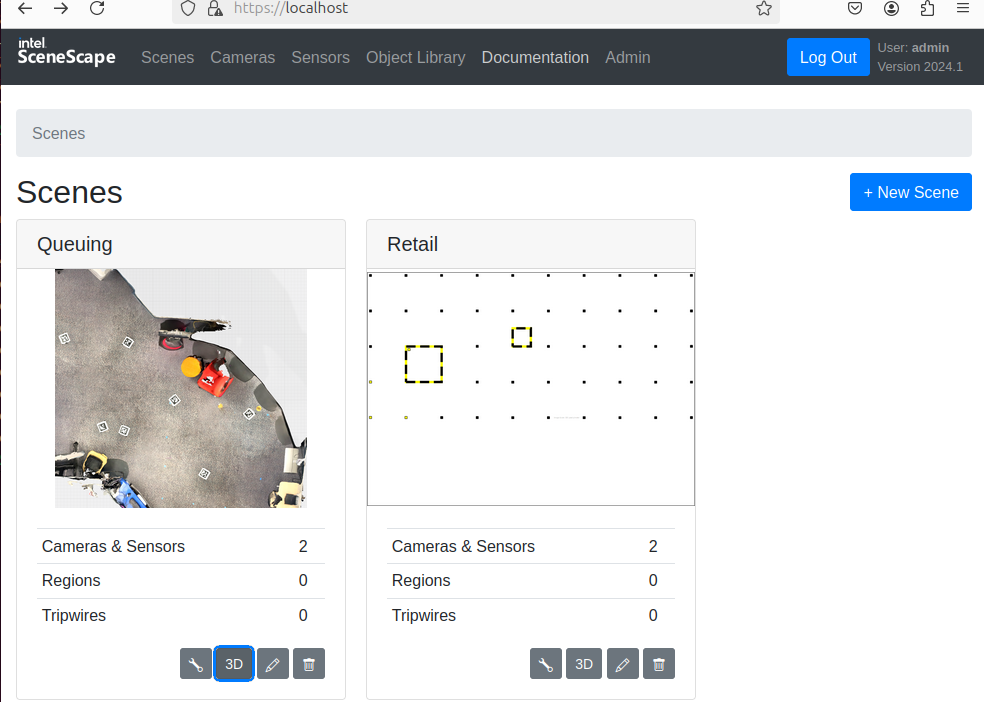
You will be directed to the 3D UI view.
Expected Results:
Scene loads with camera icons, tracked objects, and a glTF/GLB background.
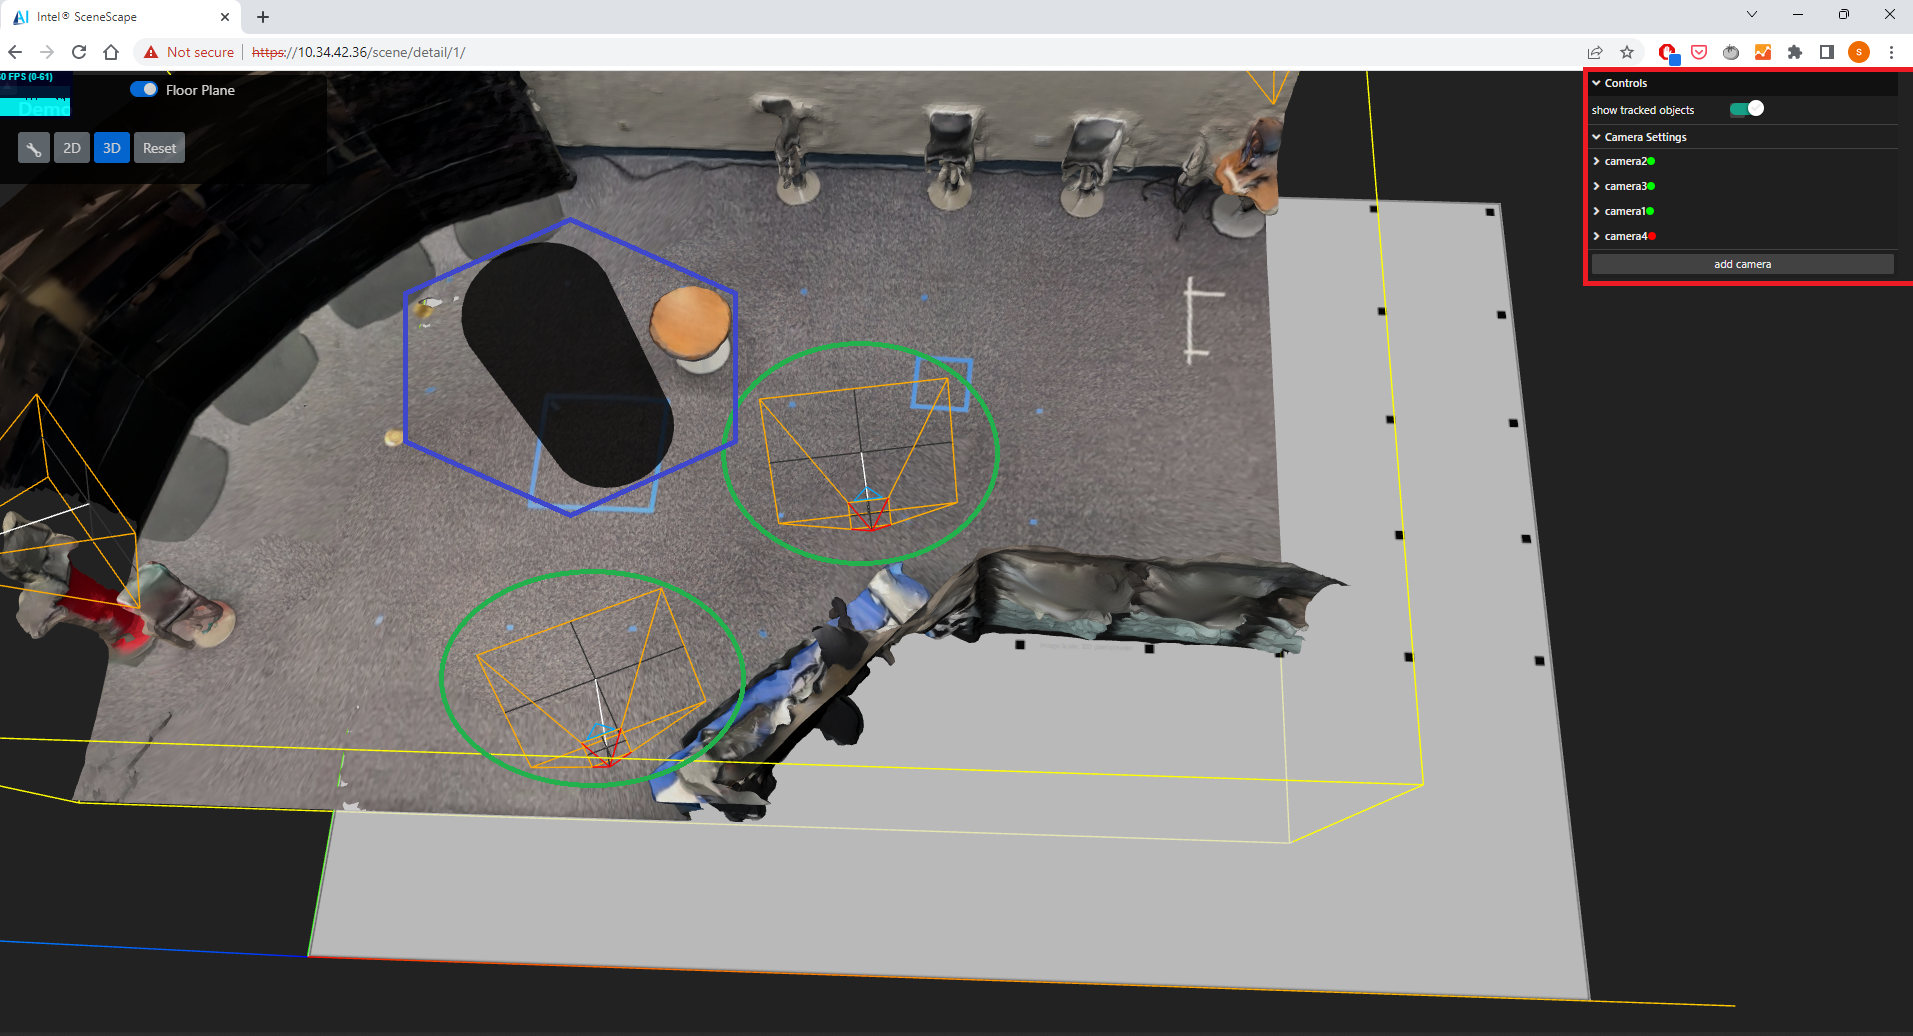
Step 2: Add or Modify a Camera#
Click on
Add Camerato place a new camera.Select a camera by clicking its icon in the scene.
Use transform tools to rotate or move the camera.
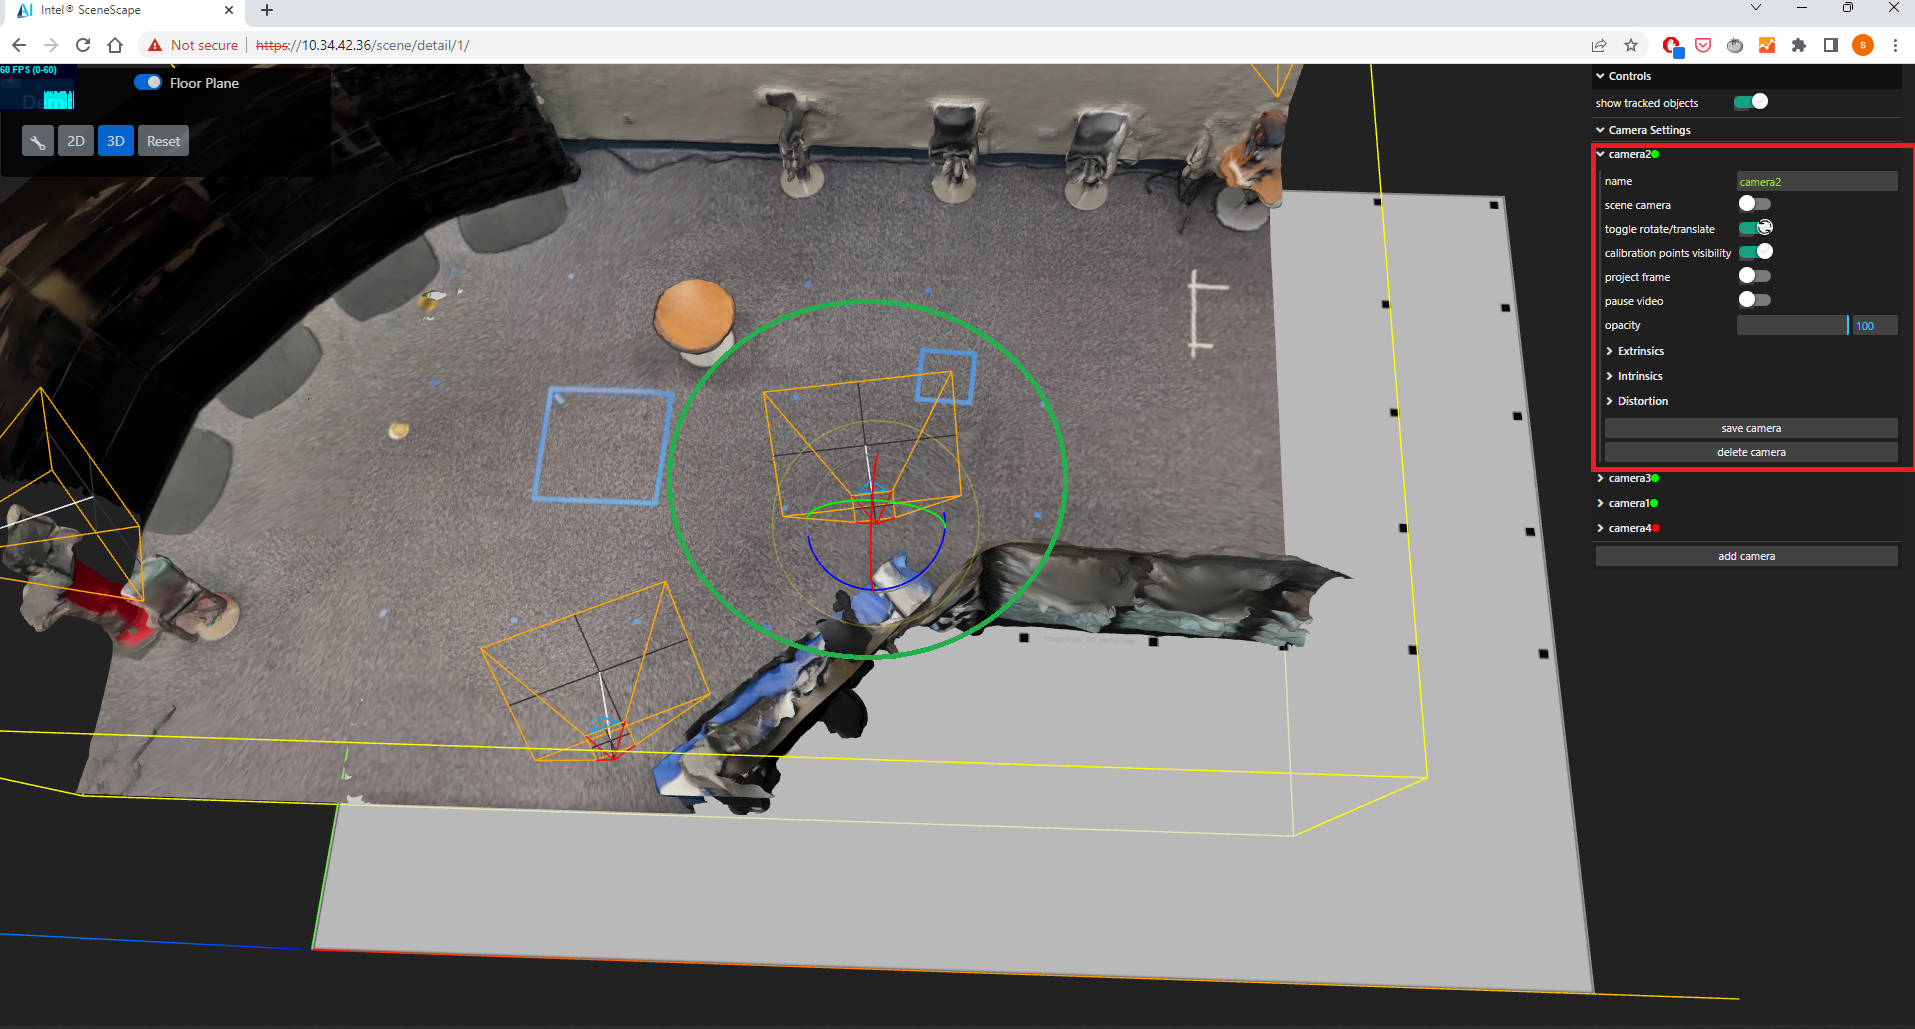 Camera Control Panel Options:
name: Assign a custom name.
scene camera: Set view to camera’s perspective.
toggle rotate/translate: Switch between rotation and translation tools.
project frame: Display camera frame projected into the 3D scene.
pause video: Pause live camera feed.
opacity: Adjust projection transparency.
extrinsics/intrinsics/distortion: Configure camera settings.
save camera: Persist the current camera configuration.
delete camera: Remove selected camera.
Step 3: Calibrate the Camera#
Ensure camera is facing the scene for proper projection.
Enable
project frame.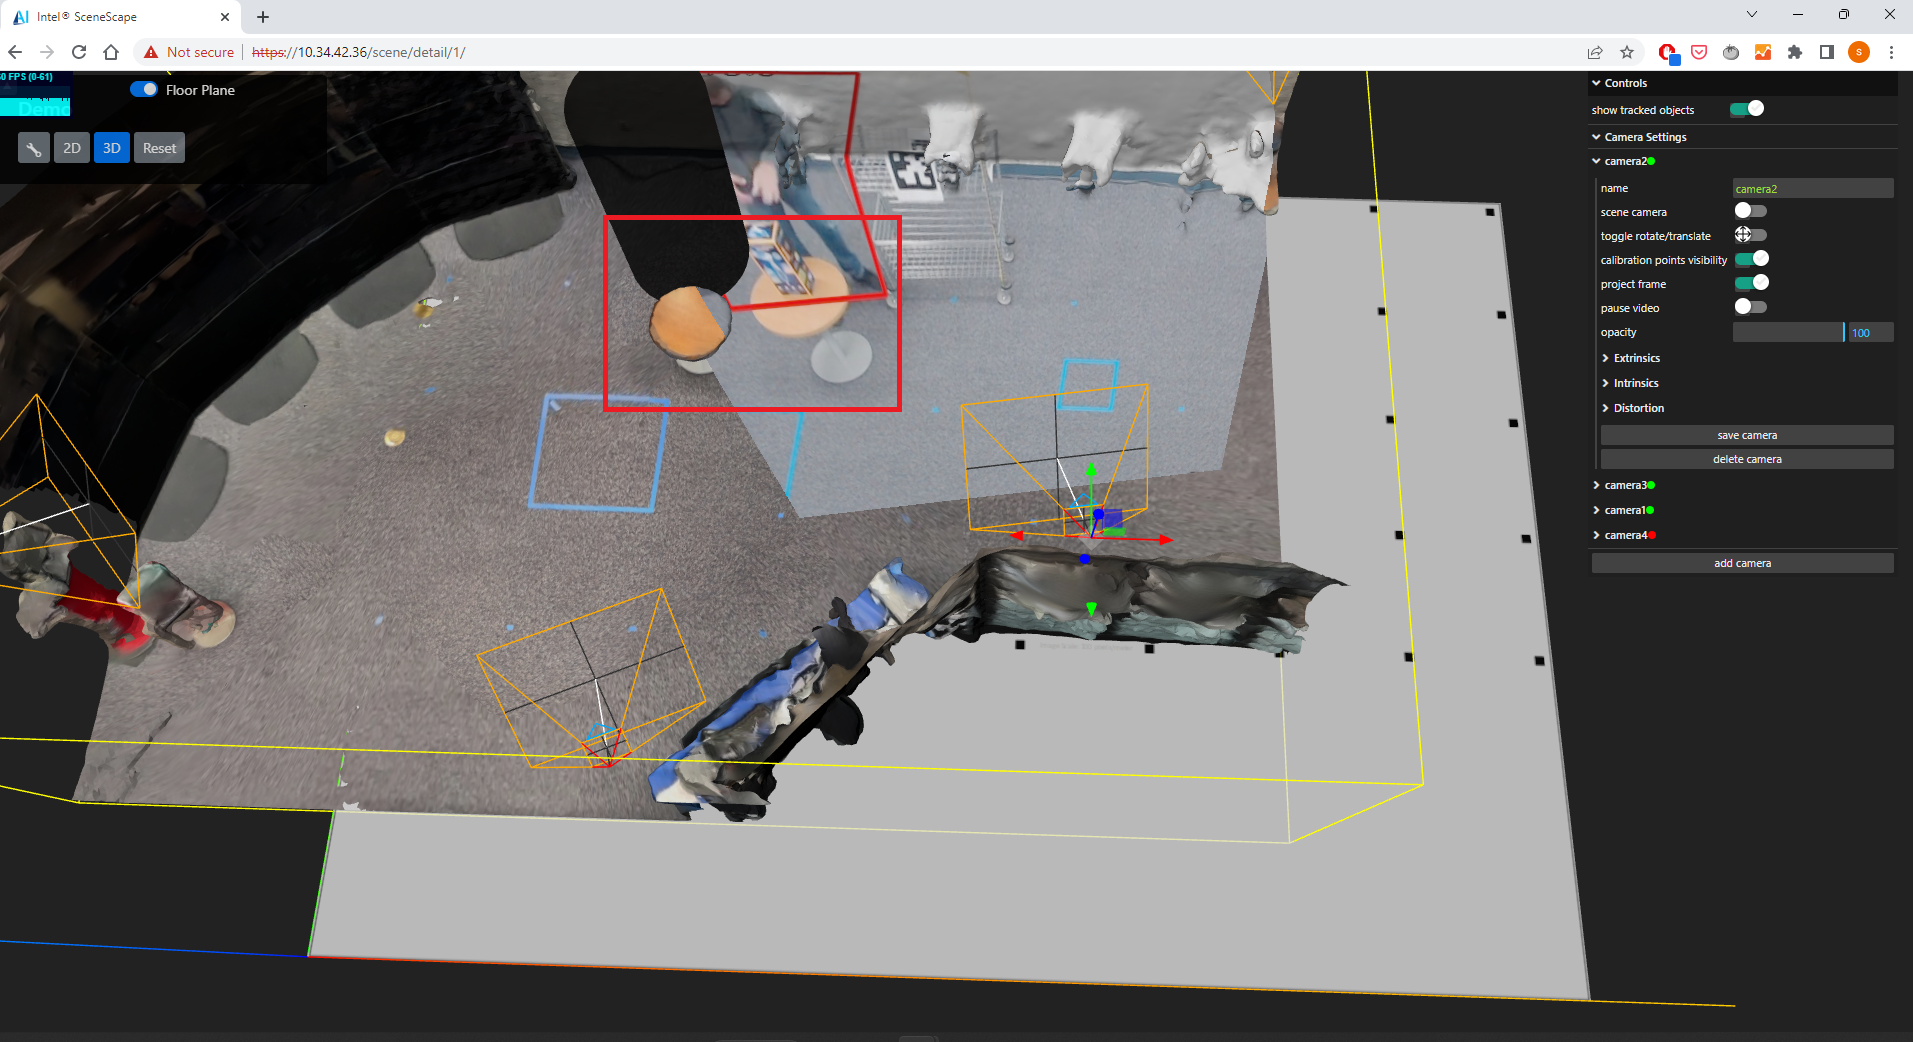
Double-click on the projected image area to create a calibration point. Repeat until four points are added.
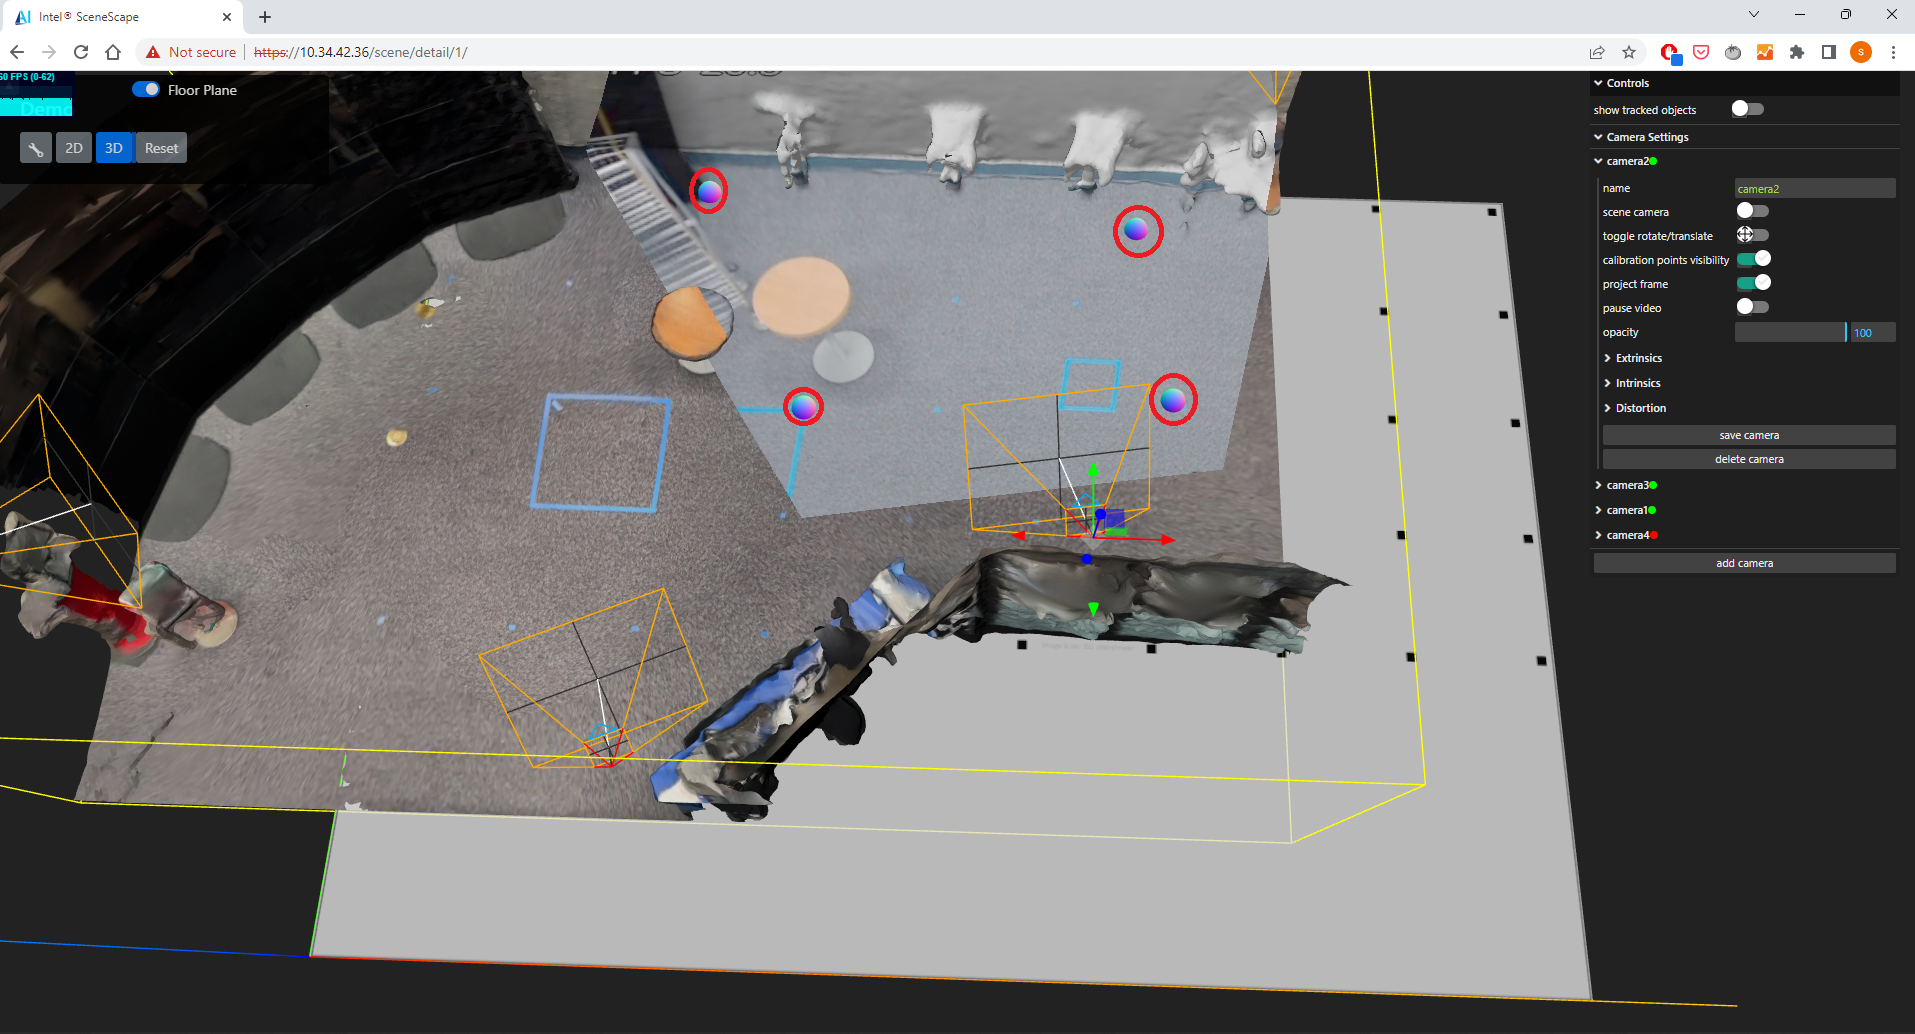
Drag the calibration spheres to align the projection with the 3D scene.
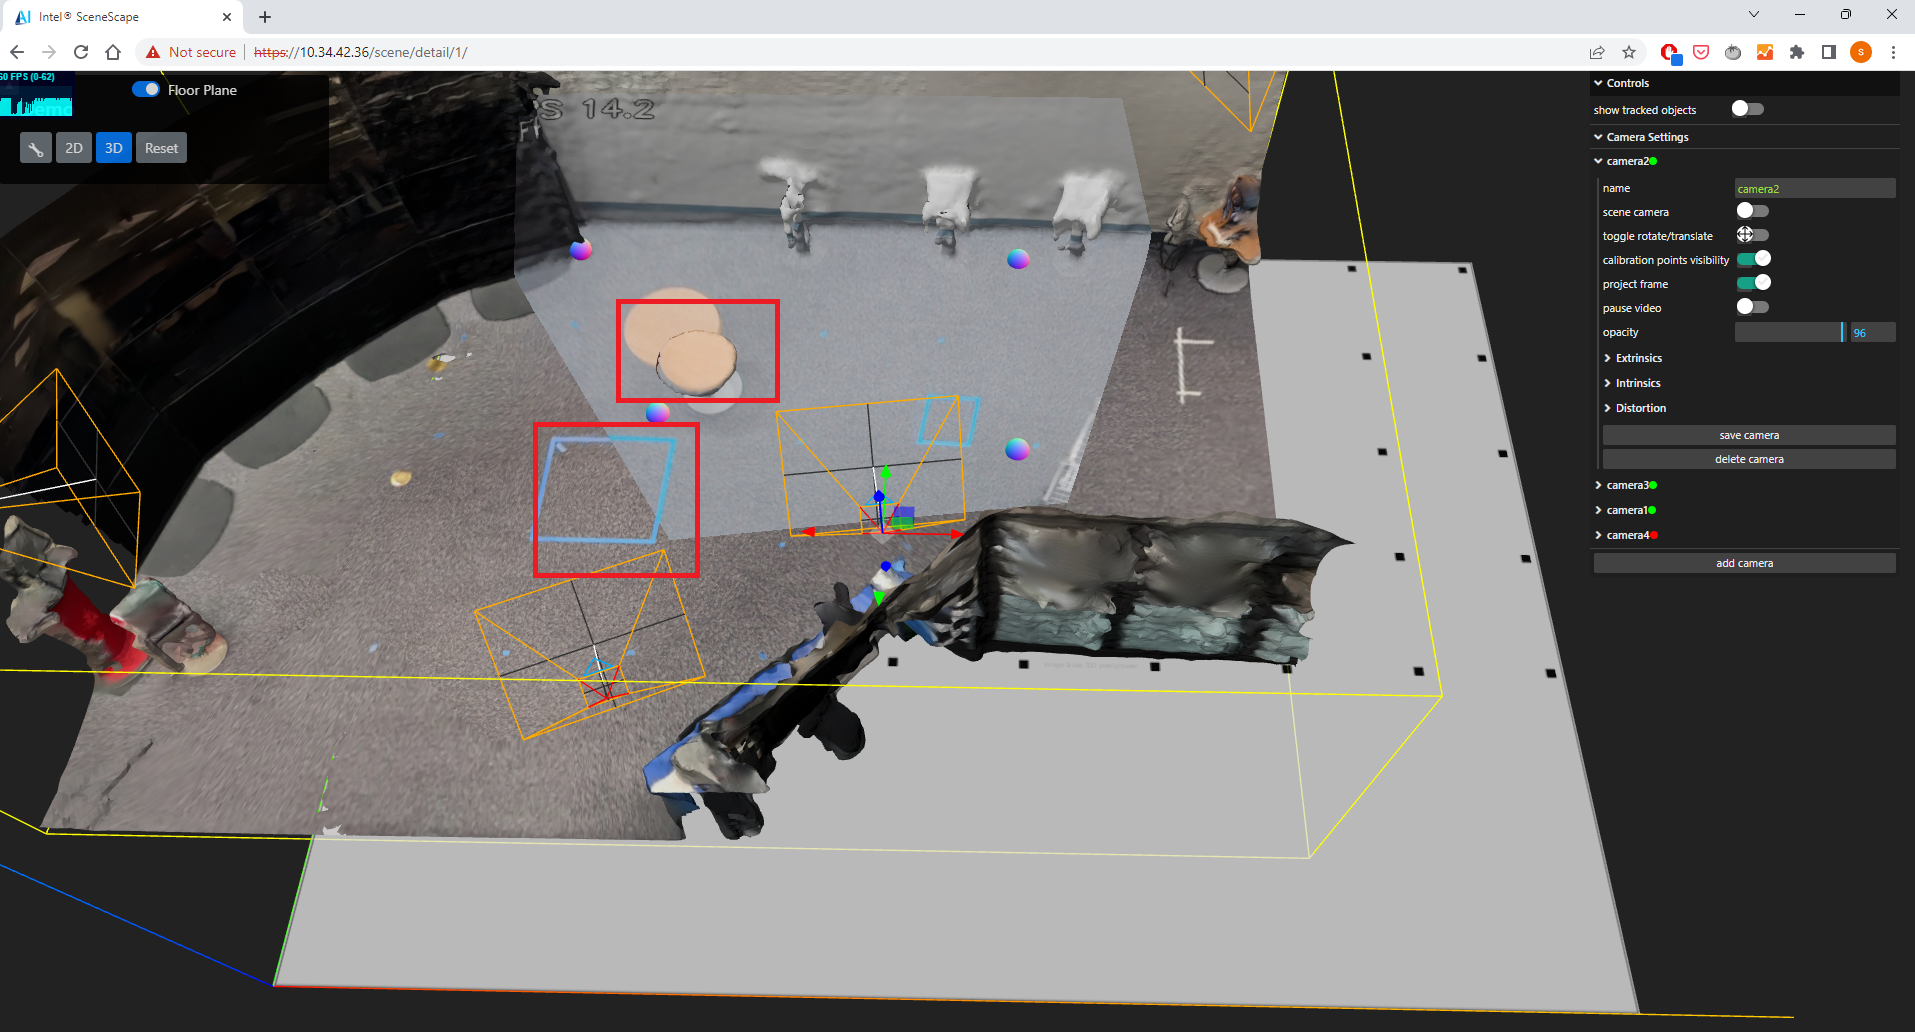
Click save to persist the calibration.
Tips:
Choose distinct, identifiable image features.
Space calibration points apart for better accuracy.
Configuration Options#
Parameter |
Purpose |
Expected Values |
|---|---|---|
camera_name |
Custom label for the camera |
String |
extrinsics |
Camera position and orientation |
Matrix or 3D transform values |
intrinsics |
Lens configuration |
fx, fy, cx, cy, etc. |
distortion |
Lens distortion coefficients |
k1, k2, p1, p2, etc. |
opacity |
Transparency of projected image |
0.0 (transparent) to 1.0 (solid) |
Troubleshooting#
Issue: If you use 3D UI Camera Calibration, the 8-points in 2D UI Camera Calibration will no longer be consistent with the current pose.