How to Autocalibrate Cameras using Visual Features in Intel® SceneScape#
This guide provides step-by-step instructions to calibrate cameras in Intel® SceneScape using markerless methods with raw RGBD data from Polycam. By completing this guide, you will:
Capture and export valid Polycam datasets.
Set up markerless camera calibration in Intel® SceneScape.
Validate and adjust camera pose via 3D UI.
This task is essential for developers who want to simplify calibration by using RGBD scans rather than physical markers.
Prerequisites#
Before You Begin, ensure the following:
Device Requirements: Use an iOS device with LiDAR (iPad Pro 2020+, iPhone 12 Pro+).
Polycam Requirements: Use LiDAR or ROOM mode in Polycam.
Developer Mode: Enable Developer Mode in the app settings to expose raw data export.
SceneScape Installation: Installed and running on the host machine.
Steps to Calibrate Using Markerless Camera Calibration#
1. Generate Polycam Dataset#
Open Polycam and switch to LiDAR mode or ROOM mode.
Enable Developer Mode in settings to allow raw data export.
Capture a scan of the scene. After completion, export the dataset in Raw format.
The exported ZIP will contain:
raw.glbthumbnail.jpgpolycam.mp4mesh_info.jsonkeyframes/(with images, cameras, depth, and confidence maps)
2. Configure Scene in Intel® SceneScape#
Copy the Polycam ZIP dataset to the Intel® SceneScape host machine.
Open Intel® SceneScape and either:
Update an existing scene, or
Create a new scene using the
raw.glbfile in the Map field.
On the Scene configuration page:
Set Calibration Type to
MarkerlessUpload the ZIP file in the Polycam_data field
Click Save
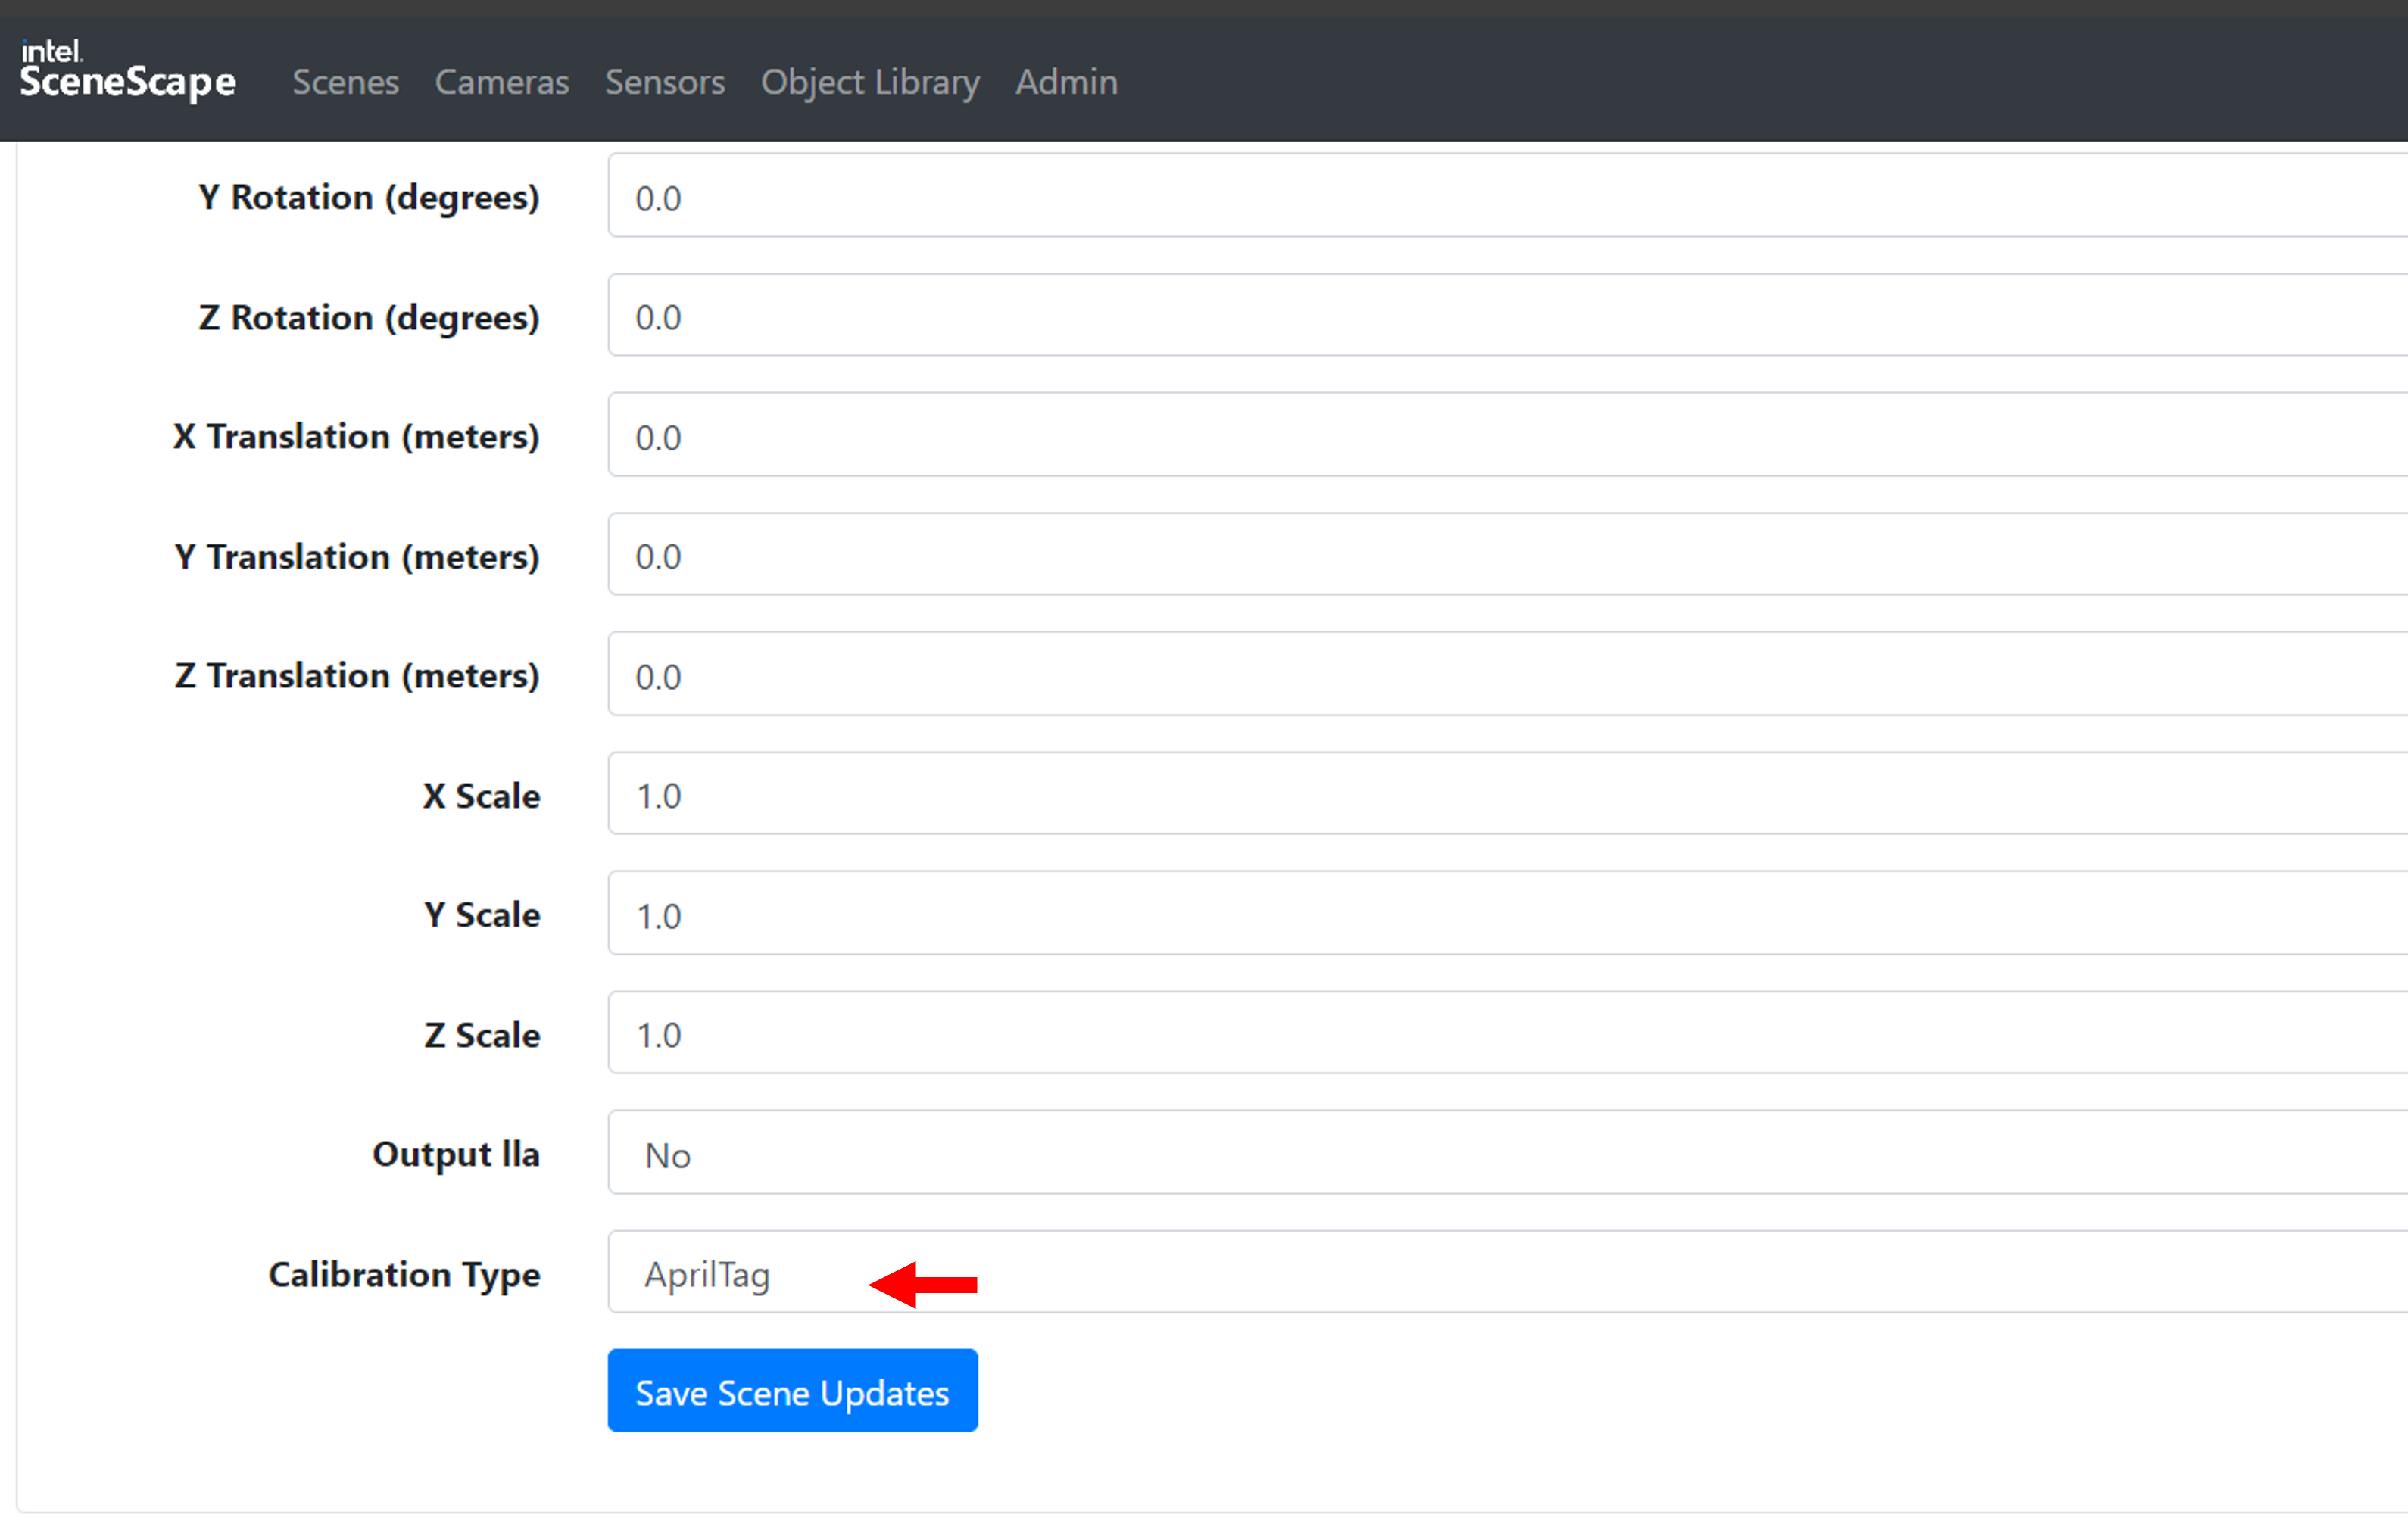
Figure 1: Switch Calibration Type to Markerless.
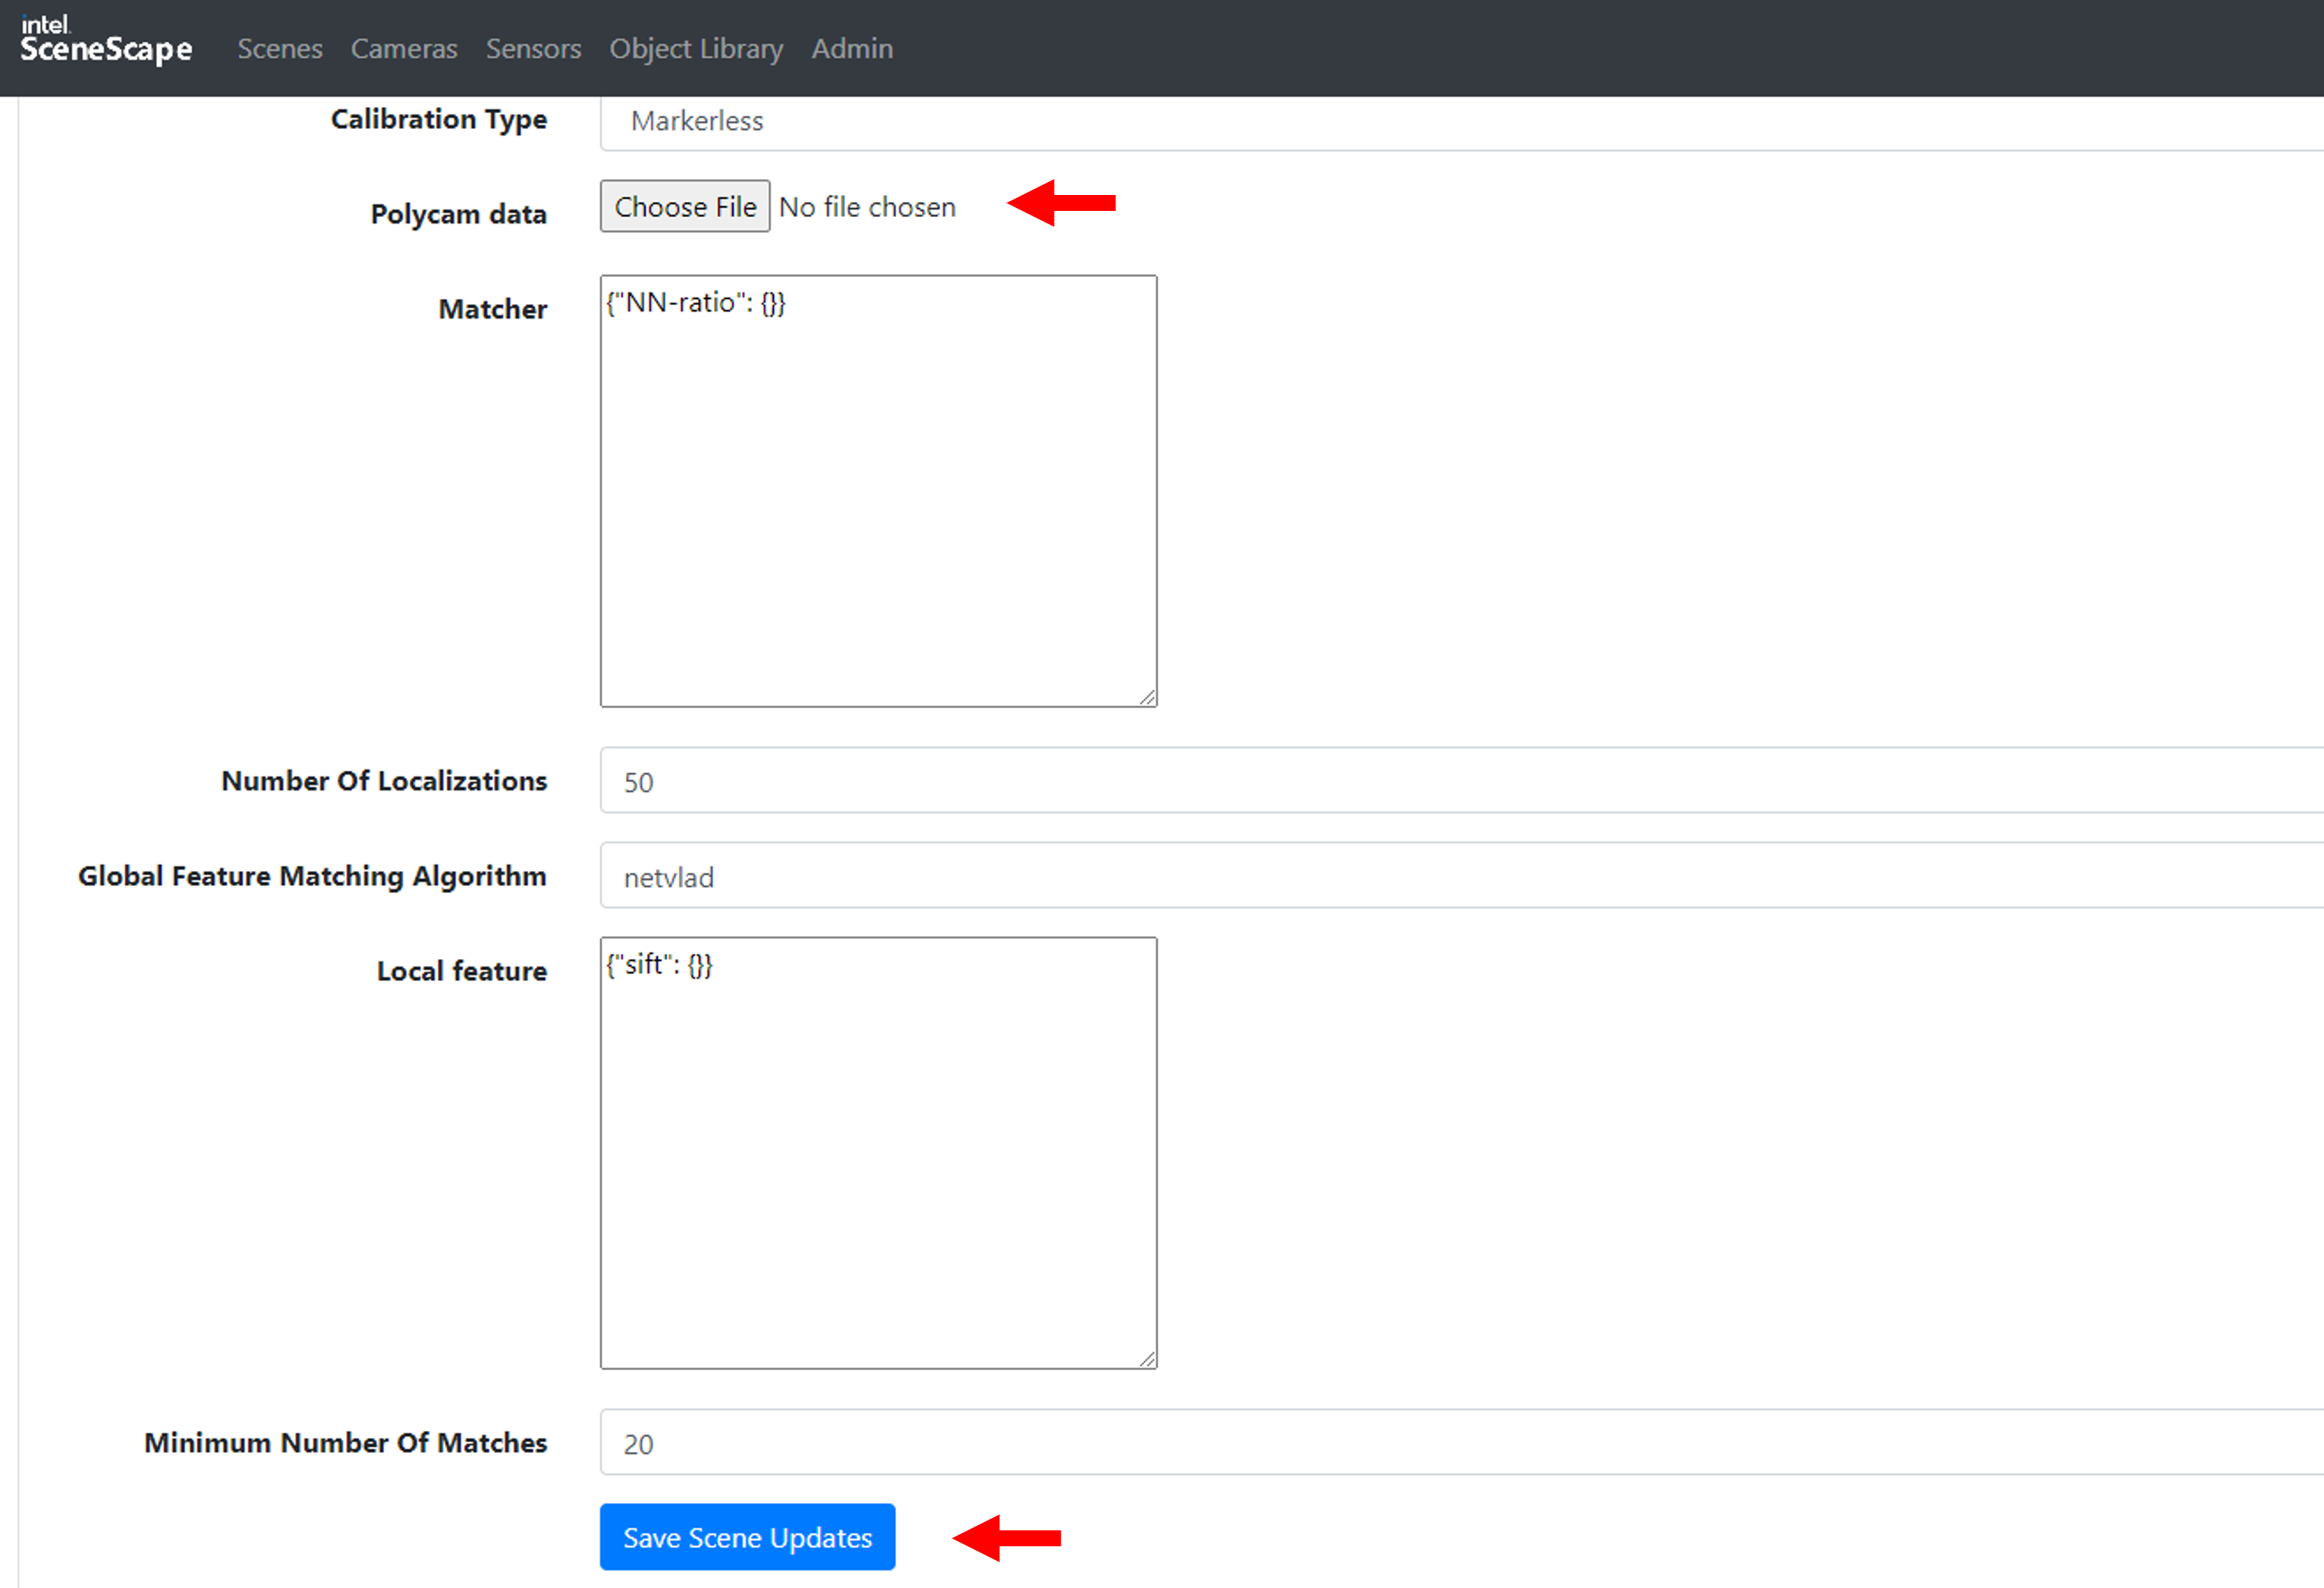
Figure 2: Upload the raw dataset ZIP from Polycam.
3. Perform Calibration in 3D UI#
Add and configure cameras in the Scene.
Go to the 3D UI.
Select a camera, then click Auto Calibrate.
The camera pose will update upon completion.
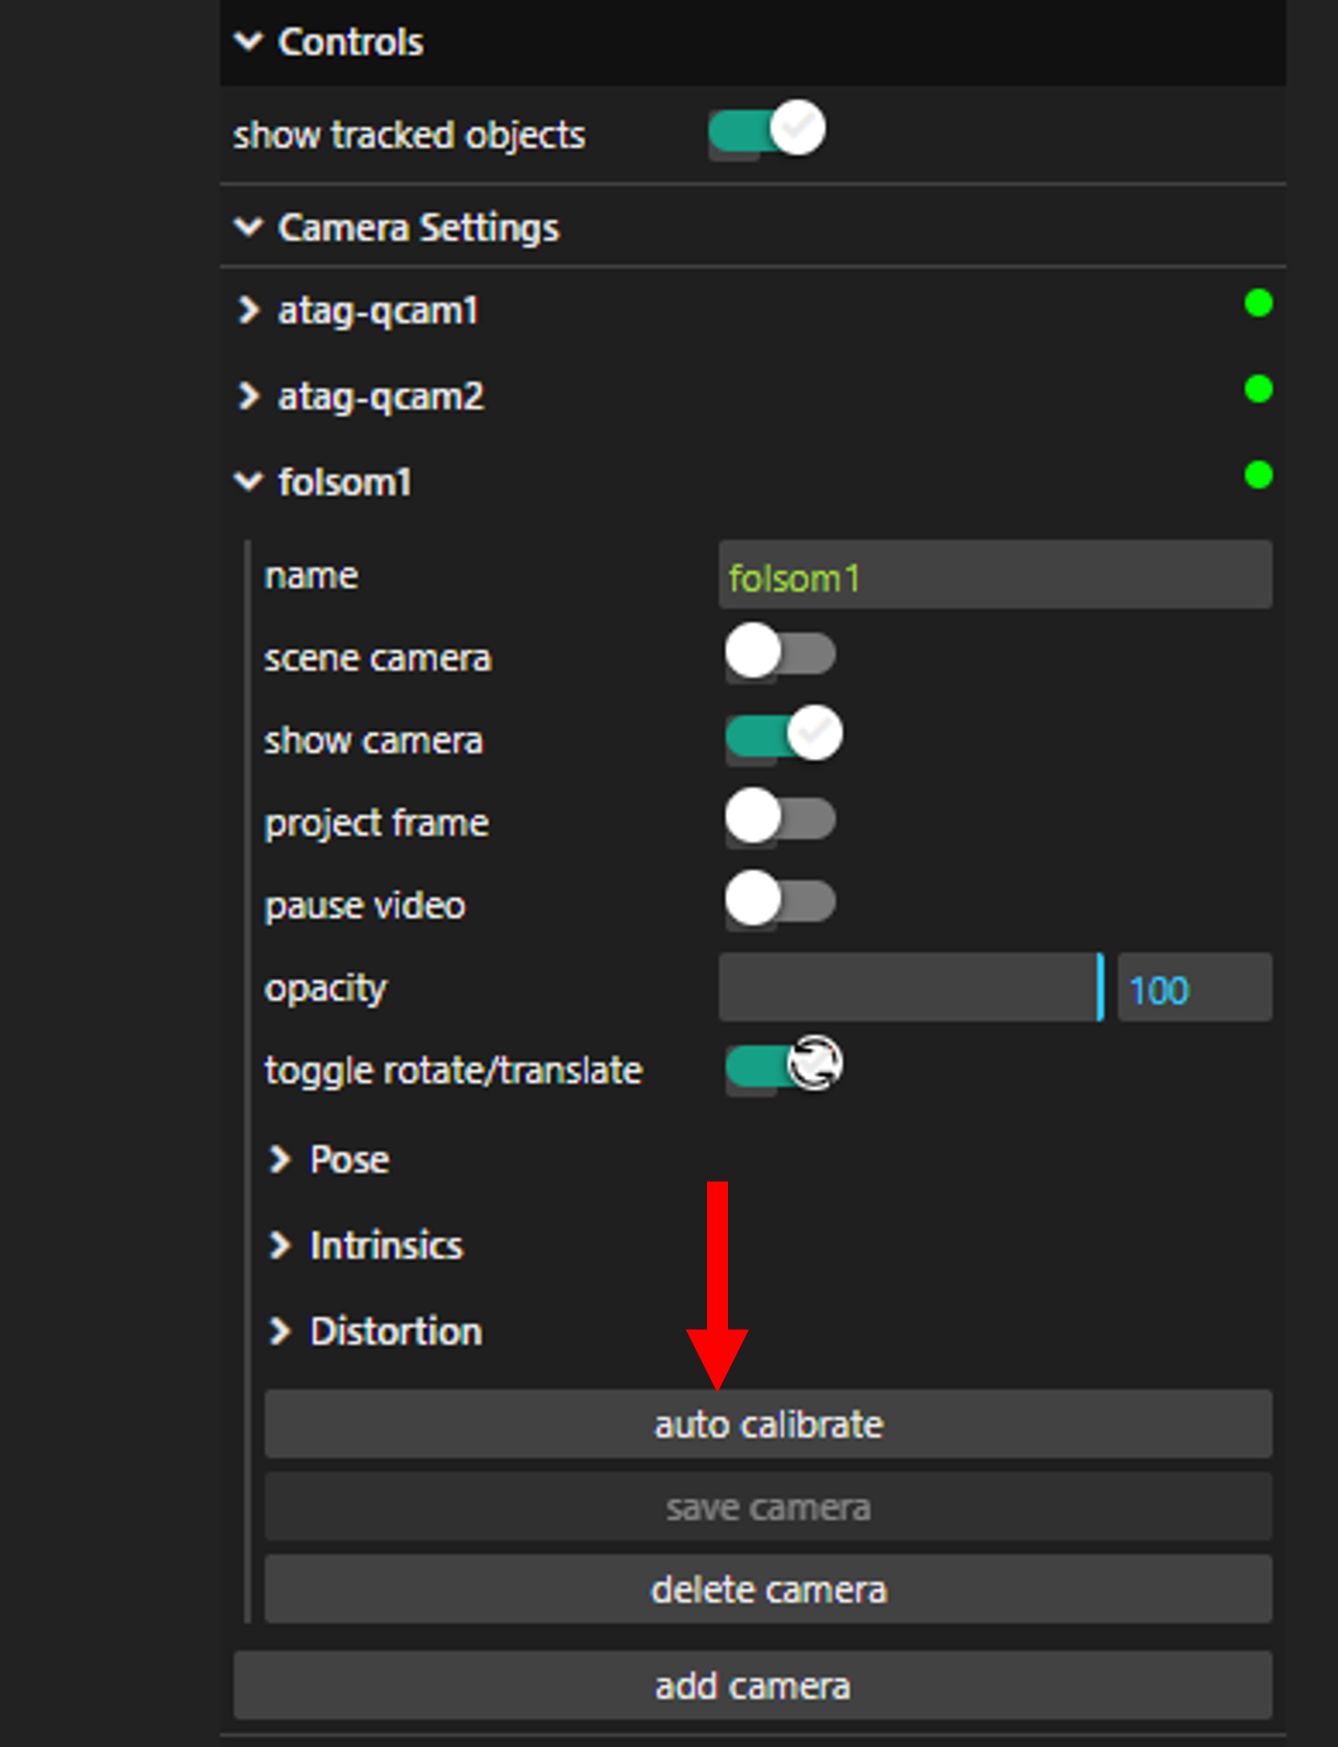
Figure 3: Click the Auto Calibrate button in the 3D UI.
Enable Project Frame to verify pose visually.
Adjust manually if needed, then click Save Camera.

Figure 4: Visualize and save calibrated camera pose.
Note: Markerless calibration does not work in the 2D UI.
Note: Markerless calibration has only been tested with pinhole camera models. Use narrow-FOV cameras with minimal distortion. See Live Scene README for supported camera types.
Customizable Parameters#
Parameter |
Purpose |
Expected Values/Range |
|---|---|---|
Calibration Type |
Specifies the calibration method |
|
Polycam_data |
Raw Polycam dataset ZIP used for markerless calibration |
Valid Polycam ZIP file with RGBD data |
Camera Model |
Defines the camera projection model |
|
Intrinsics |
Camera lens parameters (fx, fy, cx, cy) |
Positive floating-point numbers |
Project Frame |
Overlay camera view frustum on 3D scene |
|
Future Enhancements#
Intel® SceneScape will support more dataset formats beyond Polycam.
Dataset registration and calibration will be optimized for speed.