How to Integrate Intel® Geti™ AI Models with Intel® SceneScape#

This guide provides step-by-step instructions to train and integrate a custom AI model using the Intel® Geti™ platform with Intel® SceneScape. By completing this guide, you will:

  • Train and export a custom AI model from Intel® Geti™.

  • Integrate the model into the Intel® SceneScape pipeline.

  • Validate inference results visually.

This task is important for deploying and validating custom vision models in production scenarios using Intel® SceneScape. If you’re new to Intel® Geti™, review Intel® Geti™

Prerequisites#

Before You Begin, ensure the following:

  • Dependencies Installed: Docker, Docker Compose, and required Geti/SceneScape files.

  • Permissions: Sufficient system access to configure files and run Docker containers.

This guide assumes familiarity with basic machine learning and Docker concepts. If needed, see:

Steps to Integrate Geti AI Models#

  1. Train and Export the Model in Intel® Geti™:

    • Login to your Geti instance Home page

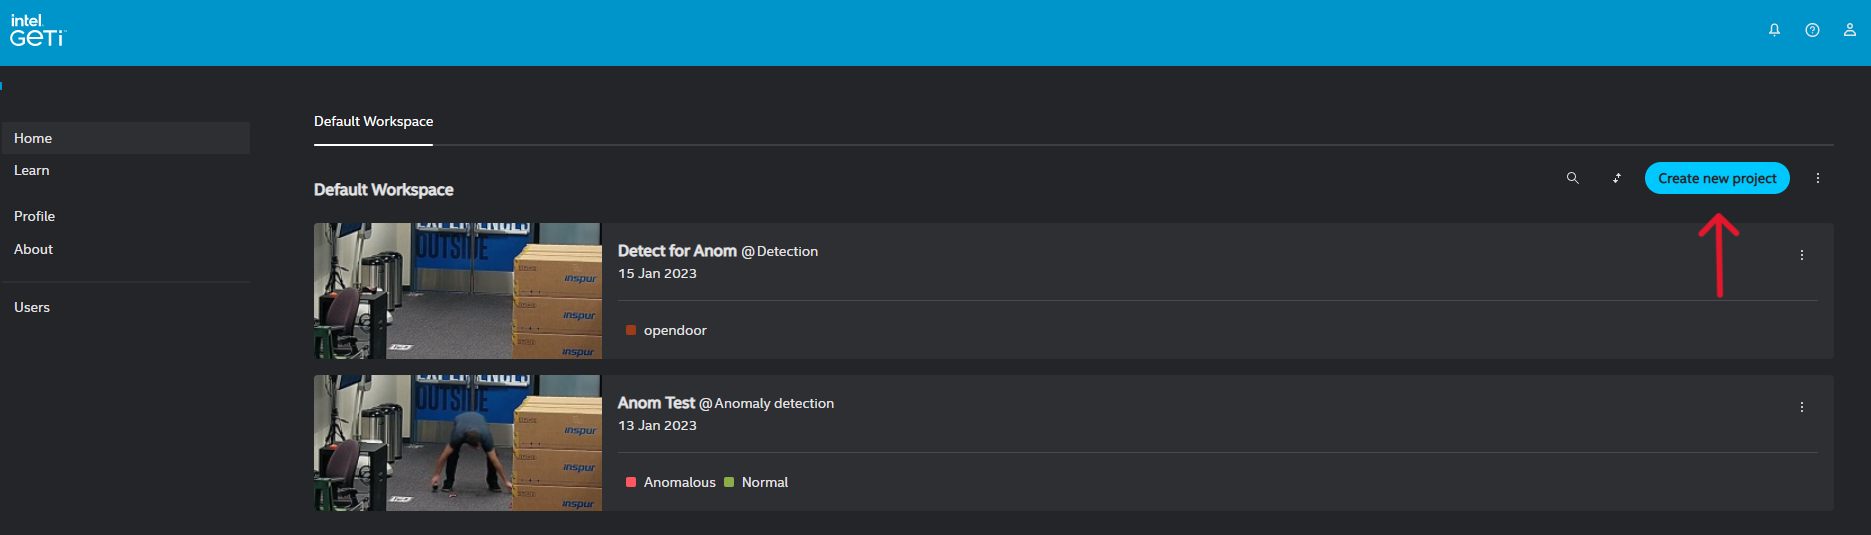
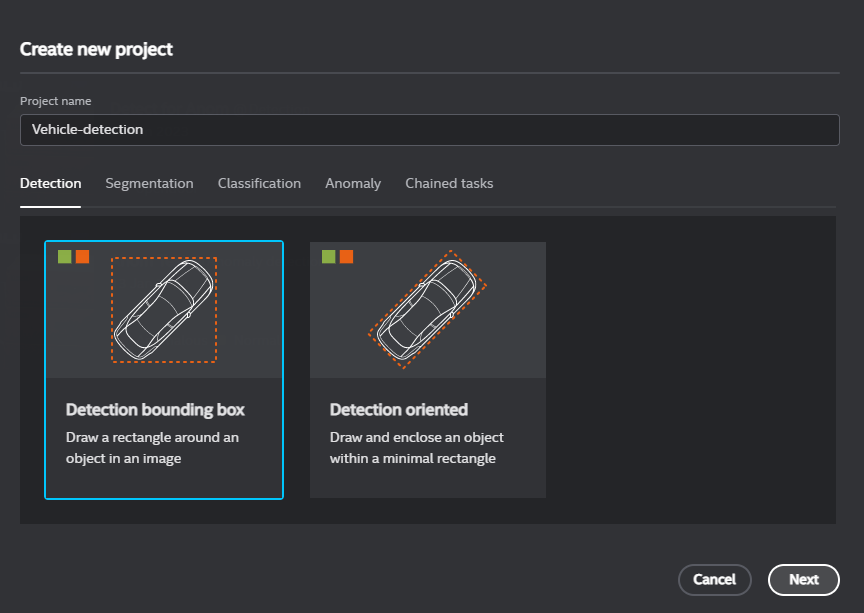
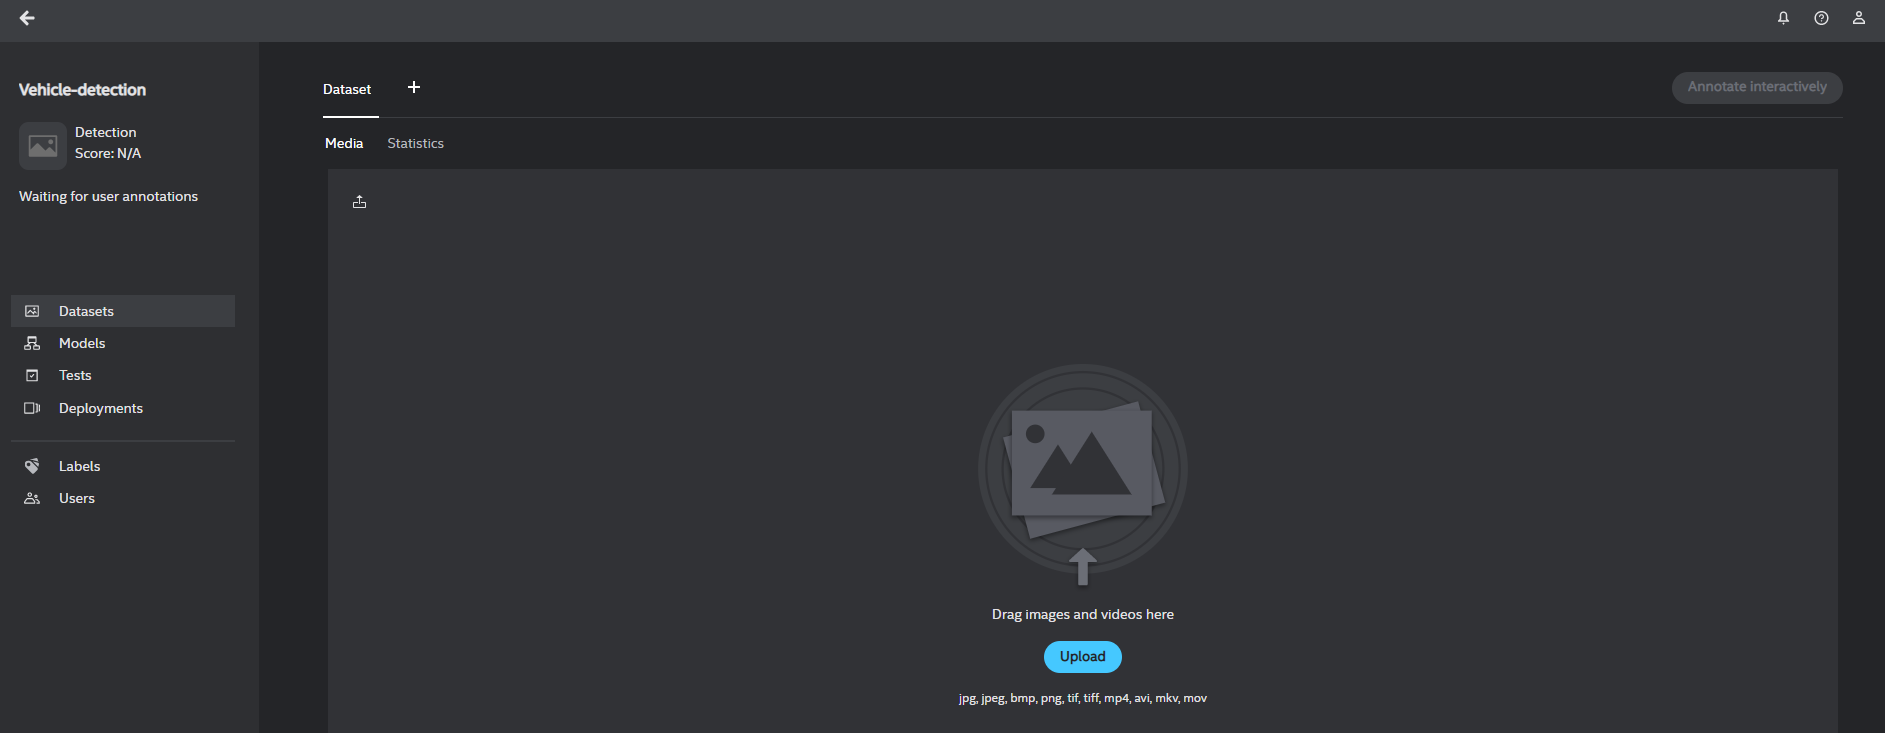
    • Create a project in Geti for your use case. Example: Vehicle-detection create project

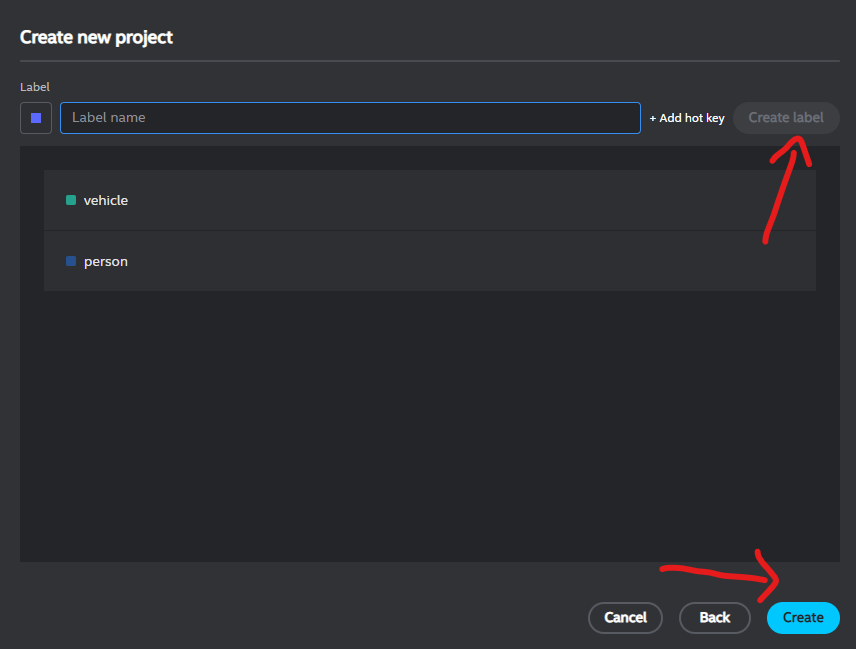
    • Create labels: Add a label for each type of object, by filling in the text box and clicking Create label. Example: vehicle, person create label

    • Upload the data set file/folder: Upload .mp4 video file for vehicle-detection model training upload file

    • Start interactive annotation on your data: Annotation of a minimum of 12 frames is required for model training. The default frame skip is 25. Continue to draw bounding boxes and label the objects (vehicle, person) until you are satisfied with the results and then click Submit >> annotate-vehicle

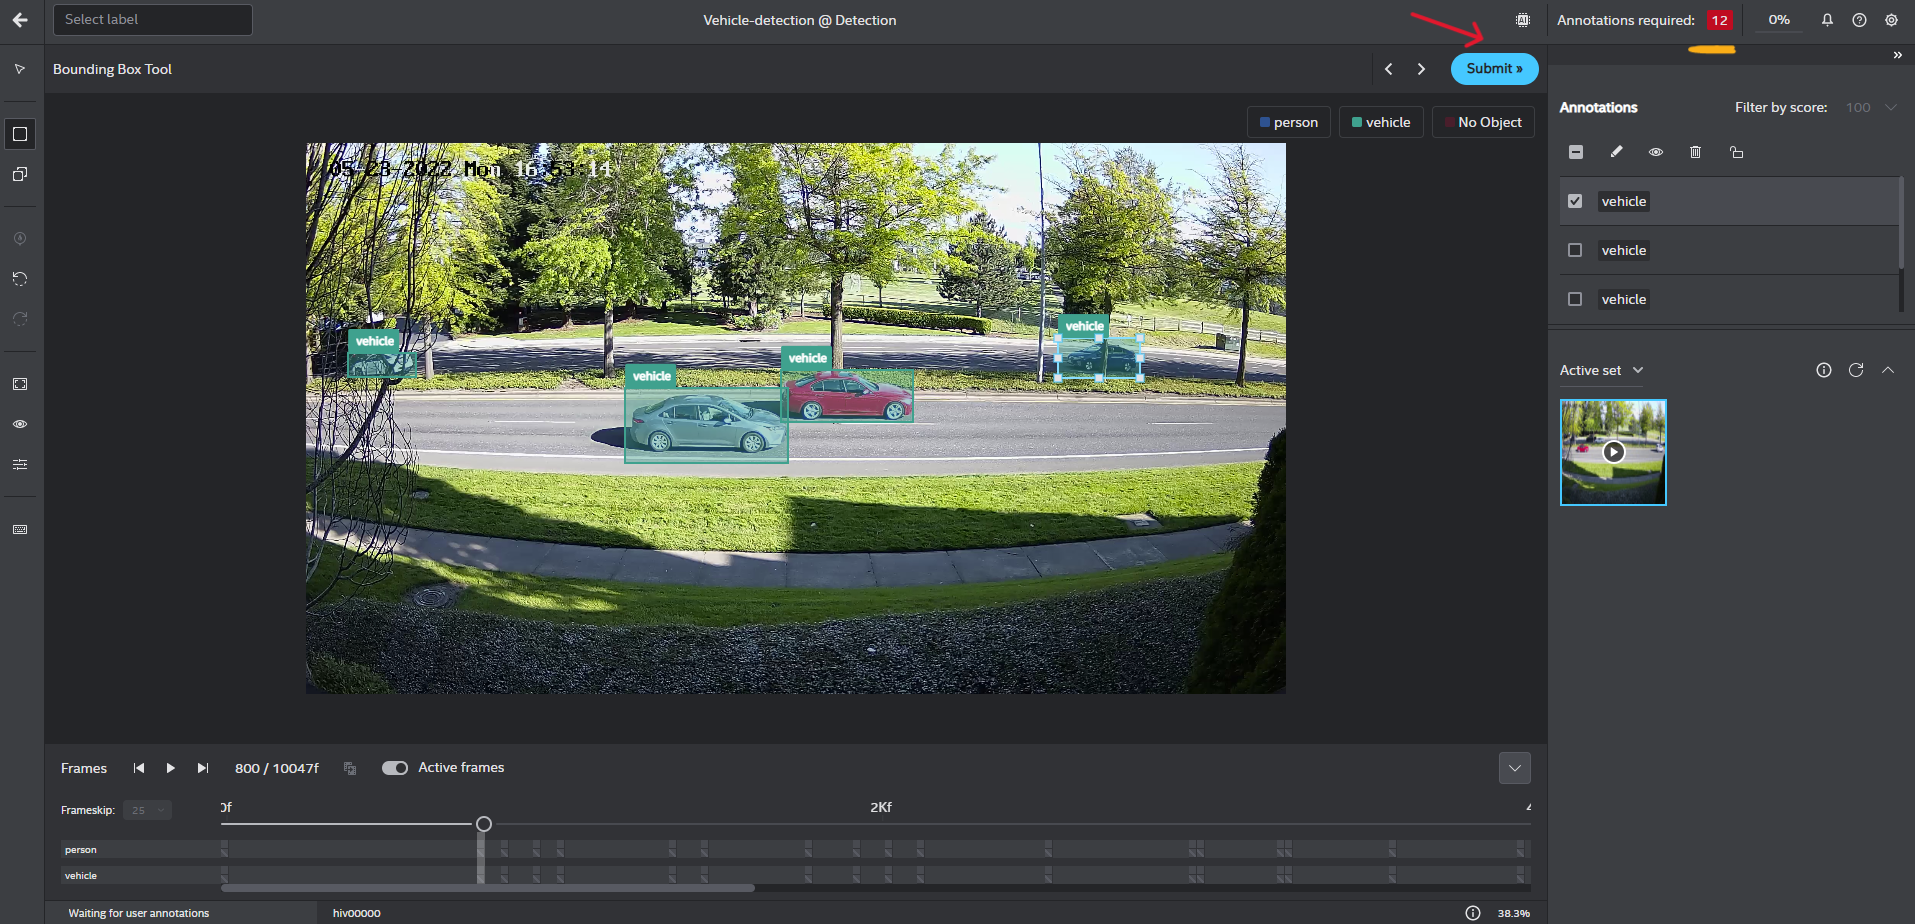
    • Start model training: After annotating all the frames, click on ... beside Annotation required to begin with model training. start model training

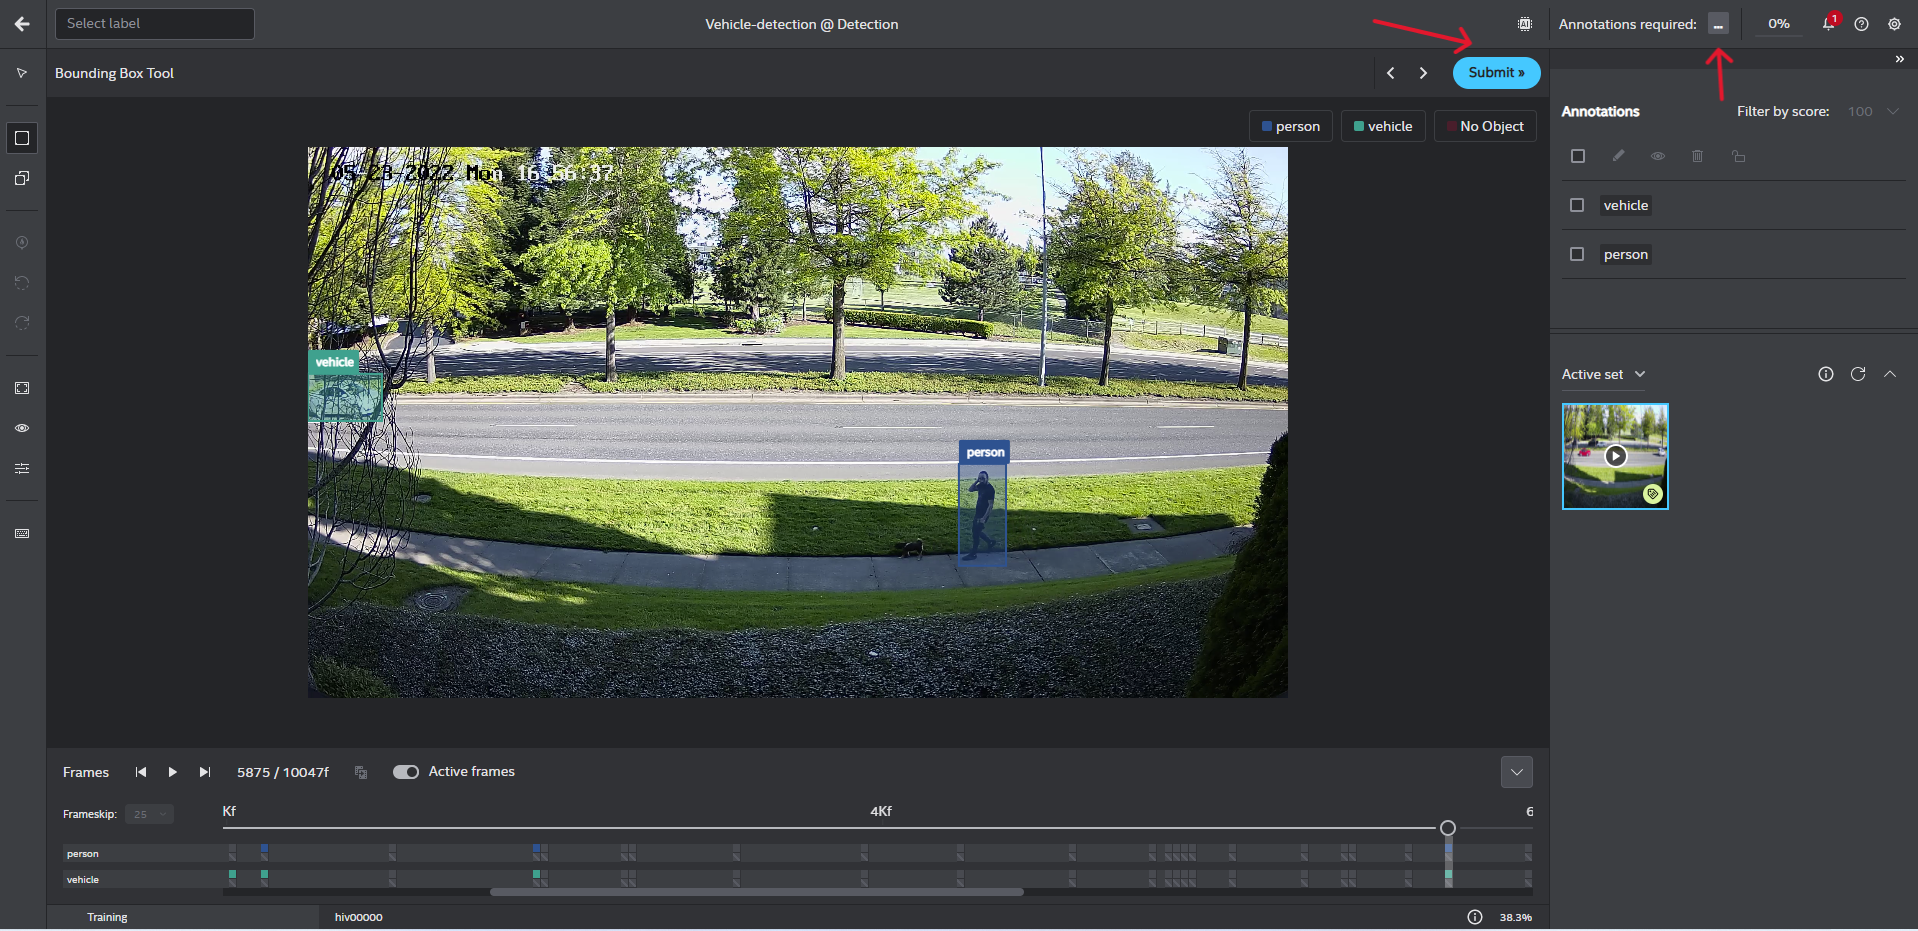
    • Your pre-trained model is ready trained model training

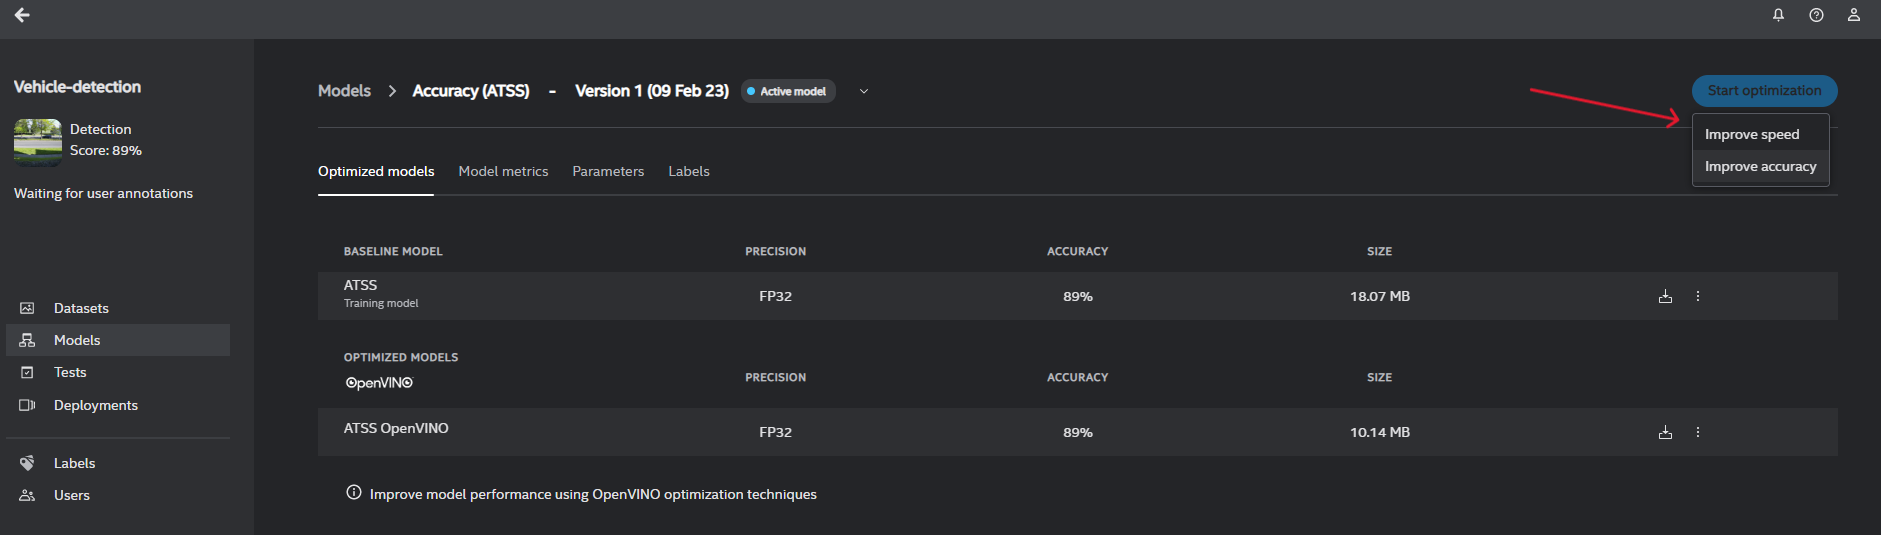
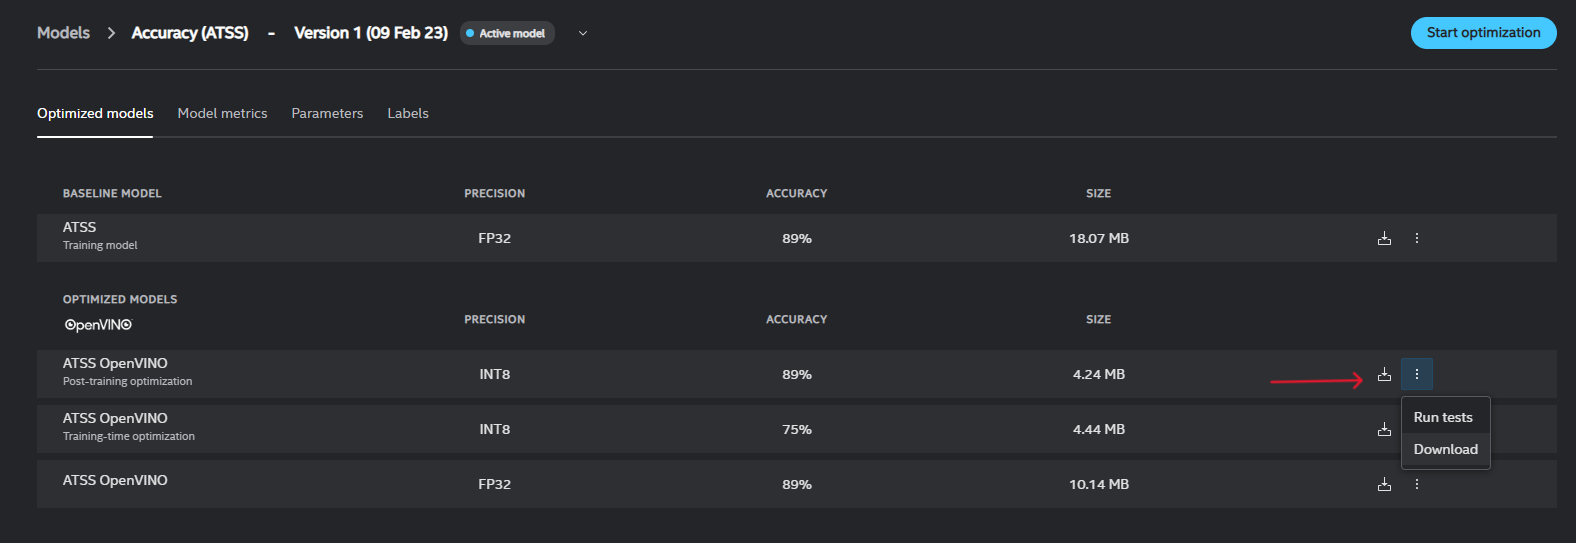
    • Optimize model: Intel® Geti™ builds a baseline model and an OpenVINO™ optimized model. You can improve the model performance using OpenVINO™ optimization techniques. optimized model

    • Download the trained model: Each trained model is exported from Intel® Geti™ as a zip archive that includes a simple demo to visualize the results of model inference. We will only utilize a few files from this archive. download models

    Expected Output:

    • model.xml, model.bin, and config.json under model/.

    Structure of generated zip:

    • model

      • model.xml

      • model.bin

      • config.json

    • python

      • model_wrappers (Optional)

        • __init__.py

        • model_wrappers required to run demo

      • README.md

      • LICENSE

      • demo.py

      • requirements.txt

  2. Prepare the Model Directory:

    • Unzip and move the model files to models/<your_model_name>/ inside Intel® SceneScape.

    • Create a config file: models/<your_model_name>/<your_model_name>.conf.

    [
        {
            "model": "my_custom_model",
            "engine": "GetiDetector",
            "directory": "/opt/intel/openvino/deployment_tools/intel_models/my_custom_model",
            "categories": ["cart", "person"],
            "colorspace": "RGB"
        }
    ]
    
  3. Update docker-compose.yml:

    Modify the video container:

      - "--camerachain=my_custom_model"
      - "--modelconfig=/opt/intel/openvino/deployment_tools/intel_models/my_custom_model/my_custom_model.conf"
    

    video container

  4. Deploy Intel® SceneScape:

    docker compose down --remove-orphans
    docker compose up -d
    

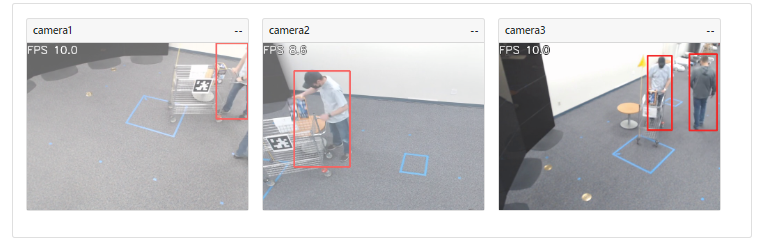
    Log into the Intel® SceneScape UI and verify that bounding boxes appear correctly. Verify object detection inference

Alternate: Using Intel® Geti™ with OpenVINO™ Model Server (OVMS)#

The OVMS has been integrated with Intel® SceneScape to run various OpenVINO™ Open Model Zoo models. Follow these steps to run Intel® Geti™ with OpenVINO™ Model Server:

  1. Place your Intel® Geti™ model in [PROJECT_DIR]/models/ovms. Ensure the directory structure matches the OpenVINO™ Model Server model layout.

  2. Modify docker-compose.yml:

    • Uncomment the ovms section.

    • Uncomment the depends_on for ovms in the video container.

    • Update the model’s name to my_custom_model=ovms.

  3. Update Percebro Model Config:

    In percebro/config/model-config.json, remove the directory attribute and add external_id:

    {
      "model": "my_custom_model",
      "engine": "GetiDetector",
      "keep_aspect": 0,
      "categories": ["cart", "person"],
      "external_id": "my_custom_model"
    }
    
  4. Add Model Entry in ovms-config.json:

    In models/ovms-config.json, add the following:

    {
      "config": {
        "name": "my_custom_model",
        "base_path": "/models/my_custom_model",
        "shape": "auto",
        "batch_size": "1",
        "plugin_config": {
          "PERFORMANCE_HINT": "LATENCY"
        },
        "allow_cache": true
      }
    }
    

    Note: Ensure the name matches the external_id in the model config.

  5. Launch Intel® SceneScape:

    docker compose down --remove-orphans
    docker compose up -d
    

Running YOLOv8 models with Intel® SceneScape detector#

  • Add the exported model into the Intel® SceneScape models directory.

  • Create configuration file my_custom_model.conf, as shown in the Intel® Geti™ models section.

  • The exported model will contain a ‘metadata.yaml’ file, which lists the categories it can detect. Use the "categories" attribute to point to that file.

  • The model might have been trained using RGB data. Use the "colorspace" attribute to specify if so.

  • Verify the name of the xml file, and update accordingly. Note the engine must be set to "YoloV8Detector":

my_custom_model.conf file example:

[
    {
        "_optional_comment" : "Configuration notes",
        "model": "my_custom_model", "engine": "YoloV8Detector", "keep_aspect": 0,
        "directory": "/opt/intel/openvino/deployment_tools/intel_models/my_custom_model",
        "colorspace": "RGB",
        "xml": "my_custom_model.xml",
        "categories": "/opt/intel/openvino/deployment_tools/intel_models/my_custom_model/metadata.yaml"}
]
  • Replace the default model and add the parameter --modelconfig in the video container of docker-compose.yml file as shown below.

     - "--camerachain=my_custom_model"
     - "--modelconfig=/opt/intel/openvino/deployment_tools/intel_models/my_custom_model/my_custom_model.conf"

Configuration Options#

Customizable Parameters#

Parameter

Purpose

Expected Values

engine

Model engine for inference

GetiDetector, YoloV8Detector

colorspace

Input image format

RGB or BGR

categories

Detected classes

Array of strings or .yaml path

xml

Specific .xml file name (YOLOv8 only)

Filename string

Apply Configuration Changes#

  1. Edit Config File: Update your model configuration.

  2. Apply Changes:

    docker compose down --remove-orphans
    docker compose up -d
    

Troubleshooting#

  1. Model not found

    • Cause: OpenVINO™ Model Server throws a “model not found” exception if Percebro starts while the OVMS container is still loading the model config. This only happens when there are many models listed in ovms-config.json and the model that is in use is listed at the bottom

    • Resolution: Move your model to the top of ovms-config.json.

Supporting Resources#