Get Started on Windows#
Smart Classroom for Windows is distributed as a desktop application installer. The app checks and installs the prerequisites, edits the configuration, and starts and stops the backend services, all from one window.
Note
To build the installer yourself, see Build the Installer from Source.
Step 1: Download the Installer#
Check that your machine meets the System Requirements.
Open the Releases page of the repository.
Under Assets of the release you want, download
SmartClassroom-<version>-setup.exe.
Note
The app checks the Intel GPU and NPU drivers but does not install them. Install or update the NPU driver from an administrator account before you start.
Step 2: Install the App#
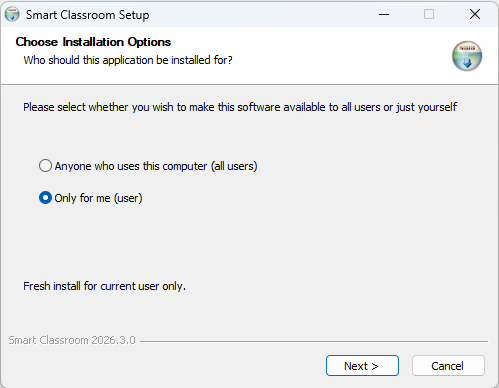
Run SmartClassroom-<version>-setup.exe and follow the installer:
Choose Installation Options: install for Anyone who uses this computer (requires administrator approval) or Only for me.
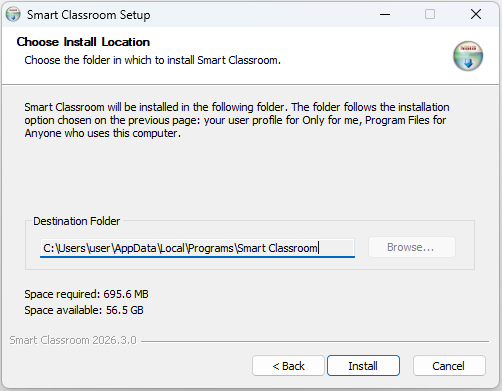
Choose Install Location: shows where the app will be installed. The folder follows the option chosen on the previous page and cannot be changed:
%LOCALAPPDATA%\Programs\Smart Classroomfor Only for me, andC:\Program Files\Smart Classroomfor Anyone who uses this computer.Finish: the installer adds a Smart Classroom shortcut to the desktop and the Start menu, and can launch the app right away.
The installed program folder is not modified while the app runs. Settings, models, the Python environment, sessions, and logs are stored separately for each Windows user, also when the app is installed for everyone; see Where Your Data Is Stored.
Step 3: Let the App Prepare Itself#
Launch Smart Classroom from the desktop or the Start menu. On the first launch the app prepares itself without being asked: it installs Python 3.12 and FFmpeg when they are missing, creates the Python environment and, when grading is enabled, the grading conversion environment and layout detection model. It then starts the backend. Keep the window open until it finishes.
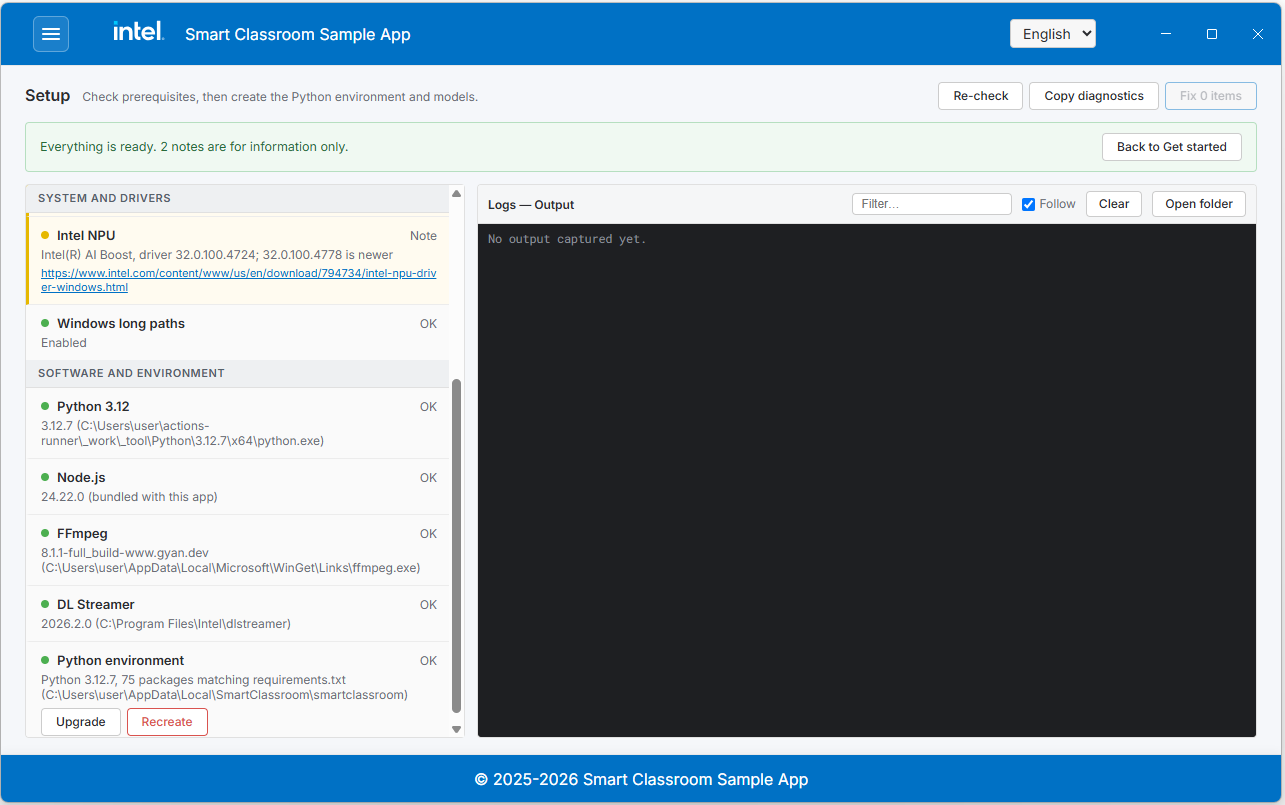
While this runs, the app shows the Get started screen, which lists what is still being worked on. Open Setup to follow the progress in its Output pane. The menu button at the top left switches between screens.
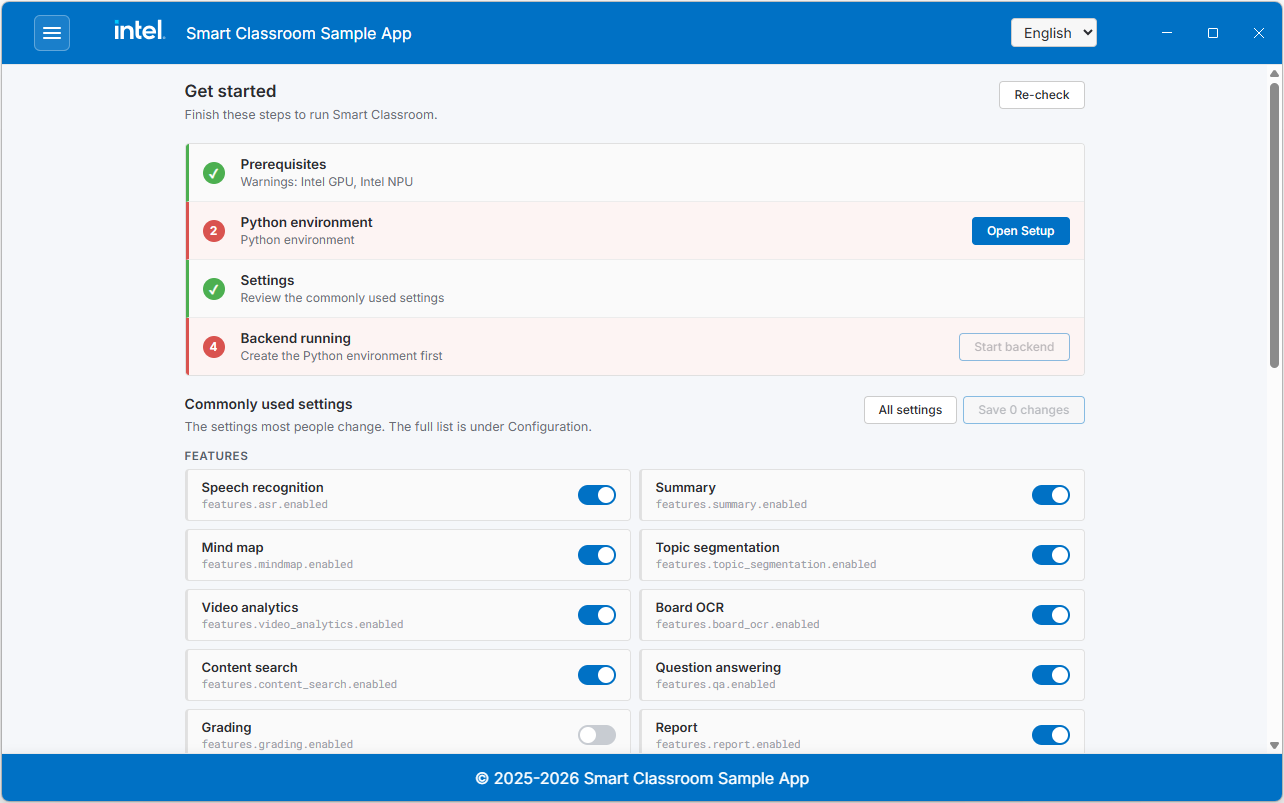
Two items need you, because they show an administrator prompt: enabling Windows long paths, and installing DL Streamer for video analytics. Follow the links on Get started, or open Setup directly, for these and for any step that failed:
Section |
Covers |
|---|---|
System and drivers |
Operating system, processor, memory, free disk space, Intel GPU and NPU drivers, Windows long paths |
Software and environment |
Python 3.12, Node.js (bundled with the app), FFmpeg, DL Streamer, the Python environment, and the grading conversion environment and layout detection model |
Each row shows what was found and what it blocks. Rows the app can fix have a button:
Install for Python, FFmpeg, and Deep Learning Streamer (DL Streamer)
Create for the Python environment and the grading conversion environment
Prepare for the layout detection model
Enable for Windows long paths (shows an administrator prompt)
Fix n items at the top runs everything outstanding in order. Copy diagnostics puts the whole list on the clipboard for a bug report.
Important
If you are behind a proxy, the first launch uses the HTTP_PROXY and HTTPS_PROXY
environment variables of your Windows account. If they are not set, the downloads
fail and Setup shows the failed rows. Set the proxy on the Get started or
Configuration screen, then select Fix n items on Setup to continue.
Note
Creating the Python environment downloads several gigabytes, and preparing the layout detection model downloads and converts it. Both take a while on a first run.
If you close the app before setup finishes, the next launch continues where it stopped.
Step 4: Review the Settings#
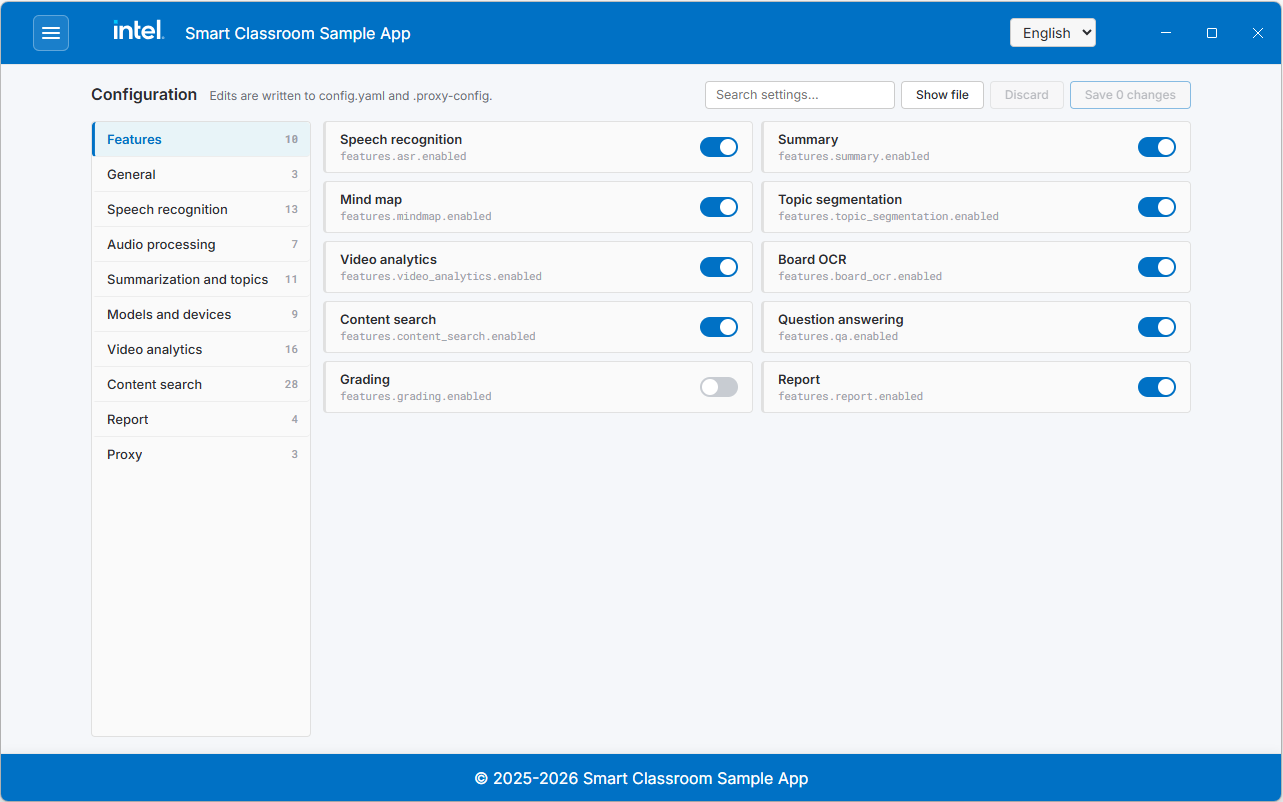
Get started shows the settings most people change. The Configuration screen has
the full list from config.yaml and .proxy-config, grouped and searchable.
Show file opens the file the screen writes to. For what each setting does, see
Configure the Application.
Note
Speaker diarization (identifying who is speaking) is optional and requires a one-time Hugging Face access token. The Get started screen flags this when diarization is enabled without a token; set it under Configuration, or see Speaker Diarization Setup.
Step 5: Check the Backend#
The app starts the backend at every launch once the Python environment exists. If you stopped it, or it failed to start, start it in either of these ways:
Select Start backend on the Get started screen.
Open Services and select Start on the backend row.
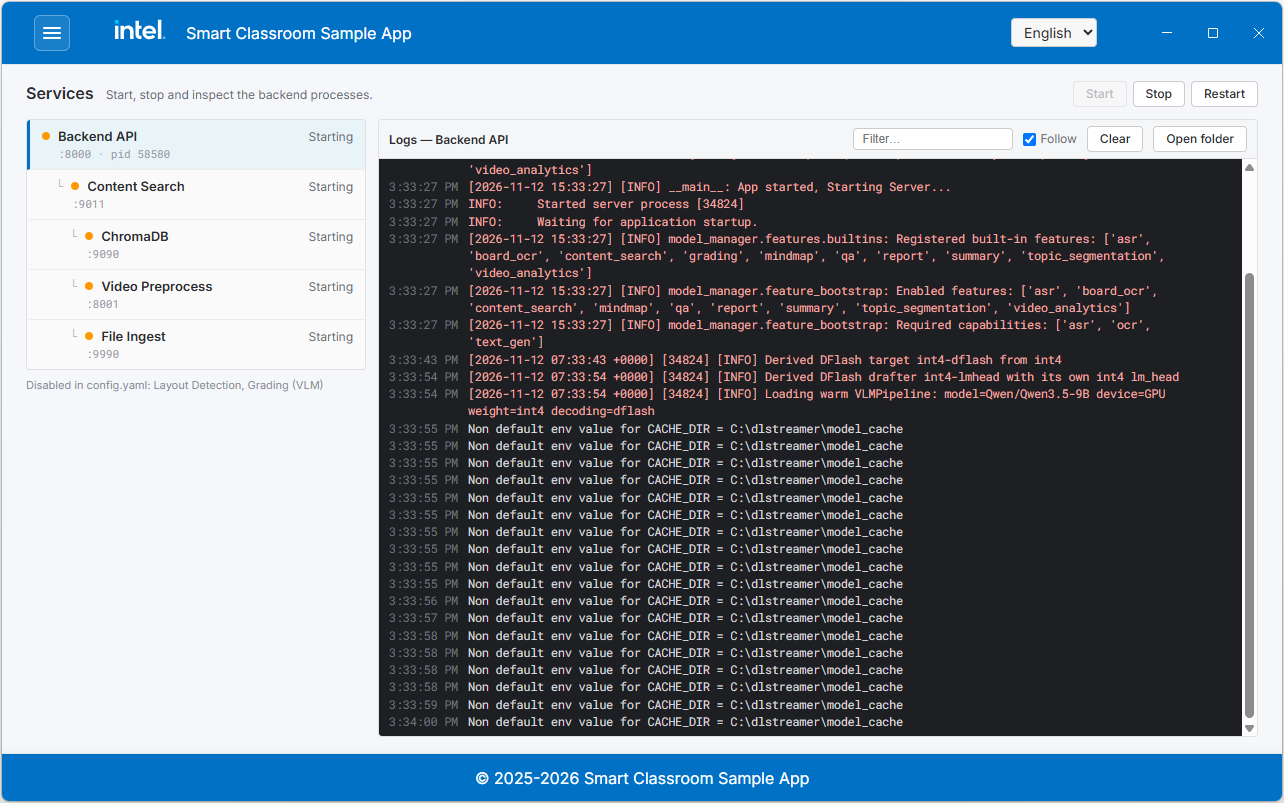
The Services screen shows the backend and every service it starts, with their status and live logs. Use Stop and Restart there as needed. The first start downloads and prepares the AI models, so it takes longer than later starts.
When you save a configuration change while the backend is running, the app offers Restart backend so the change takes effect.
Step 6: Use the App#
Once the backend is running, open Home, Content Search, or Grading from the menu.
Screen |
What it does |
|---|---|
Home |
Audio transcription, summary, mind map, video analytics, and class reports |
Content Search |
Upload materials, search them, and ask questions about them |
Grading |
Grade exam papers against a rubric |
For a walkthrough of each feature, see Application Flow, Content Search Flow, and Grading Flow.
Update to a New Version#
Stop the backend on the Services screen and close the app.
Download and run the newer
SmartClassroom-<version>-setup.exe. It installs over the existing version in the same folder; you do not need to uninstall first.Launch the app and open Setup. If the Python environment row shows Outdated, select Upgrade to match the new release’s requirements.
Models, the Python environments, sessions, and content search data are kept across updates. Your settings are kept too, unless the new version ships different default settings:
On the first start after such an update,
config.yamland the grading configuration are reset to the new defaults, and a message tells you so.The previous files are saved in
logs\config-backupsaspre-update.*.bak. Re-enter the settings you had changed, including the Hugging Face token, on the Configuration screen.Proxy settings (
.proxy-config) are not reset.
Where Your Data Is Stored#
Everything the app writes is under %LOCALAPPDATA%\SmartClassroom\ of the Windows user
running it:
Path |
Contents |
|---|---|
|
Your settings, edited through the Configuration screen |
|
Python environment for the backend |
|
Grading conversion environment |
|
Downloaded and converted AI models |
|
Session recordings, transcripts, summaries, and reports |
|
Uploaded materials and the content search vector database |
|
Grading configuration, uploaded rubrics, and grading results |
|
Service logs (Open folder on the Services screen opens them) and configuration backups, including the |
|
Records which shipped default settings your configuration came from |
|
Download caches |
Automated Deployment#
The installer accepts the standard silent-install options:
# Install silently for the current user
.\SmartClassroom-<version>-setup.exe /S /currentuser

# Install silently for all users (run from an administrator PowerShell)
.\SmartClassroom-<version>-setup.exe /S /allusers
The first-run work on the Setup screen is interactive and cannot be scripted.
Troubleshooting and Uninstall#
See Troubleshooting, Known Issues, and Uninstall the Application.
Learn More#
System Requirements: Hardware, software, supported models, and weight formats.
Advanced Setup Guide: Configuration reference, troubleshooting, and uninstall.
Build the Installer from Source: Build
SmartClassroom-<version>-setup.exeyourself.Application Flow: End-to-end application flow.
Content Search Flow: The flow of the content search functionality.