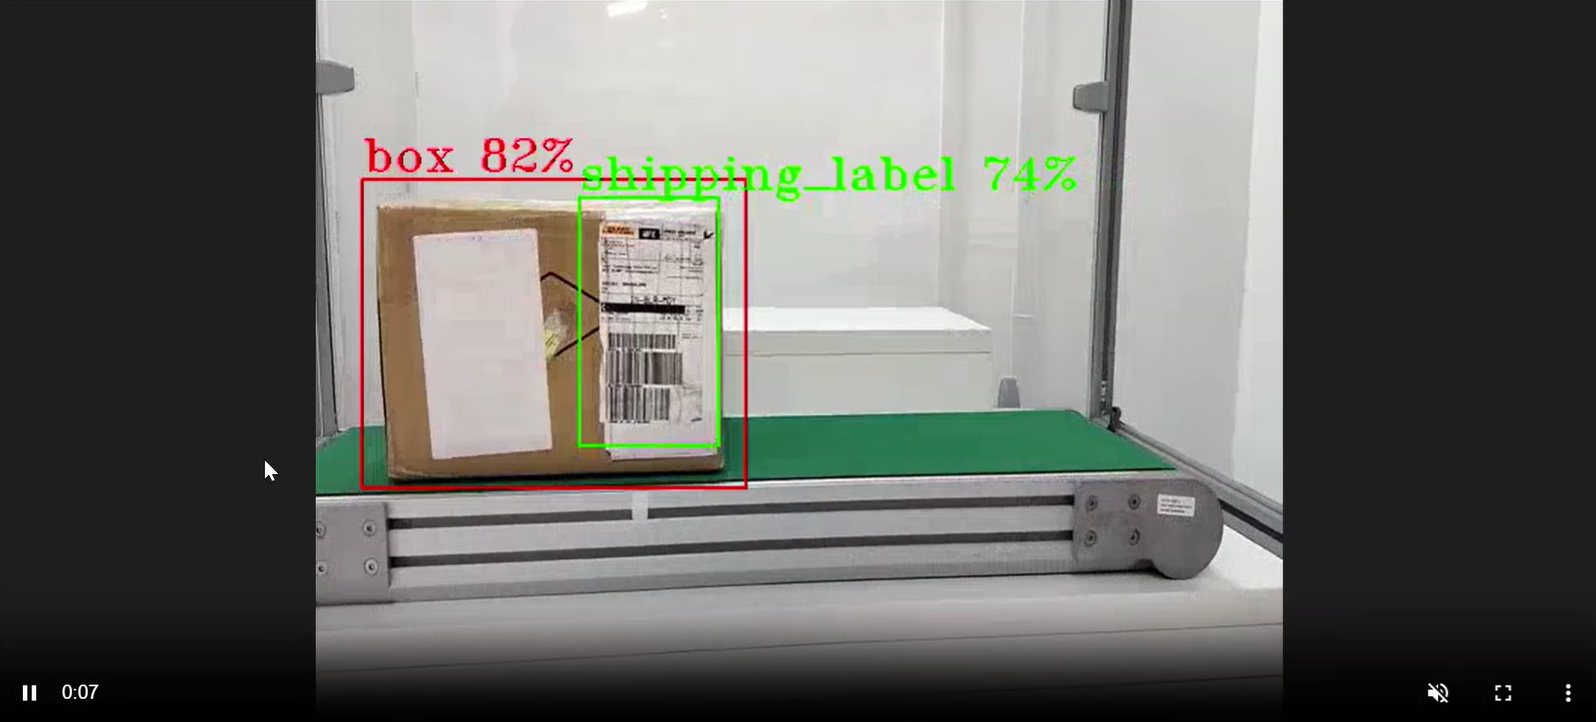
Deploy With Helm#
Prerequisites#
Kubernetes Cluster: Ensure you have a properly installed and configured Kubernetes cluster.
Tools Installed: Install the required tools:
Kubernetes CLI (kubectl)
Helm 3 or later
For Helm installation, refer to Helm website
Intel NFD and Device Plugins (required for GPU/NPU workloads): Install Node Feature Discovery (NFD) and the Intel GPU/NPU device plugins to enable hardware detection and scheduling. This ensures pods requesting GPU or NPU resources are only deployed on nodes with available hardware. Refer to release tags for available versions (tested with
v0.35.0):# Pick a release version compatible with your cluster export RELEASE_VERSION=v0.35.0 # Step 1: Create namespace for the Intel device plugins kubectl create namespace intel-device-plugins # Step 2: Allow privileged pods in the device plugin namespace # Required because the plugin needs hostPath mounts and access to host device files. kubectl label namespace intel-device-plugins \ pod-security.kubernetes.io/enforce=privileged \ pod-security.kubernetes.io/audit=privileged \ pod-security.kubernetes.io/warn=privileged \ --overwrite # Step 3: Install Node Feature Discovery (NFD) # NFD uses its own namespace: node-feature-discovery kubectl apply -k "https://github.com/intel/intel-device-plugins-for-kubernetes/deployments/nfd?ref=${RELEASE_VERSION}" # Step 4: Allow privileged pods in the NFD namespace kubectl label namespace node-feature-discovery \ pod-security.kubernetes.io/enforce=privileged \ pod-security.kubernetes.io/audit=privileged \ pod-security.kubernetes.io/warn=privileged \ --overwrite # Step 5: Install Intel GPU NodeFeatureRules # These rules let NFD detect and label Intel GPU nodes. kubectl apply -k "https://github.com/intel/intel-device-plugins-for-kubernetes/deployments/nfd/overlays/node-feature-rules?ref=${RELEASE_VERSION}" # Step 6: Verify NFD pods are running kubectl get pods -n node-feature-discovery # Step 7: Verify the node got Intel GPU and NPU labels kubectl get node $(hostname) --show-labels | tr ',' '\n' | grep intel # Step 8: Install the Intel GPU device plugin kubectl apply -n intel-device-plugins -k "https://github.com/intel/intel-device-plugins-for-kubernetes/deployments/gpu_plugin/overlays/nfd_labeled_nodes?ref=${RELEASE_VERSION}" # Step 9: Install the Intel NPU device plugin kubectl apply -n intel-device-plugins -k "https://github.com/intel/intel-device-plugins-for-kubernetes/deployments/npu_plugin/overlays/nfd_labeled_nodes?ref=${RELEASE_VERSION}"
Verify the Intel Device Plugin pods are running:
kubectl get pods -n intel-device-plugins
Verify the GPU and NPU resources are advertised on nodes:
kubectl get nodes -o json | jq '.items[] | {name: .metadata.name, gpu: .status.allocatable["gpu.intel.com/i915"], npu: .status.allocatable["npu.intel.com/accel"]}'
Note: If your node uses Intel Xe discrete GPUs (Arc), set
gpu:to.status.allocatable["gpu.intel.com/xe"].
Setup the application#
Note: The following instructions assume Kubernetes is already running in the host system with Helm package manager installed.
Clone the edge-ai-suites repository and change into industrial-edge-insights-vision directory. The directory contains the utility scripts required in the instructions that follows.
git clone https://github.com/open-edge-platform/edge-ai-suites.git -b release-2026.1.0
cd edge-ai-suites/manufacturing-ai-suite/industrial-edge-insights-vision/
Set app specific values.yaml file.
cp helm/values_pallet-defect-detection.yaml helm/values.yaml
Optional: Pull the helm chart and replace the existing helm folder with it
Note: The helm chart should be downloaded when you are not using the helm chart provided in
edge-ai-suites/manufacturing-ai-suite/industrial-edge-insights-vision/helmDownload helm chart with the following command
helm pull oci://registry-1.docker.io/intel/pallet-defect-detection-reference-implementation --version 2.7.0
Unzip the package using the following command
tar -xvf pallet-defect-detection-reference-implementation-2.7.0.tgz
Replace the helm directory
rm -rf helm && mv pallet-defect-detection-reference-implementation helm
Edit the HOST_IP, proxy and other environment variables in
helm/values.yamlas follows:env: HOST_IP: <HOST_IP> # host IP address MINIO_ACCESS_KEY: <DATABASE USERNAME> # example: minioadmin MINIO_SECRET_KEY: <DATABASE PASSWORD> # example: minioadmin http_proxy: <http proxy> # proxy details if behind proxy https_proxy: <https proxy> SAMPLE_APP: pallet-defect-detection # application directory webrtcturnserver: username: <username> # WebRTC credentials e.g. intel1234 password: <password>
Note: To run the pipeline on GPU, set
gpu.enabled:trueinvalues.yaml. To run the pipeline on NPU, setnpu.enabled:true- this also requires a GPU resource since NPU pipelines use VA-API (GPU) for video decoding. For Intel Arc (Xe) discrete GPUs, setgpu.type: "gpu.intel.com/xe".Install prerequisites. Run with sudo if needed.
./setup.sh helmThis sets up application prerequisites, download artifacts, sets executable permissions for scripts, etc. Downloaded resource directories.
Deploy the application#
Install the helm chart
helm install app-deploy helm -n apps --create-namespace
After installation, check the status of the running pods:
kubectl get pods -n apps
To view logs of a specific pod, replace
<pod_name>with the actual pod name from the output above:kubectl logs -n apps -f <pod_name>
Copy the resources such as video and model from local directory to the
dlstreamer-pipeline-serverpod to make them available for application while launching pipelines.# Below is an example for Pallet Defect Detection. Please adjust the source path of models and videos appropriately for other sample applications. POD_NAME=$(kubectl get pods -n apps -o jsonpath='{.items[*].metadata.name}' | tr ' ' '\n' | grep deployment-dlstreamer-pipeline-server | head -n 1) kubectl cp resources/pallet-defect-detection/videos/warehouse.avi $POD_NAME:/home/pipeline-server/resources/videos/ -c dlstreamer-pipeline-server -n apps kubectl cp resources/pallet-defect-detection/models/* $POD_NAME:/home/pipeline-server/resources/models/ -c dlstreamer-pipeline-server -n apps
Fetch the list of pipeline loaded available to launch
./sample_list.sh helmThis lists the pipeline loaded in DL Streamer Pipeline Server.
Output:
# Example output for Pallet Defect Detection
Environment variables loaded from /home/intel/OEP/edge-ai-suites/manufacturing-ai-suite/industrial-edge-insights-vision/.env
Running sample app: pallet-defect-detection
Checking status of dlstreamer-pipeline-server...
Server reachable. HTTP Status Code: 200
Loaded pipelines:
[
    ...
    {
        "description": "DL Streamer Pipeline Server pipeline",
        "name": "user_defined_pipelines",
        "parameters": {
        "properties": {
            "detection-properties": {
            "element": {
                "format": "element-properties",
                "name": "detection"
            }
            }
        },
        "type": "object"
        },
        "type": "GStreamer",
        "version": "pallet_defect_detection"
    }
    ...
]
Start the sample application with a pipeline.
./sample_start.sh helm -p pallet_defect_detection
This command looks for the payload for the pipeline specified in
-pargument above, inside thepayload.jsonfile and launches a pipeline instance in DL Streamer Pipeline Server. Refer to the table to learn about different options available.Output:
# Example output for Pallet Defect Detection
Environment variables loaded from /home/intel/OEP/edge-ai-suites/manufacturing-ai-suite/industrial-edge-insights-vision/.env
Running sample app: pallet-defect-detection
Checking status of dlstreamer-pipeline-server...
Server reachable. HTTP Status Code: 200
Loading payload from /home/intel/OEP/edge-ai-suites/manufacturing-ai-suite/industrial-edge-insights-vision/helm/apps/pallet-defect-detection/payload.json
Payload loaded successfully.
Starting pipeline: pallet_defect_detection
Launching pipeline: pallet_defect_detection
Extracting payload for pipeline: pallet_defect_detection
Found 1 payload(s) for pipeline: pallet_defect_detection
Payload for pipeline 'pallet_defect_detection' {"source":{"uri":"file:///home/pipeline-server/resources/videos/warehouse.avi","type":"uri"},"destination":{"frame":{"type":"webrtc","peer-id":"pdd"}},"parameters":{"detection-properties":{"model":"/home/pipeline-server/resources/models/models/pallet-defect-detection/model.xml","device":"CPU"}}}
Posting payload to REST server at http://<HOST_IP>:30107/pipelines/user_defined_pipelines/pallet_defect_detection
Payload for pipeline 'pallet_defect_detection' posted successfully. Response: "99ac50d852b511f09f7c2242868ff651"
Note: This starts the pipeline. You can view the inference stream on WebRTC by opening a browser and navigating to
https://<HOST_IP>:30443/mediamtx/pdd/for Pallet Defect Detection. If you are running Helm using anNGINX_HTTPS_PORTother than the default 30443, replace<HOST_IP>with<HOST_IP>:<NGINX_HTTPS_PORT>.
Starting GPU and NPU based pipelines#
For GPU and NPU based pipelines, ensure you have done the necessary setup from here, and start the respective pipelines as following.
For GPU-based pipelines:
./sample_start.sh helm -p pallet_defect_detection_gpu
For NPU-based pipelines:
./sample_start.sh helm -p pallet_defect_detection_npu
Get status of pipeline instance(s) running.
./sample_status.sh helmThis command lists status of pipeline instances launched during the lifetime of sample application.
Output:
# Example output for Pallet Defect Detection
Environment variables loaded from /home/intel/OEP/edge-ai-suites/manufacturing-ai-suite/industrial-edge-insights-vision/.env
Running sample app: pallet-defect-detection
[
{
    "avg_fps": 30.00446179356829,
    "elapsed_time": 36.927825689315796,
    "id": "99ac50d852b511f09f7c2242868ff651",
    "message": "",
    "start_time": 1750956469.620569,
    "state": "RUNNING"
}
]
Stop pipeline instance.
./sample_stop.sh helmThis command will stop all instances that are currently in
RUNNINGstate and respond with the last status.Output:
# Example output for Pallet Defect Detection
No pipelines specified. Stopping all pipeline instances
Environment variables loaded from /home/intel/OEP/edge-ai-suites/manufacturing-ai-suite/industrial-edge-insights-vision/.env
Running sample app: pallet-defect-detection
Checking status of dlstreamer-pipeline-server...
Server reachable. HTTP Status Code: 200
Instance list fetched successfully. HTTP Status Code: 200
Found 1 running pipeline instances.
Stopping pipeline instance with ID: 99ac50d852b511f09f7c2242868ff651
Pipeline instance with ID '99ac50d852b511f09f7c2242868ff651' stopped successfully. Response: {
"avg_fps": 30.01631239459745,
"elapsed_time": 49.30651903152466,
"id": "99ac50d852b511f09f7c2242868ff651",
"message": "",
"start_time": 1750960037.1471195,
"state": "RUNNING"
}
If you wish to stop a specific instance, you can provide it with an
--idargument to the command. For example,./sample_stop.sh helm --id 99ac50d852b511f09f7c2242868ff651Uninstall the Helm chart.
helm uninstall app-deploy -n apps
Storing frames to S3 storage#
Applications can take advantage of the S3 publish feature from DL Streamer Pipeline Server and use it to save frames to an S3 compatible storage.
Run all the steps mentioned in above section to setup the application.
Install the Helm chart.
helm install app-deploy helm -n apps --create-namespace
Copy the resources such as video and model from local directory to the
dlstreamer-pipeline-serverpod to make them available for application while launching pipelines.# Below is an example for Pallet Defect Detection. Please adjust the source path of models and videos appropriately for other sample applications. POD_NAME=$(kubectl get pods -n apps -o jsonpath='{.items[*].metadata.name}' | tr ' ' '\n' | grep deployment-dlstreamer-pipeline-server | head -n 1) kubectl cp resources/pallet-defect-detection/videos/warehouse.avi $POD_NAME:/home/pipeline-server/resources/videos/ -c dlstreamer-pipeline-server -n apps kubectl cp resources/pallet-defect-detection/models/* $POD_NAME:/home/pipeline-server/resources/models/ -c dlstreamer-pipeline-server -n apps
Install the package
boto3in your python environment if not installed.It is recommended to create a virtual environment and install it there. You can run the following commands to add the necessary dependencies as well as create and activate the environment.
sudo apt update && \
sudo apt install -y python3 python3-pip python3-venv
python3 -m venv venv && \
source venv/bin/activate
Once the environment is ready, install
boto3with the following commandpip3 install --upgrade pip && \ pip3 install boto3==1.36.17
Note: DL Streamer Pipeline Server expects the bucket to be already present in the database. The next step will help you create one.
Create an S3 bucket using the following script.
Update the
HOST_IPand credentials with that of the running MinIO server. Usecreate_bucket.pyas the file name.import boto3 url = "http://<HOST_IP>:30800" user = "<value of MINIO_ACCESS_KEY used in helm/values.yaml>" password = "<value of MINIO_SECRET_KEY used in helm/values.yaml>" bucket_name = "ecgdemo" client= boto3.client( "s3", endpoint_url=url, aws_access_key_id=user, aws_secret_access_key=password ) client.create_bucket(Bucket=bucket_name) buckets = client.list_buckets() print("Buckets:", [b["Name"] for b in buckets.get("Buckets", [])])
Run the above script to create the bucket.
python3 create_bucket.pyStart the pipeline with the following cURL command with
<HOST_IP>set to system IP. Ensure to give the correct path to the model as seen below. This example starts an AI pipeline.Note: If you are running helm using an NGINX_HTTPS_PORT other than the default 30443, replace
<HOST_IP>with<HOST_IP>:<NGINX_HTTPS_PORT>.curl -k https://<HOST_IP>:30443/api/pipelines/user_defined_pipelines/pallet_defect_detection_s3write -X POST -H 'Content-Type: application/json' -d '{ "source": { "uri": "file:///home/pipeline-server/resources/videos/warehouse.avi", "type": "uri" }, "destination": { "frame": { "type": "webrtc", "peer-id": "pdds3" } }, "parameters": { "detection-properties": { "model": "/home/pipeline-server/resources/models/pallet-defect-detection/deployment/Detection/model/model.xml", "device": "CPU" } } }'
Go to MinIO console on
https://<HOST_IP>:30443/minio/and login withMINIO_ACCESS_KEYandMINIO_SECRET_KEYprovided inhelm/values.yamlfile. After logging into console, you can go toecgdemobucket and check the frames stored.Note: If you are running helm using an NGINX_HTTPS_PORT other than the default 30443, replace 30443 with <NGINX_HTTPS_PORT>.
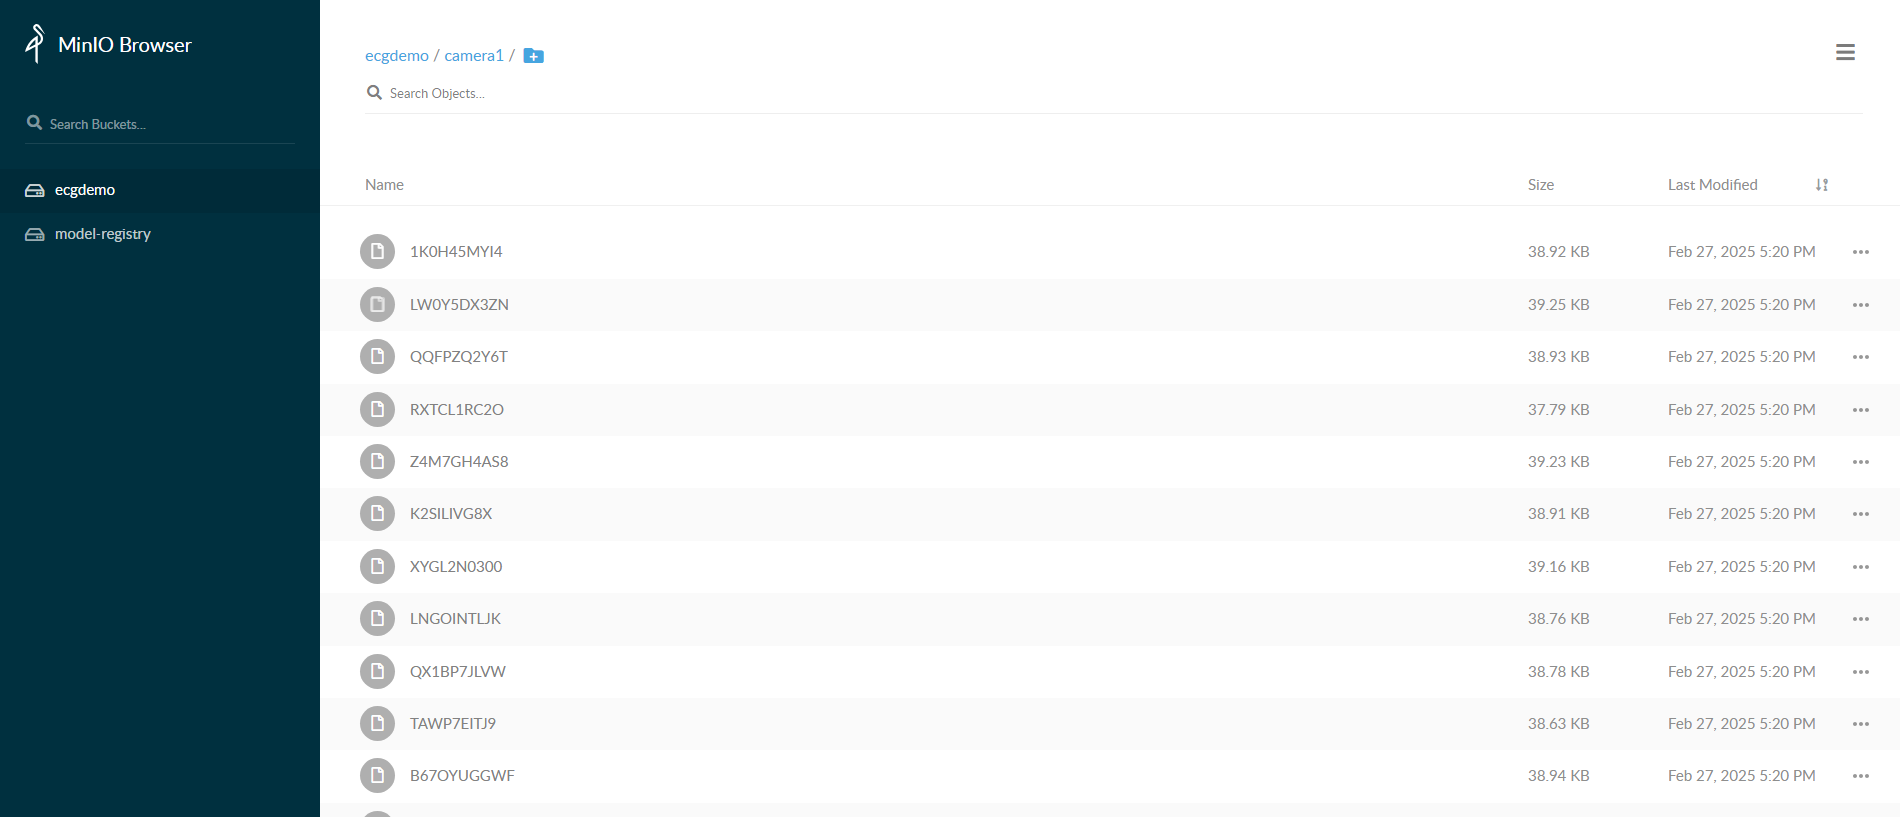
Uninstall the helm chart.
helm uninstall app-deploy -n apps
MLOps using Model Download#
Run all the steps mentioned in the above section to setup the application.
Install the Helm chart
helm install app-deploy helm -n apps --create-namespace
Copy the resources such as video and model from local directory to the
dlstreamer-pipeline-serverpod to make them available for application while launching pipelines.# Below is an example for Pallet Defect Detection. Please adjust the source path of models and videos appropriately for other sample applications. POD_NAME=$(kubectl get pods -n apps -o jsonpath='{.items[*].metadata.name}' | tr ' ' '\n' | grep deployment-dlstreamer-pipeline-server | head -n 1) kubectl cp resources/pallet-defect-detection/videos/warehouse.avi $POD_NAME:/home/pipeline-server/resources/videos/ -c dlstreamer-pipeline-server -n apps kubectl cp resources/pallet-defect-detection/models/* $POD_NAME:/home/pipeline-server/resources/models/ -c dlstreamer-pipeline-server -n apps
Modify the payload in
helm/apps/pallet-defect-detection/payload.jsonto launch an instance for the MLOps pipeline.[ { "pipeline": "pallet_defect_detection_mlops", "payload":{ "source": { "uri": "file:///home/pipeline-server/resources/videos/warehouse.avi", "type": "uri" }, "destination": { "frame": { "type": "webrtc", "peer-id": "pdd" } }, "parameters": { "detection-properties": { "model": "/home/pipeline-server/resources/models/pallet-defect-detection/deployment/Detection/model/model.xml", "device": "CPU" } } } } ]
Start the pipeline with the above payload.
./sample_start.sh helm -p pallet_defect_detection_mlops
Note the instance-id.
Download and prepare the model.
Note: For sake of simplicity, we assume that the new model has already been downloaded by Model Download microservice. The following curl command is only a simulation that just downloads the model. In production, however, they will be downloaded by the Model Download service.
export MODEL_URL='https://github.com/open-edge-platform/edge-ai-resources/raw/06bb0d621cb14a1791672552a538beddddcc4066/models/INT8/pallet_defect_detection.zip'

curl -L "$MODEL_URL" -o "$(basename $MODEL_URL)"

unzip "$(basename $MODEL_URL)" -d new-model # downloaded model is now extracted to `new-model` directory.
Copy the new model to the
dlstreamer-pipeline-serverpod to make it available for application while launching pipeline.POD_NAME=$(kubectl get pods -n apps -o jsonpath='{.items[*].metadata.name}' | tr ' ' '\n' | grep deployment-dlstreamer-pipeline-server | head -n 1) kubectl cp new-model $POD_NAME:/home/pipeline-server/resources/models/ -c dlstreamer-pipeline-server -n apps
Stop the existing pipeline before restarting it with a new model. Use the instance-id generated from step 5.
Note: If you are running helm using an NGINX_HTTPS_PORT other than the default 30443, replace 30443 with <NGINX_HTTPS_PORT>.
curl -k --location -X DELETE https://<HOST_IP>:30443/api/pipelines/{instance_id}
Modify the payload in
helm/apps/pallet-defect-detection/payload.jsonto launch an instance for the MLOps pipeline with this new model[ { "pipeline": "pallet_defect_detection_mlops", "payload":{ "source": { "uri": "file:///home/pipeline-server/resources/videos/warehouse.avi", "type": "uri" }, "destination": { "frame": { "type": "webrtc", "peer-id": "pdd" } }, "parameters": { "detection-properties": { "model": "/home/pipeline-server/resources/models/new-model/deployment/Detection/model/model.xml", "device": "CPU" } } } } ]
Start the pipeline with the above payload.
./sample_start.sh helm -p pallet_defect_detection_mlops
View the WebRTC streaming on
https://<HOST_IP>:30443/mediamtx/<peer-str-id>/by replacing<peer-str-id>with the value used in the original cURL command to start the pipeline.
Note: If you are running helm using an
NGINX_HTTPS_PORTother than the default 30443, replace<HOST_IP>with<HOST_IP>:<NGINX_HTTPS_PORT>.