Get Started#
Time to Complete: 45–60 minutes
Programming Language: Python 3
Prerequisites#
Configure Docker#
To configure Docker:
Run Docker as Non-Root: Follow the steps in Manage Docker as a non-root user.
NOTE: Run all commands as a regular (non-root) user, without using
sudo.Configure Proxy (if required):
Set up proxy settings for Docker client and containers as described in Docker Proxy Configuration.
Example
~/.docker/config.json:{ "proxies": { "default": { "httpProxy": "http://<proxy_server>:<proxy_port>", "httpsProxy": "http://<proxy_server>:<proxy_port>", "noProxy": "127.0.0.1,localhost" } } }
Enable Log Rotation:
Add the following configuration to
/etc/docker/daemon.json:{ "log-driver": "json-file", "log-opts": { "max-size": "10m", "max-file": "5" } }
Reload and restart Docker:
sudo systemctl daemon-reload
sudo systemctl restart docker
Step 1: Clone the Repository#
git clone https://github.com/intel-retail/digital-signage -b main
cd digital-signage
Step 2: Build Docker Images#
make build
Step 3: Download AI Models#
Download YOLO11s Model (for PID)#
Please review the YOLO11s license before downloading.
cd configs/pid && \
wget https://raw.githubusercontent.com/intel-retail/automated-self-checkout/v3.6.3/download_models/downloadAndQuantizeModel.sh && \
sed -i 's|MODELS_PATH="${MODELS_DIR:-/workspace/models}"|MODELS_PATH="${MODELS_DIR:-$PWD/models}"|g' downloadAndQuantizeModel.sh && \
sed -i 's/MODEL_NAME="yolo11n"/MODEL_NAME="yolo11s"/g' downloadAndQuantizeModel.sh && \
rm -rf .modelenv && \
python3 -m venv .modelenv && \
source .modelenv/bin/activate && \
pip3 install -r model_download_requirements.txt && \
rm -rf models && \
chmod +x downloadAndQuantizeModel.sh && \
./downloadAndQuantizeModel.sh && \
rm ./downloadAndQuantizeModel.sh && \
deactivate && \
cd ../..
The quantized model is saved to ./configs/pid/models/object_detection/yolo11s.
Note: If the objects are not getting detected in the pretrained YOLO11s model, use a custom object-detection model instead. See Use Intel® Geti™ Exported Model for model training and export guidance.
Download SDXL-Turbo and MiniLM Models (for AIG)#
Please review the SDXL-Turbo license before downloading.
cd aig && \
rm -rf .modelenv && \
python3 -m venv .modelenv && \
source ./.modelenv/bin/activate && \
pip3 install -r export-requirements.txt && \
export HF_HUB_ENABLE_HF_TRANSFER=1 && \
optimum-cli export openvino --model stabilityai/sdxl-turbo --task stable-diffusion-xl --weight-format int8 ./models/sdxl_turbo_ov/int8 && \
hf download sentence-transformers/all-MiniLM-L12-v2 --local-dir ./models/all-MiniLM-L12-v2 && \
deactivate && \
cd ../
Models are downloaded to ./aig/models/.
Step 4: Configure Environment#
Edit the .env file in the repository root and set the following required variables:
Variable |
Description |
|---|---|
|
Defaults to |
|
WebRTC ICE server username (minimum 5 alphabetic characters) |
|
WebRTC ICE server password (minimum 8 alphanumeric characters, at least one digit) |
Optional variables:
RTSP_CAMERA_IPand related RTSP settings for live camera input.AIG_INFERENCE_DEVICEto set the inference device for AIG (CPUorGPU).AIG_*andASE_*variables for advanced AIG and ASe tuning.OBJECT_CONFIDENCE_THRESHOLDandOBJECT_RECENCY_FRAME_COUNTfor detection filtering.TIME_TO_DISPLAY_AD_SECONDSfor controlling ad rotation frequency.
To enable predefined advertisements (optional), update:
web-ui/ProductAssociations.csv— product, pricing, promo text, slogan, and optional image filename.web-ui/pre-defined-ads/— JPEG/JPG image assets referenced by the CSV.
Step 5: Deploy with Docker Compose#
make up
This command validates your environment configuration, verifies that required models are available, removes any previously running containers, and starts all services.
Step 6: Access the Web UI#
Open Google Chrome and navigate to:
https://localhost:5000
Note: If you are accessing the UI remotely, replace
localhostwith the host system IP address.
You should see the live video stream and dynamic advertisements.
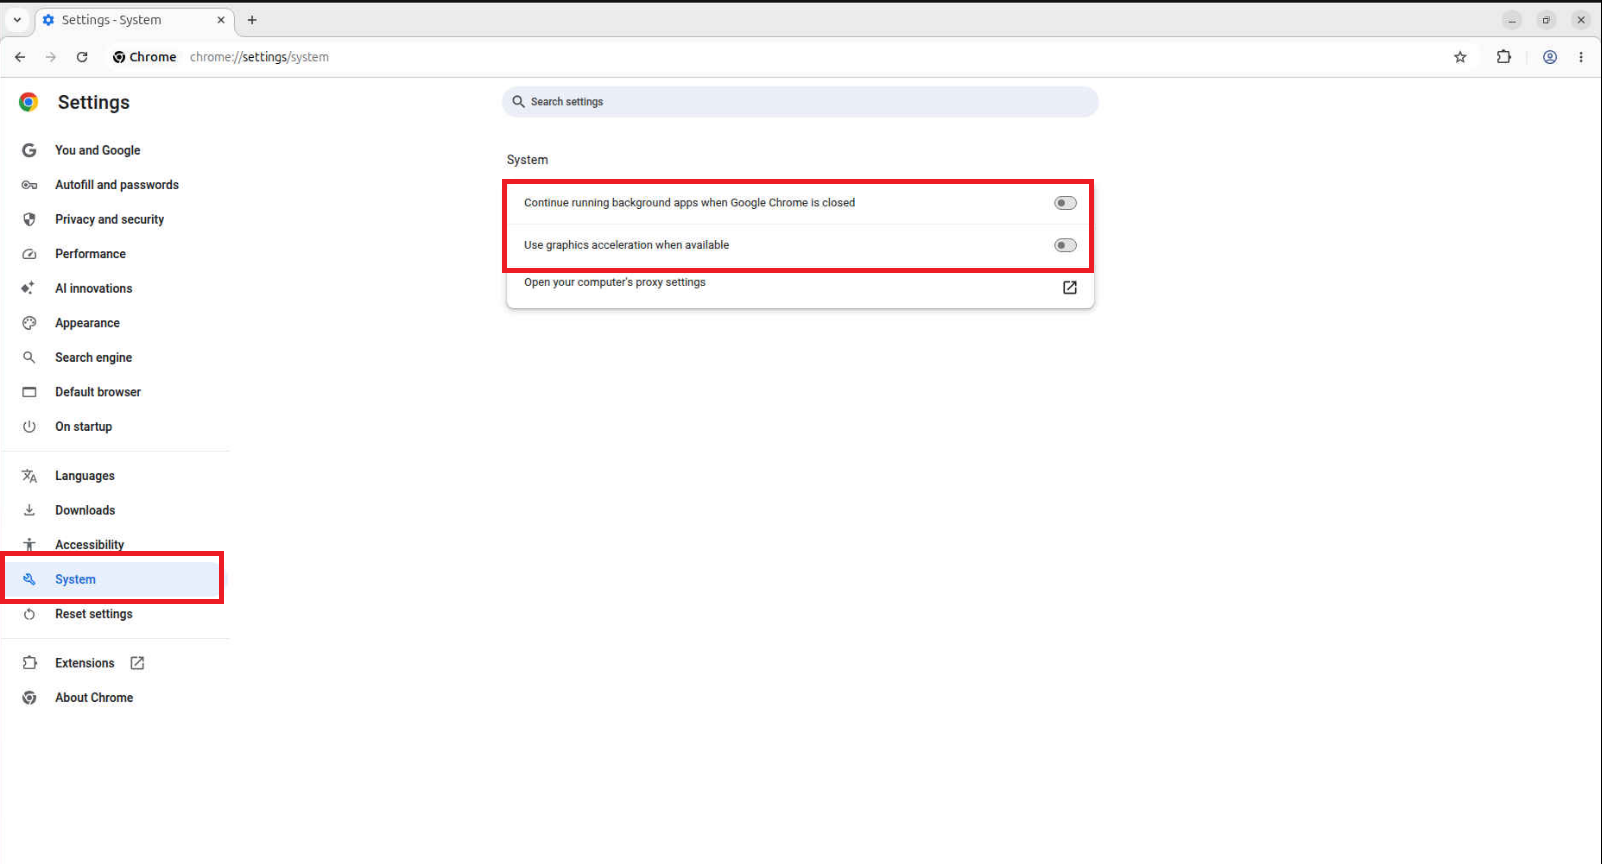
Note: For local systems with limited compute resources, launch Chrome with GPU acceleration disabled:
google-chrome --process-per-site --disable-plugins --disable-gpu https://localhost:5000Alternatively, in Chrome go to Settings → System and disable Use graphics acceleration when available, then relaunch Chrome.
Click to see Chrome System settings screenshot
Step 7: Verify Output#
Check that all containers are running:
docker ps
If any container restarts, inspect its logs:
docker logs -f <container_name>
Undeploy#
To stop and remove all containers and volumes:
make down