Configure the Basler Camera to Use PTP Timestamps#
This guide explains how to configure the Basler GigE camera to use IEEE 1588v2 PTP hardware timestamping, which provides sub-microsecond time synchronization across the TSN network.
Prerequisites#
Before configuring the camera, ensure:
The MOXA TSN switch has been configured for IEEE 1588v2 as described in Configure PTP 1588v2
The host has a network interface with an IP address assigned within the camera subnet (for example,
192.168.127.x/24)Basler pylon Viewer is installed on your machine
Steps#
Step 1: Assign a Static IP Address#
Use pylon IP Configurator (Tools > pylon IP Configurator in pylon Viewer) to assign the camera a static IP address within the same subnet as the TSN switch and host interface (for example, 192.168.127.x/24).
Step 2: Enable PTP Timestamping#
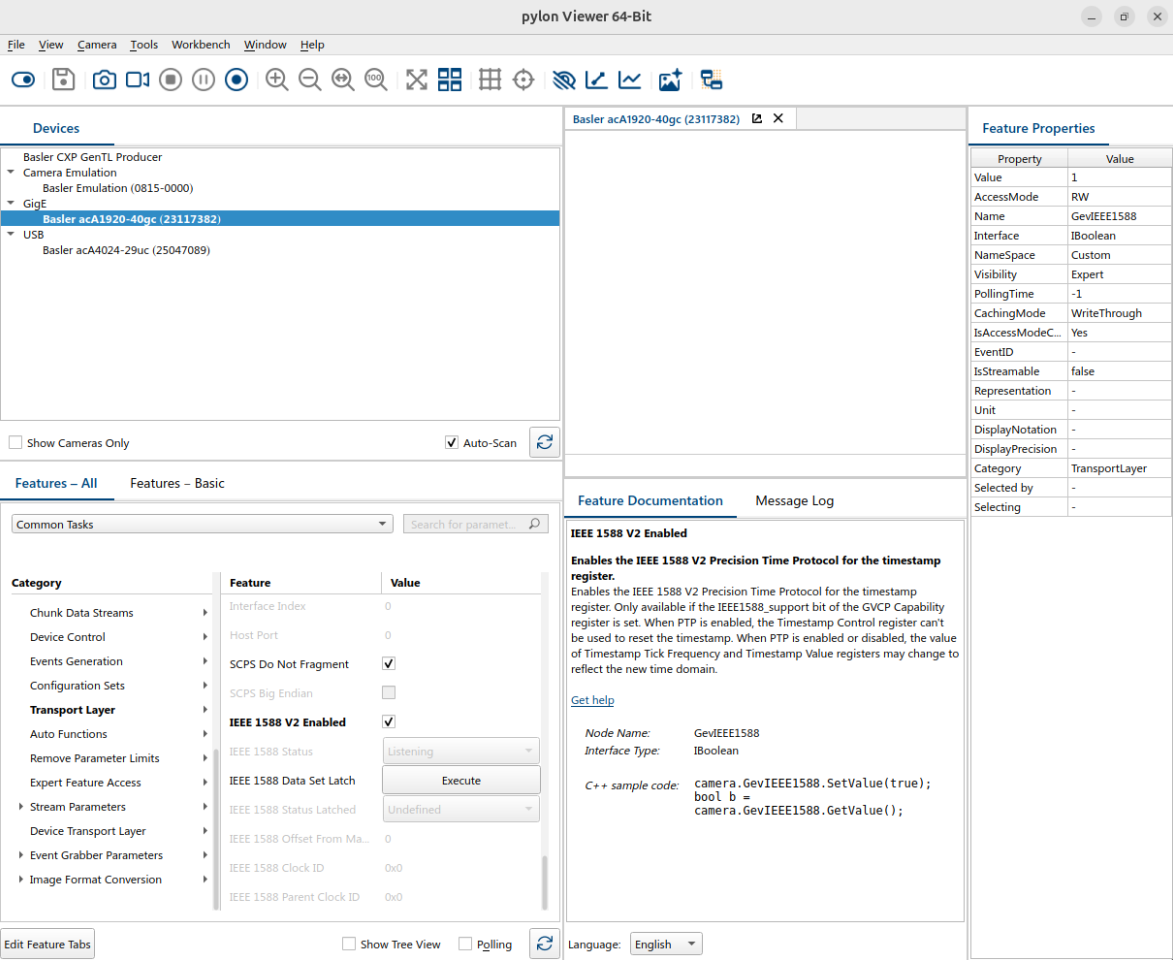
Open pylon Viewer and enable PTP timestamping under the camera’s PTP feature group as shown below. This causes the camera to embed a hardware PTP timestamp in every captured frame.
Step 3: Configure PTP Parameters#
In the PTP feature group, configure the following settings to match the MOXA switch configuration:
Parameter |
Value |
|---|---|
Profile |
1588v2 Default Profile |
Clock Type |
Boundary Clock |
Delay Mechanism |
End-to-End |
Transport Mode |
UDP IPv4 |
Domain Number |
0 |
Priority 1 |
64 |
Priority 2 |
128 |
Verification#
Once configured, the camera will synchronize its PTP clock to the MOXA switch Grandmaster. You can verify the sync status in pylon Viewer under the PTP feature group — look for a Synchronized or Master indicator.