Export and Optimize Geti Model#
Overview#
This guide starts by downloading the trained YOLOX PyTorch weights from Intel Geti and the COCO dataset used during training. A workspace is then set up and the Training Extensions repository is cloned, which provides the conversion script. After installing the required Python and Rust dependencies, the export_and_optimize.py script is run to convert the model to OpenVINO IR format — producing a full-precision FP32 model and an INT8 post-training quantized model optimized for Intel hardware.
Prerequisites#
Before you begin, ensure you have the following:
A trained model exported from Intel Geti as a PyTorch weights file (
.pth)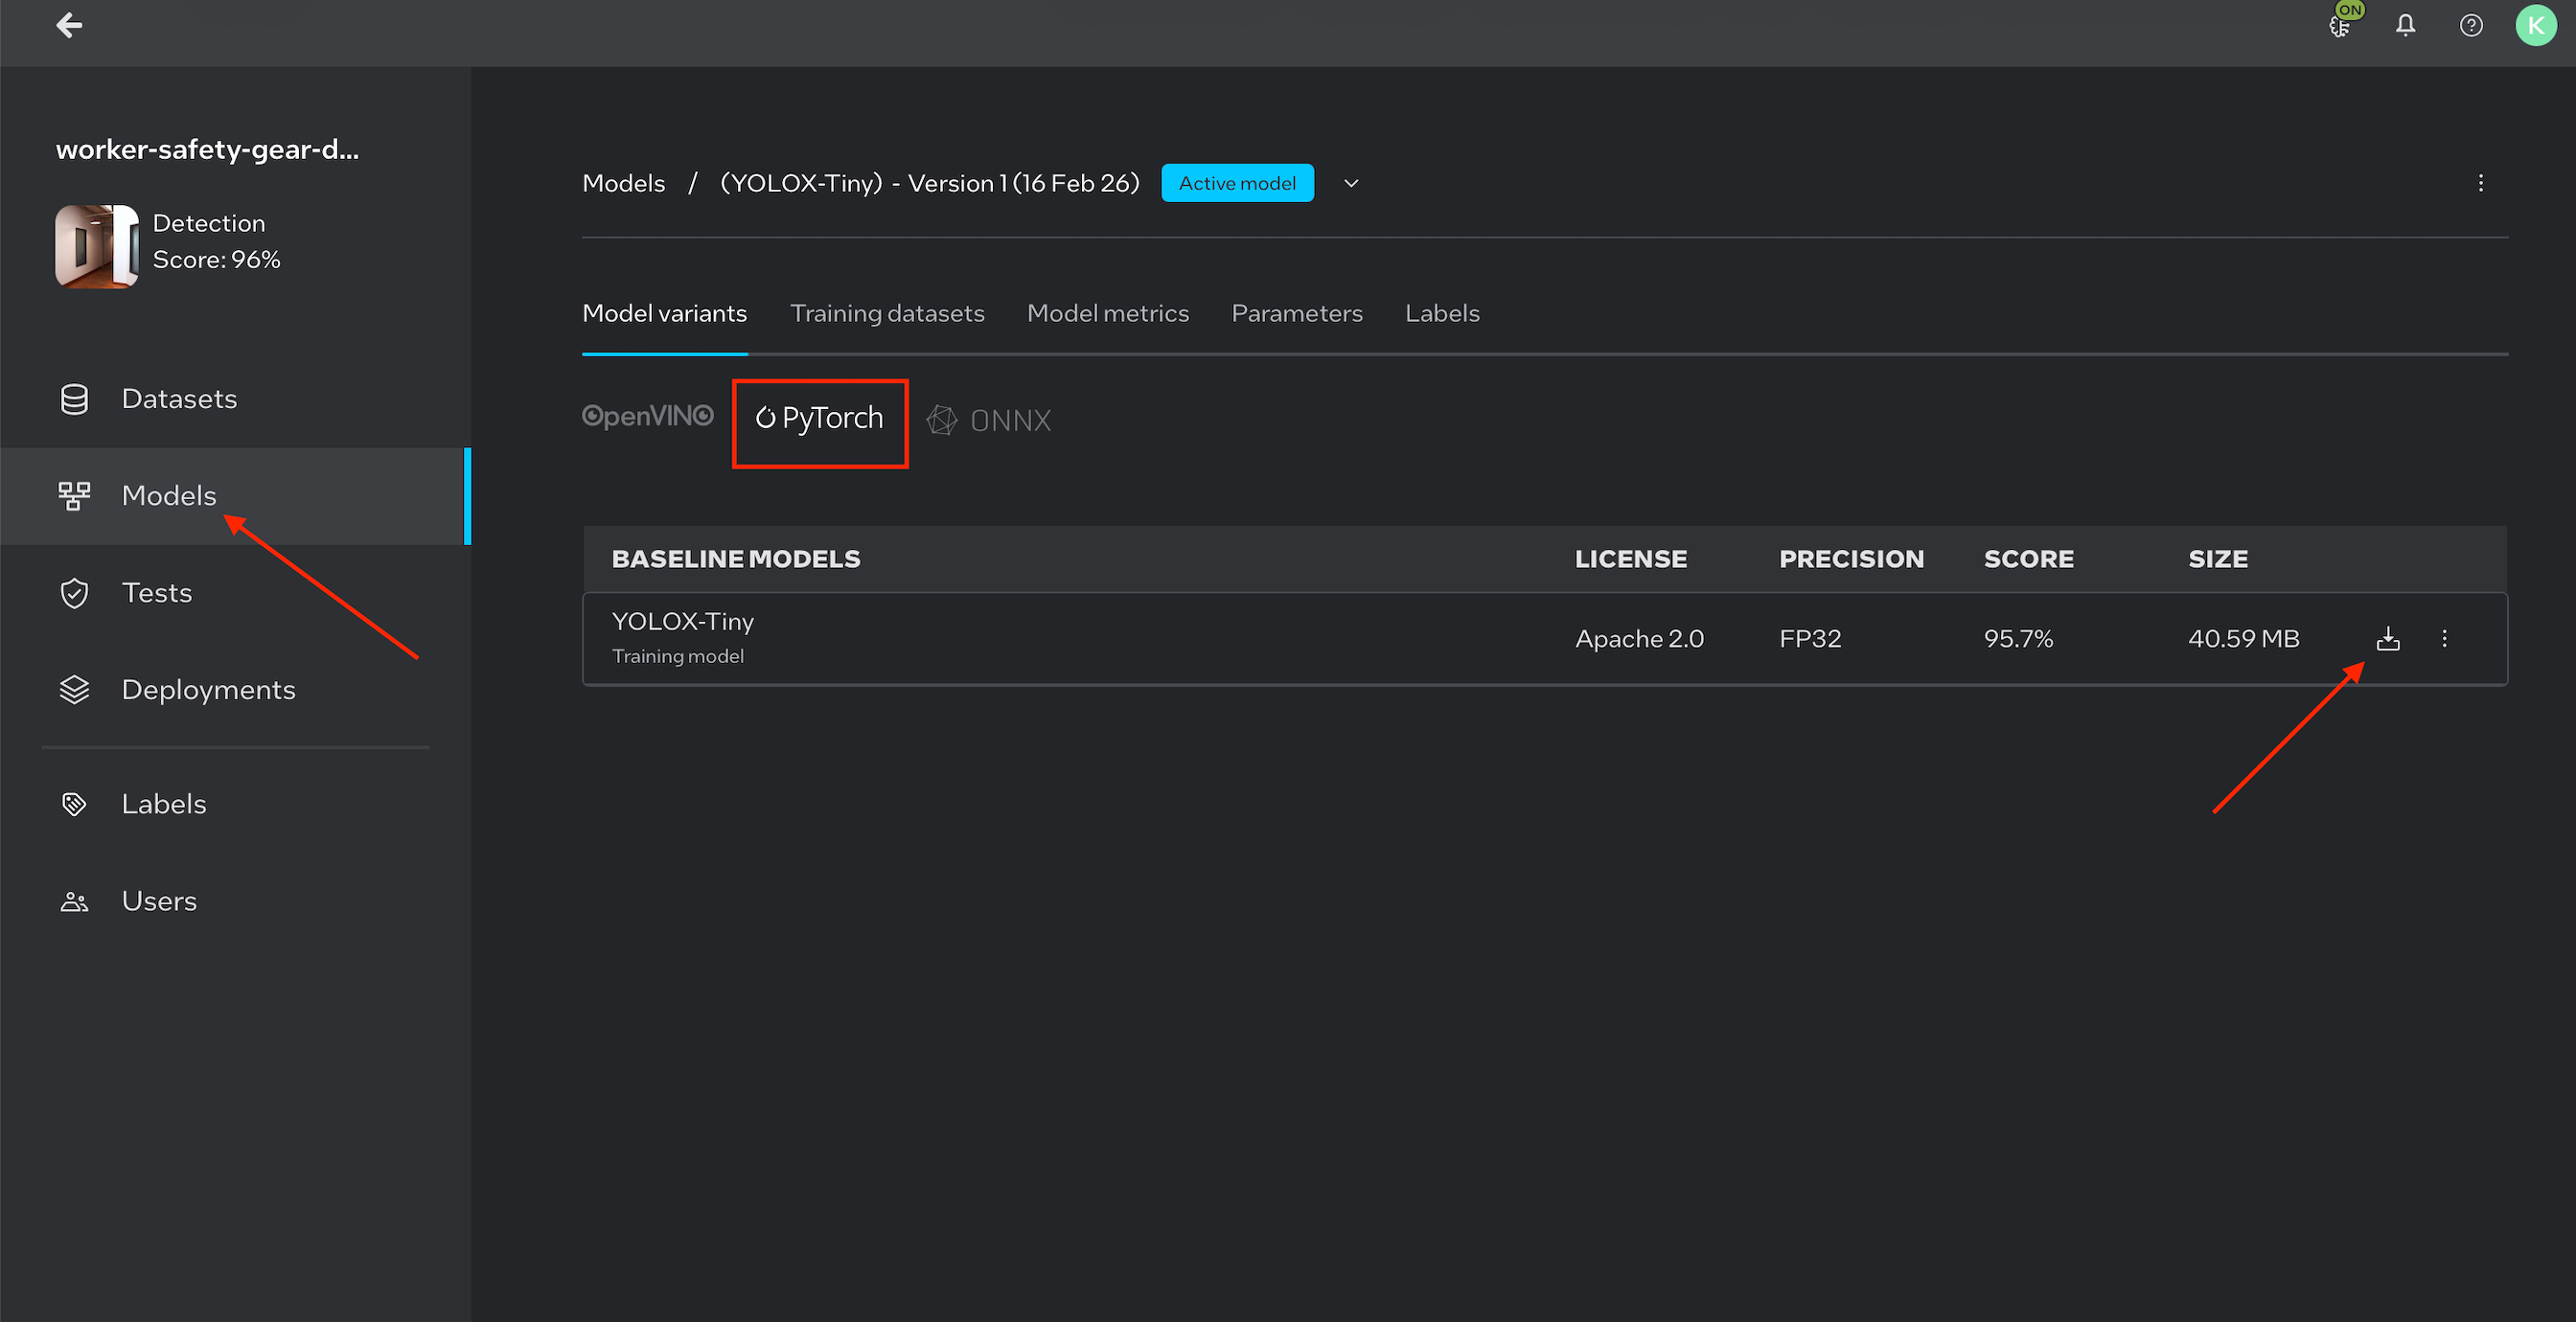
Note: Image is for illustration purposes only.
A COCO-format dataset (
.zip) used during training (required for post-training optimization)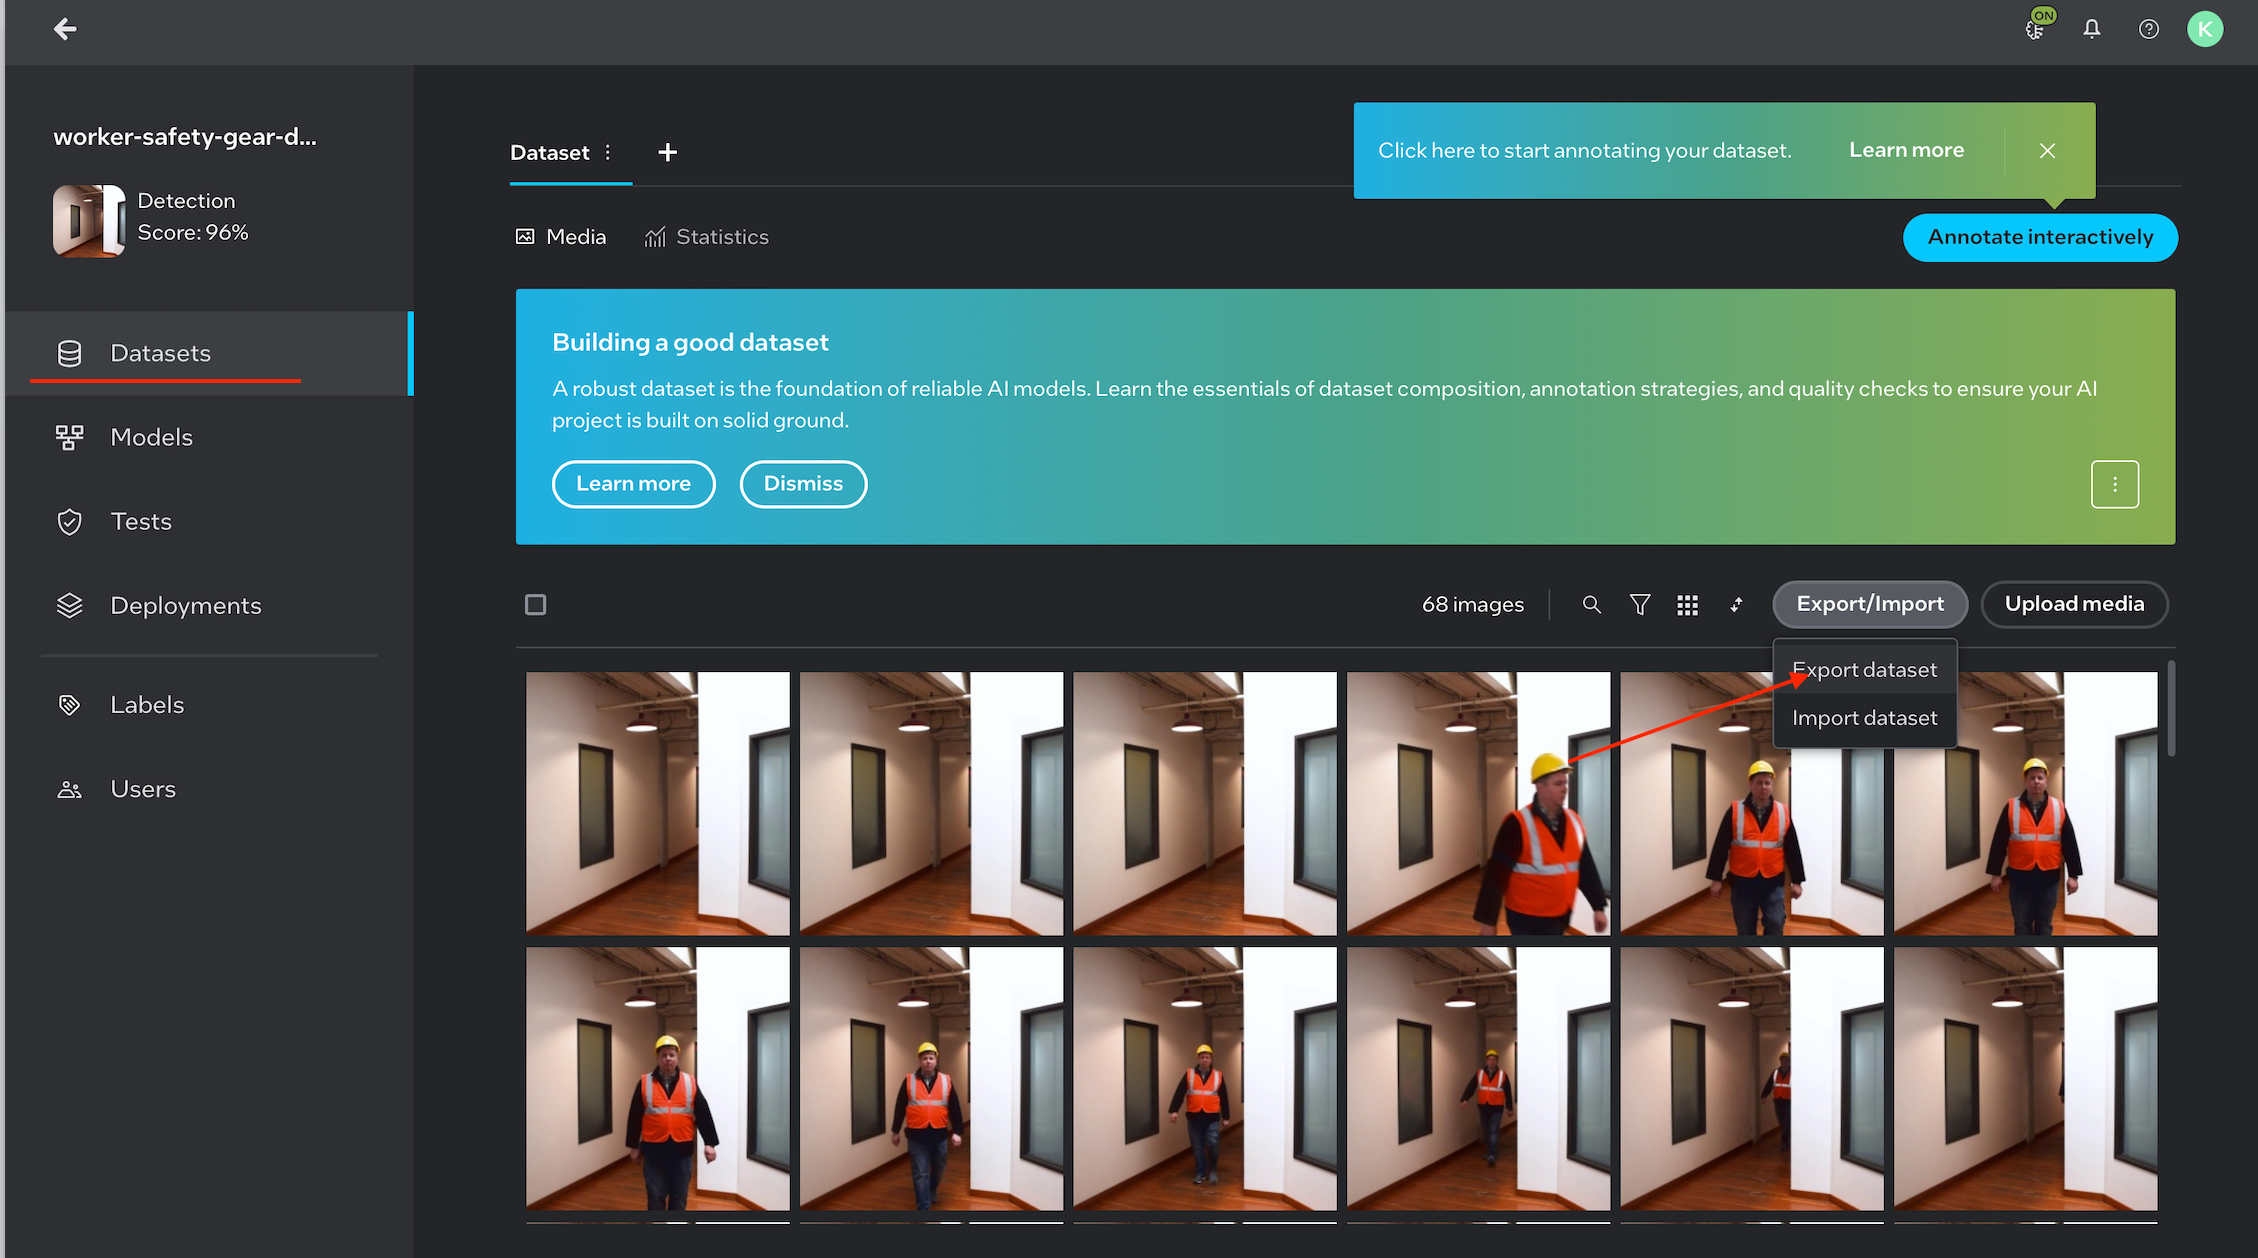
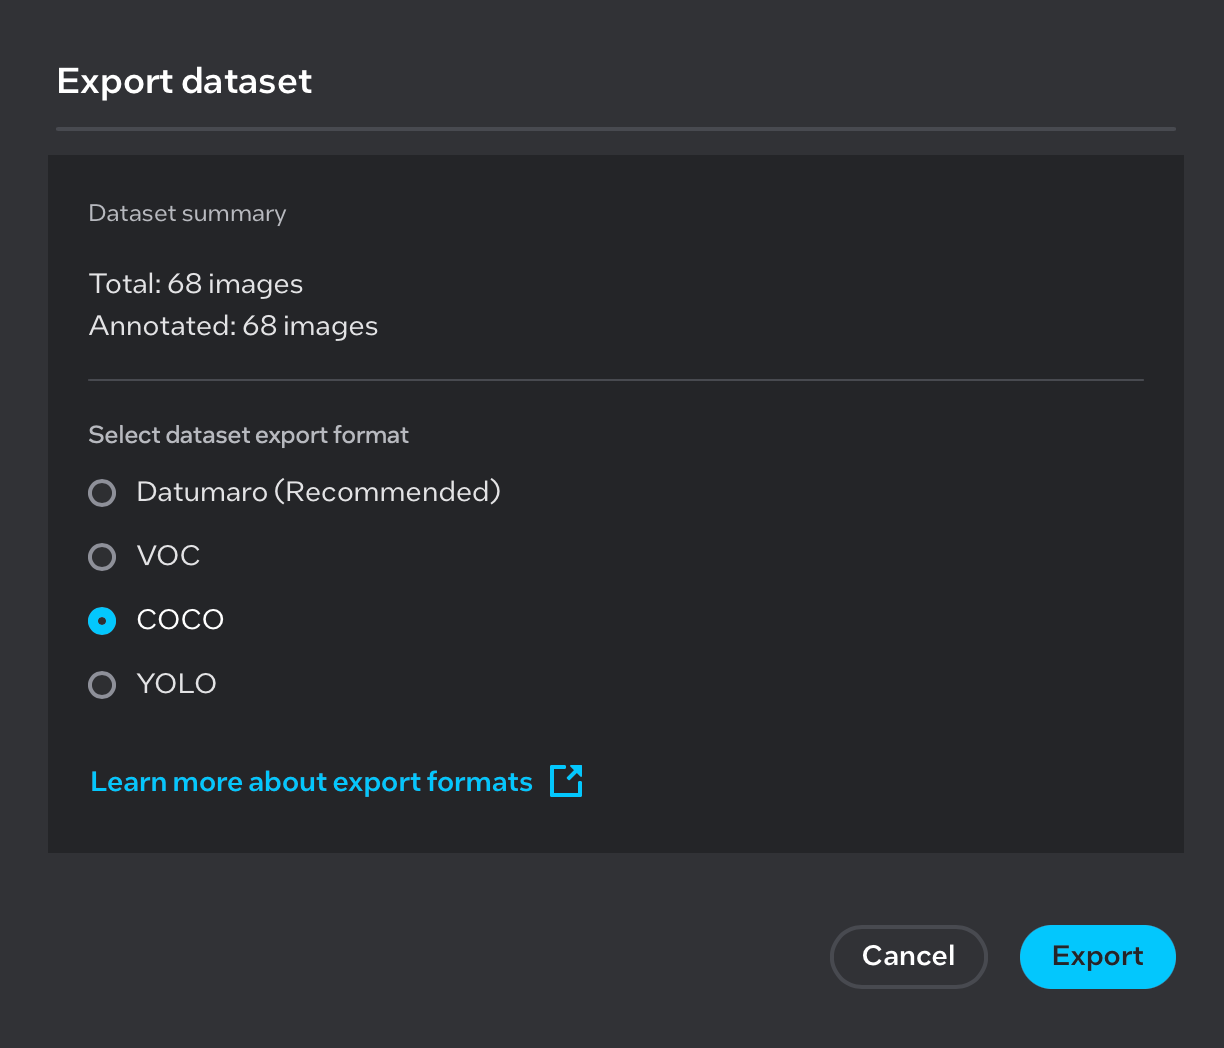
Note: Images are for illustration purposes only.
Git installed
Internet access to download dependencies
Step 1: Set Up the Workspace#
Create the working directory structure:
mkdir generate_model
cd generate_model

mkdir model
mkdir coco_dataset
mkdir output
Directory |
Purpose |
|---|---|
|
Stores the downloaded PyTorch weights file |
|
Stores the COCO dataset used for optimization |
|
Stores the exported and optimized model files |
Step 2: Add Model Weights and Dataset#
Copy and Extract the PyTorch Model#
Place the downloaded Pytorch_model.zip file into the model/ directory and extract it:
# Copy Pytorch_model.zip into the model directory, then unzip
cp /path/to/Pytorch_model.zip model/
cd model
unzip Pytorch_model.zip
cd ..
After extraction, the model/ directory should contain a weights.pth file.
Copy and Extract the COCO Dataset#
Place the downloaded COCO dataset archive into the coco_dataset/ directory and extract it:
# Copy the COCO dataset zip into the coco_dataset directory, then unzip
cp /path/to/<coco_dataset>.zip coco_dataset/
cd coco_dataset
unzip <coco_dataset>.zip
cd ..
After extraction, the coco_dataset/ directory should follow the standard COCO layout:
coco_dataset/
├── annotations/
└── images/
Step 3: Clone the Training Extensions Repository#
git clone https://github.com/open-edge-platform/training_extensions.git
Step 4: Install Dependencies#
Install uv (Python Package Manager)#
curl -LsSf https://astral.sh/uv/install.sh | sh
source $HOME/.local/bin/env
Install Rust Toolchain (required by some dependencies)#
curl --proto '=https' --tlsv1.2 -sSf https://sh.rustup.rs | sh -s -- -y
Step 5: Set Up the Python Environment#
Navigate to the library directory within the cloned repository and check out the required branch:
cd training_extensions/library
git checkout kp/test_yolox
Create and activate a virtual environment, then sync all dependencies:
uv venv
source .venv/bin/activate
source "$HOME/.cargo/env"
uv sync
Step 6: Export and Optimize the Model#
Run the export_and_optimize.py script with the appropriate paths and model configuration:
python export_and_optimize.py \
    --weights        /path/to/model/weights.pth \
    --source_dataset /path/to/coco_dataset \
    --output_dir     /path/to/output \
    --model_name     yolox_tiny
Arguments#
Argument |
Required |
Description |
|---|---|---|
|
Yes |
Path to the PyTorch weights file ( |
|
Yes |
Path to the COCO dataset directory |
|
Yes |
Directory where exported and optimized model files are saved |
|
Yes |
Model variant to use. Supported values: |
Example with Absolute Paths#
Assuming the workspace is located at ~/generate_model:
python export_and_optimize.py \
    --weights        ~/generate_model/model/weights.pth \
    --source_dataset ~/generate_model/coco_dataset \
    --output_dir     ~/generate_model/output \
    --model_name     yolox_tiny
Output#
After the script completes, the output/ directory will contain the exported and optimized model files ready for deployment in the Worker Safety Gear Detection pipeline:
output/
├── otx-workspace/
│   ├── exported_model.xml    # FP32 – full-precision exported model
│   └── optimized_model.xml   # INT8 – post-training quantized model
File |
Precision |
Description |
|---|---|---|
|
FP32 |
Full-precision model exported directly from the PyTorch weights |
|
INT8 |
Post-training quantized model optimized using the COCO dataset |
Both files can be used directly with the OpenVINO inference engine. The INT8 model (optimized_model.xml) offers faster inference with reduced memory footprint, while the FP32 model (exported_model.xml) retains full numerical precision.

Note: Image is for illustration purposes only.
Troubleshooting#
Issue |
Resolution |
|---|---|
|
Re-run |
Rust compilation errors |
Ensure |
Dataset not found |
Verify the COCO dataset was extracted and the |
Incorrect model output |
Confirm |